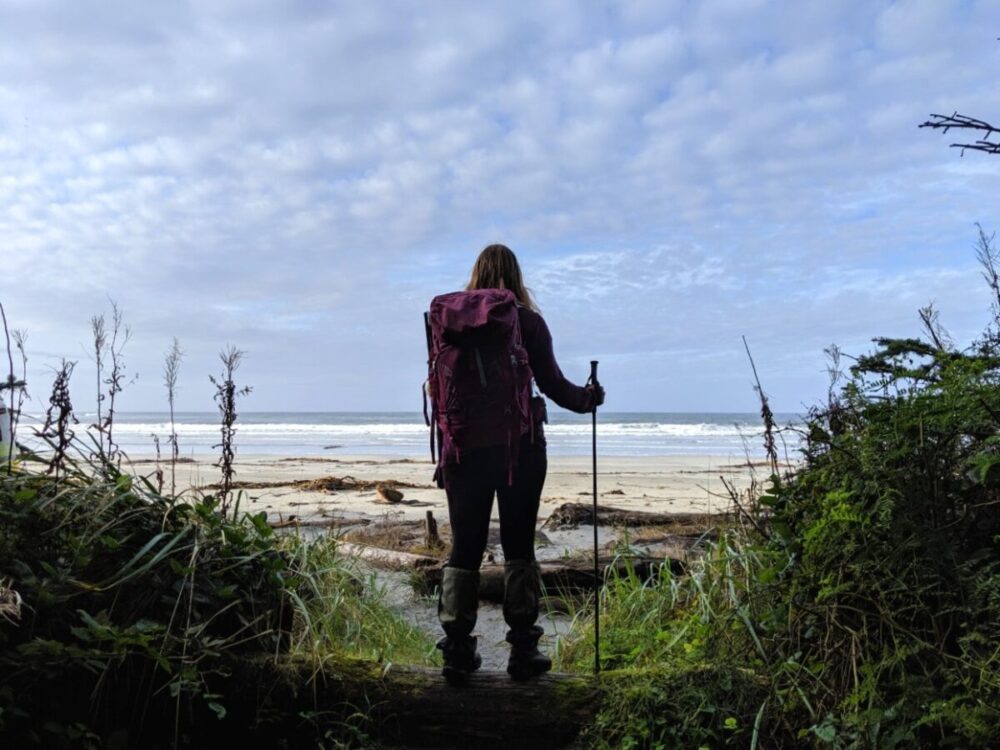
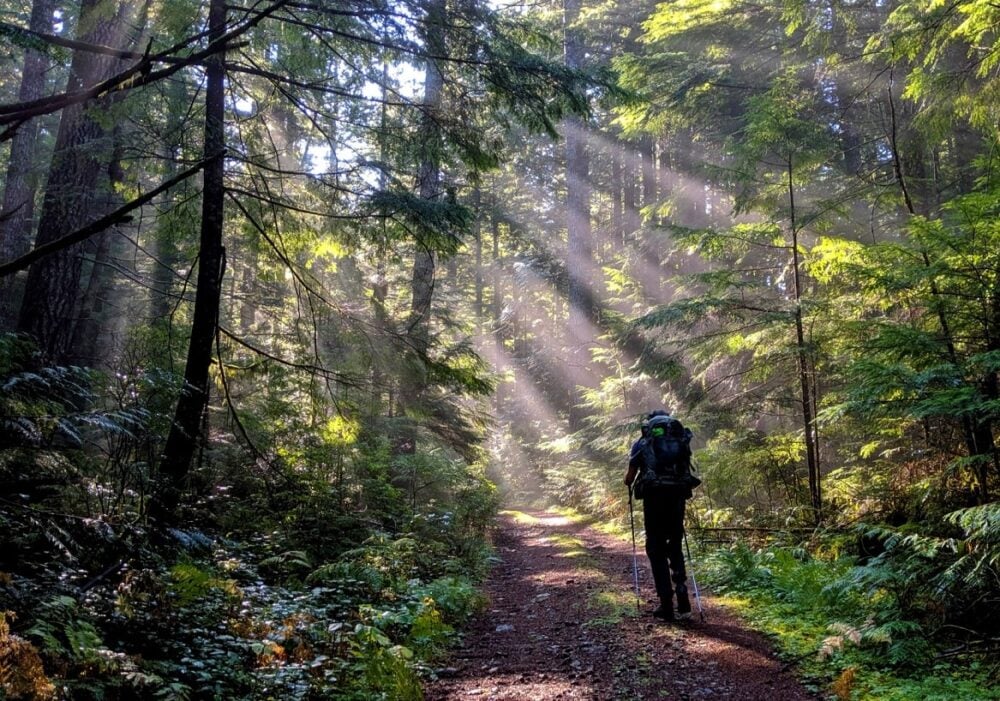
Thinking about trying out backpacking for the first time? You’re in the right place!
Read on to discover everything you need to know about planning for your first backpacking trip, from buying appropriate gear and choosing a destination to outdoor safety, backcountry meals and more!
It should help you feel more confident, organised and excited to go on your first backpacking adventure.
Writing this with the experience of 25+ backpacking trips, I want to help you avoid all of the mistakes that I have made over the years.
This is a comprehensive post, so here’s a contents breakdown:
While this guide is primarily aimed at hikers who are planning their first backpacking trip in Western Canada (BC, Alberta, Yukon), the information and advice is still relevant for backpacking trips anywhere. Let’s get started!
Published May 2021. This post includes affiliate links. If you make a purchase through one of these links, I may receive a small commission from the sale at no extra cost to you.
What is backpacking?
Backpacking is the activity of going on an overnight or multi-day hike and carrying all required equipment in a backpack.
Most backpacking trips involve camping in wilderness locations that are only accessible by foot (sometimes also by horse or boat).
This combination of hiking and camping offers the chance to see beautiful, remote locations that would be difficult to access otherwise.
How to plan a backpacking trip
Preparation is everything! The more planning you do, the more successful your trip will be.
Keep in mind, however, that it also usually takes a few trips to refine the best backpacking set-up (food, gear, clothing, footwear etc.) for you.
The first trip isn’t meant to be perfect but it should be fun and inspire you to go again ASAP!
First time backpacking tips
When planning your first backpacking trip, I strongly believe you should try and keep it as simple as possible:
- Choose a destination relatively close to home (1-3 hours drive)
- Pick a campground that is within 10km of the parking lot, with low elevation gain (less than 500m total) and no technical features
- Plan to stay one or two nights
- Go in summer, when the weather is warmer
- Consider borrowing or renting gear to save money and test your own preferences before investing
- Get familiar with your camping gear before leaving home
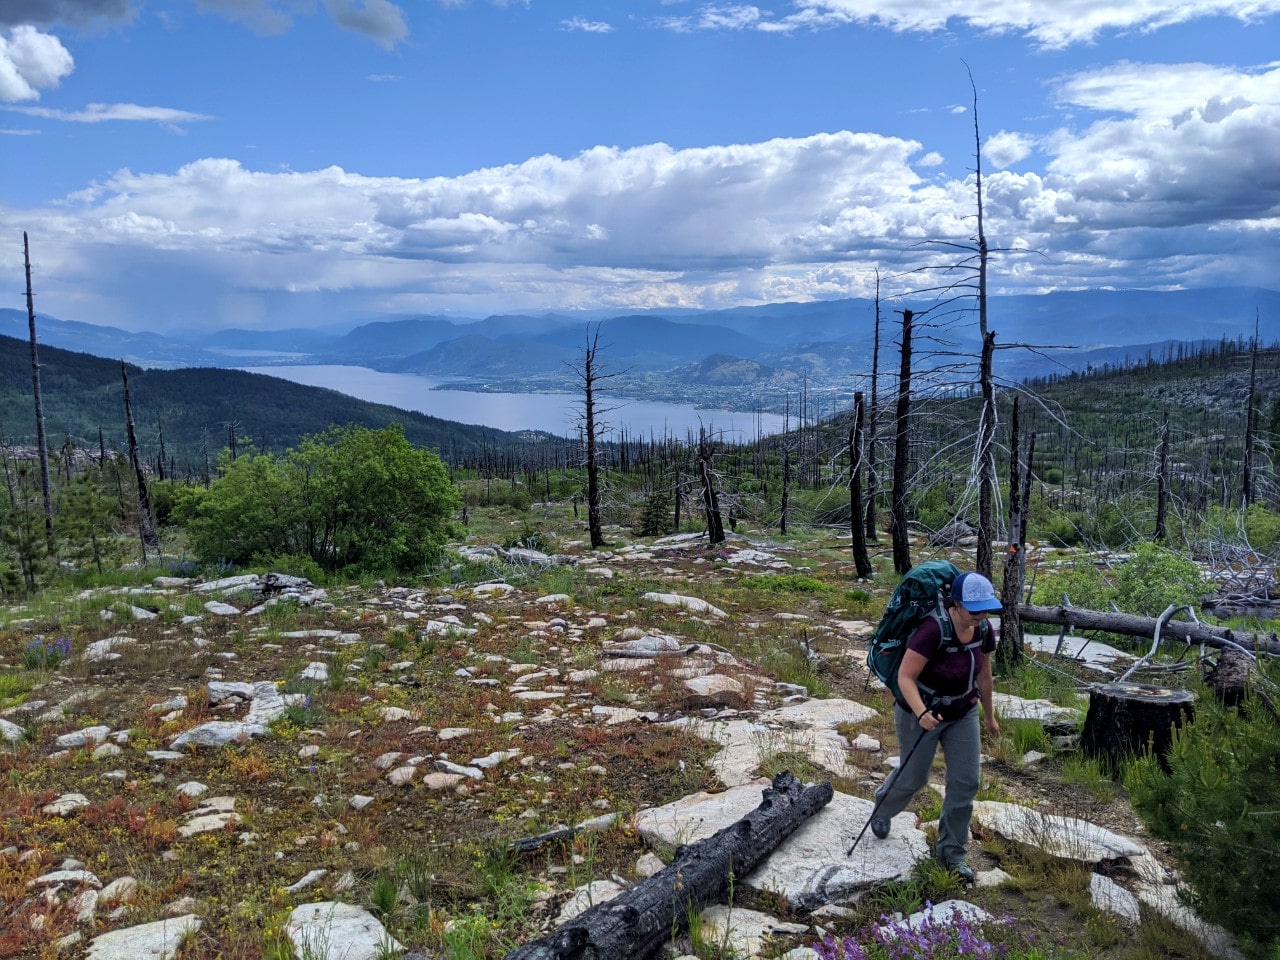
Backpacking is a significant jump from car camping and day hiking in terms of safety and physical demand. Be careful not to underestimate this. Err on the side of easy rather than hard.
When to go
As mentioned above, summer (late June to early September) is an ideal time to go backpacking in Western Canada. There are a number of reasons why:
- The weather is both warmer and drier, two factors that make backpacking more comfortable and fun
- The summer months have the longest daylight hours
- Many alpine (mountainous) regions are snowed in until summer. In some places, snow can still be on the ground until mid July or even early August
- Trail maintenance usually happens in spring and summer. Before this time, you’re more likely to find fallen trees and other debris on the trail and/or closed facilities
In line with this, some provincial and national parks close during the winter and reopen in later spring/summer. Some of Western Canada’s most popular backpacking trails and campgrounds are closed until the summer months.

Where to go
For your first backpacking trip:
- Look for a short trail (10km or less, one way) relatively close to home. This distance may not sound like much, but your regular hiking pace will be slower with a heavier pack
- As well as looking at the distance, also examine the total elevation gain of the trail too. This refers to the total amount you will climb in a day. This can make a huge difference in the difficulty of the hike
- Backpacking close to home means that you’ll arrive at the trailhead earlier and have more daylight for hiking. If something goes wrong or you forget an item, you’ll also be home that much faster
- For safety and comfort, choose a popular backpacking trail. These are more likely to have have established backcountry campgrounds located near a water source, with outhouses and designated tenting areas.
To find a trail that ticks all of these boxes, I would suggest looking at local provincial and national parks first.
Researching hiking trails
For research purposes, I absolutely love the Backroad Mapbook series. After narrowing down potential options, I then go online and look for official information (such as on the BC Parks website), guidebooks, blog posts, hiking groups and recent AllTrails reports.
Using these sources, I evaluate whether I have the skills, experience and fitness to complete the hike. I also look for references on the trail condition, the best time to go (see below), what permits may be required, how the reservation system works etc.
Permits and reservations
This is probably the most complicated part of organising a backpacking trip.
National and provincial parks have permit systems to authorise overnight camping. Camping permits are usually offered on a first come, first serve basis, unless there is a reservation system in place.
Some of Western Canada’s most popular backpacking trails have reservation systems. Examples are the West Coast Trail (BC), the Berg Lake Trail (BC), the Rockwall Trail (BC), the Skyline Trail (Jasper) and the Chilkoot Trail (Yukon).
For these trails, it is important to plan months in advance to secure a reservation (though cancellations do happen!)
It is an important part of trip planning to check what kind of camping permit you may need and how to get it.
Check the official park websites first. Blogs can be helpful too but keep in mind that procedures can change from year to year. Check out my complete guide to BC backpacking reservations.
Backpacking gear
The most common mistake to make when backpacking for the first time is bringing too much equipment.
This section will guide you through the ‘must have’ items for backpacking, with tips to help you purchase the right backpacking gear for you. Alternatively, you can check out our dedicated packing guide.
You’ll find all of these items on our backpacking checklist, which is free when you sign up to our monthly newsletter.
I absolutely love talking about backpacking gear. I once worked at (and managed) an outdoor store, so I’ve personally tried and tested a lot of gear over the years. I’ve also helped many first time backpackers get started!
If you can, I would try and borrow gear from friends and family for your first backpacking trip. If that is not an option, consider renting items (easier in non-pandemic times) or purchasing second hand gear from Facebook marketplace.
Not only will this be easier on your wallet (and better for the environment!) but it means you have the chance to test out some gear before making any final purchasing decisions of your own.

Quick backpacking gear tips
Whenever you do go ahead to buy backpacking gear, here are some golden rules:
- Your loaded backpacking pack should not weigh more than about 20 percent of your body weight
- Lighter gear is, however, usually more expensive and less durable
- The concept of ‘you pay for what you get’ is true with most outdoor gear. Quality usually goes hand-in-hand with price
- If you buy quality gear, you can expect a solid warranty. Most outdoor gear manufacturers will stand behind their products
Be sure to test and become familiar with your backpacking gear at home before leaving for a trip. It will potentially save time and frustration later!
Quick jump to:
The 10 Essentials
These items that can help prevent slight inconveniences from turning into life-threatening emergencies.
The 10 Essentials are (by category):
- Sun protection
- Navigation
- Hydration
- First Aid supplies
- Fire supplies
- Shelter
- Light
- Repair kit
- Extra clothing
- Extra food
For more details and item recommendations, head over to my comprehensive 10 Essentials post.
Backpack
There’s a lot to think about when choosing a backpack.
A good backpack should be comfortable and distribute the load of your gear evenly. It should also transfer the weight to the biggest and strongest muscles and bones in your body – your hips and legs!
Backpack sizing
The first step to choosing a backpack is to determine how much capacity you will need. There are a number of different factors that influence this (destination, season, activity, personal requirements etc.) but the primary one is length of trip.
Capacity is measured in litres, just like water. The most popular backpacking pack size is 50-70 litres. This is ideal for multi-day backpacking trips up to around 6-7 days in length. Ideally, all of your backpacking gear should fit within the backpack.
The great thing about a larger backpack is the flexibility to go on shorter backpacking trips. After all, it’s much easier to fit less items into a bigger pack than more more items in a smaller one. Don’t be tempted to bring more items than necessary, however!
If you really enjoy backpacking, you may later want to buy a lighter, smaller pack for shorter (1-3 night) trips.
Backpack fit
A well fitted backpack will help you carry loads much more efficiently. Backpack sizing is not, however standardised. Not every pack will fit every person!
The right fit is determined by:
- A harness system that fits your back/torso properly
- A snug fit on your hips (where most of the weight will be carried)
Start by measuring your back – having a friend is helpful for this!
- Tilt your head forward and find the most prominent vertebrae (C7) at the top of your neck
- Next, find the top of your hipbone (the iliac crest) and place your hands on top
- Trace a line between your thumbs on your back
- Measure the distance between this ‘thumb line’ at your C7 vertebrae. This is your back or torso length
Backpacking packs are often advertised with the torso length. This will help to narrow down options. Most backpacks do have adjustable harnesses so there is a little bit of leeway.
Trying on backpacks
When it comes to trying backpacks on, loosen all straps and then put the backpack on with the hipbelt first. The hipbelt should cover your hipbones and be snug, but not uncomfortable.
Then tighten the straps until the weight of the backpack starts to shift onto your shoulders. Walk around the store and see how it feels. Ideally, you’d have some weight in the backpack too for a more realistic experience.
It is absolutely imperative to try a backpack on to see if it fits correctly. Find a local outdoor store where you can try on multiple backpacks and see which one fits you.
Once you’ve found the right backpack for you, please purchase at the outdoor store where you tried it on. Buying online elsewhere really hurts small outdoor stores. If they disappear, there will be nowhere to try on backpacks!
How to choose a backpack
Beyond fit and size, here are some other factors that may influence your backpack buying decision:
- Suspension system: Harness styles really vary between backpack manufacturers, with more/less padding, adjustments etc.
- Access: Backpacks traditionally open from the top (and often bottom), but newer designs sometimes have suitcase-style zippers or side access
- Pockets and straps. Do you like the minimalist style? Or do you want quicker access to snacks and equipment during the hike?
- Weight. The larger the backpack (and the more features it has!), the heavier it will likely be
- Gender. Women-specific backpacks are usually designed to have shorter harness systems, narrower shoulder straps and more contoured hipbelts
- Backpack cover. Some backpacks come with integrated waterproof backpack covers. They can be purchased separately too
I’m a big fan of Osprey’s backpacking packs. They have something for everyone, from entry level to ultralight thru-hiking backpacks. I love the incredibly supportive harness of my Aura 65 AG (which I usually use without the top lid on) – the load always feels SO much lighter! JR has the Aether 65.
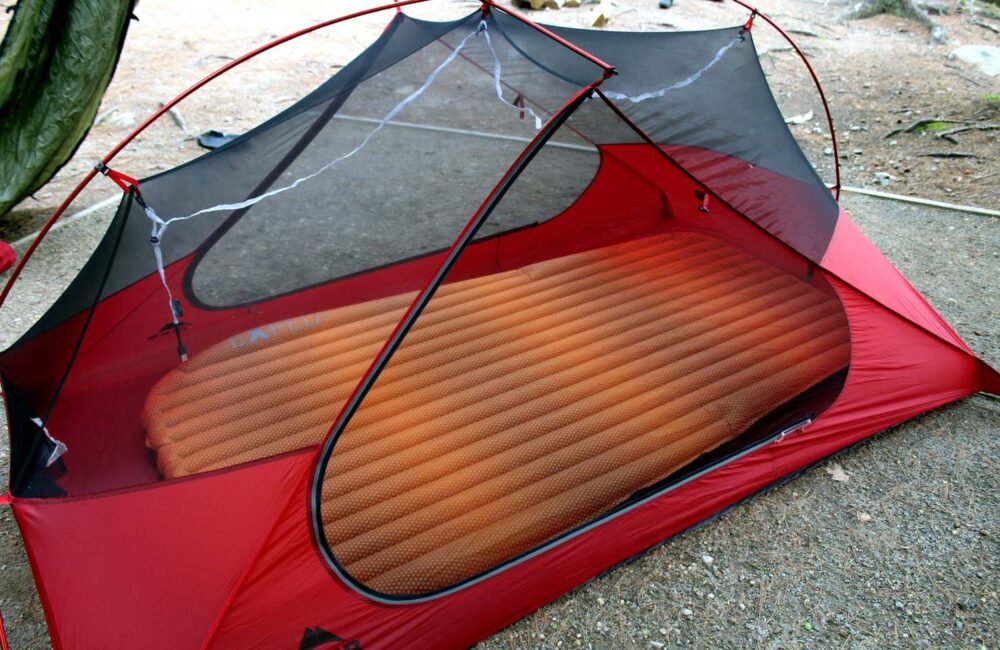
Tent
Choosing a tent is often one of the biggest decisions when buying backpacking gear. For most people, it is usually the heaviest and largest piece of equipment.
Backpacking tents are most easily categorised by their weight. Most two wall backpacking tents weigh between 2.5lb (1.1kg) to 7lbs (3.17kg). 4lb is a popular weight for a two person backpacking tent.
When travelling in a group, the weight of a tent can be split by distributing the rain fly, poles and tent to different people.
A lighter tent is easier to carry but will typically be made from materials that are less durable. More delicate materials mean less gear to carry in but may not withstand as much pressure from weather, rough campsites or human abuse.
How to choose a tent
Besides weight, here are some more factors to consider when tent shopping:
- Living space. Backpacking tents are usually on the smaller side compared to front-country or car camping tents. If space is a priority, think about sizing up e.g. from a two-person tent to the three-person version
- Three season vs. four season. Three season tents are designed for spring to autumn backpacking adventures and have mesh paneling and rain-fly vents to in crease ventilation in warmer temperatures. Four season tents are heavier and more durable to withstand winter conditions
- Door access. Some tents just have one door while others have two. With two or more people in one tent, having two doors can be convenient for those late night trips to the outhouse or just for flexibility
- Size of vestibules. Some tents have smaller vestibules (enclosed entrance space) to allow for more living and storage space inside the tent. Personally, I find larger vestibules more convenient for storing backpacks and wet clothes/shoes.
- Tent height. The peak height of the tent is the measurement at the highest point in the tent. If you’re on the taller side, this may be a key factor in your tent choice. Likewise, the length of the tent
We personally use the Freelite 2 by MSR. It’s a lighter and slightly smaller version of the very popular Hubba Hubba model. While we wish it could be a little more spacious, we’re very happy with the durability – 7 years and more than 25 backpacking trips so far.
Alternatives to tents
Most backpacking tents available on the market are double walled tents. This means that there is a tent body (first wall) and then a fly (second wall).
Single wall tents consist of just one piece of material. These are lighter and pack smaller but don’t usually ventilate as well as double walled tents.
Hammock camping has become more popular over the last decade or so. Not having to find a clear, level campsite when sleeping in a hammock is convenient. Set-up is also quick and the equipment fairly light. There is, however, a reliance on finding suitable trees.
For the ultimate in lightweight shelter, consider a tarp or bivouac (bivvy). These provide basic shelter and not much more. They’re a bit too minimalist for me personally but having such a light backpack would be appealing!

Sleeping bag
Sleeping bags are designed to keep you warm and comfortable while sleeping outdoors. Most backpackers will have their own, although it is possible to buy double versions if you want to share.
There’s a huge range of sleeping bags with different shapes, sizes and colours. Weight is still an important deciding factor with sleeping bags (as with all backpacking items!), but not usually the primary one.
How to choose a sleeping bag
The single biggest defining feature of sleeping bags is the type of insulating material used within them.
The insulating material (the fill) determines the temperature, compressibility and weight of the bag. There are two main types of sleeping bag fill – down (feathers) and synthetic (man-made).
I’m going to talk more about this in a second, but first, here are some other factors you may want to consider when searching for a sleeping bag:
- Temperature rating. The two main EN numbers to look for are the comfort rating and the lower limit rating. In my opinion, it is always best to go a little warmer than necessary. After all, you can always open your sleeping bag to cool down!
- Shape. A lot of backpacking-specific sleeping bags are mummy shaped. This not only makes them warmer but also lighter and less bulky. If this is an issue, look for rectangular/barrel models or wider versions
- Gender. Women’s sleeping bags are usually shaped differently (narrower shoulders, wider hips) and feature more insulation since men naturally produce more body heat
- Zips. Couples may want to buy sleeping bags that have opposing zips so they can be zipped together
- Packed size. Look for this measurement to work out whether the sleeping bag will fit in your pack. I’d recommend using a compression bag to help squeeze the air out and get the packed size even smaller
Synthetic vs down
Synthetic and down are the two most popular sleeping bag insulators. Some companies also mix synthetic with down, to get the best features of each material. Here’s a quick comparison of synthetic and down:
Down
More expensive
Super compressible and easier to pack
Better warmth to weight ratio (lighter)
Durable – average longevity for a down sleeping bag is around 10 years
Loses insulating properties when wet without water resistant coating
Byproduct of the food industry*
Synthetic
Cheaper
Less compressible and larger to pack
Heavier for same amount of warmth
Limited longevity due to fibres breaking down after repeated compression
More water resistant than down (provides some warmth when wet)
Vegan
*Look for a Responsible Down Standard tag to be sure that the bag was made to the highest cruelty-free standards.
Personally, I love down sleeping bags and believe it is worth the extra investment for such a warm, lightweight sleeping set-up. New technology is also enabling down insulation to be much more water resistant. I use a Rab Neutrino Pro 600 while JR has a MEC Draco (Wide).
Alternatives to sleeping bags
Quilts are a lightweight alternative to sleeping bags. Though previously only available through specialist ultralight manufacturers, quilts are starting to be offered by some of the big outdoor brands too.
Sleeping mat/pad
A sleeping pad, or mat, offers cushioning and insulation to ensure a warmer and more comfortable night. Without a sleeping pad, the ground draws heat away from the body.
There are many different sleeping mats and pads available on the market, but they can generally be divided into these three categories:
- Air pads – These need to be inflated either by breath or an included hand pump. Air pads are light and pack down small. They can be damaged more easily than the other options but repairs are usually fairly simple
- Self-inflating pads – These use closed cell insulation and air to provide insulation. A few breaths may be needed to inflate the pad to its full capacity. Self-inflating pads usually feel a little firmer than air pads and are generally more expensive and less compact
- Closed-cell foam pads – The most basic sleeping pad on the market, closed-cell foam variations are lightweight, durable and cheap. Most people, however, will find this type of pad to be are less comfortable than the other two options above. Closed-cell foam pads are also pretty bulky
How to choose a sleeping mat
With the above in mind, here are some more factors to consider when sleeping mat shopping:
- R-value. This is a measurement of the sleeping mat’s resistance to heat loss. The higher the number, the more warmth the sleeping pad offers. For a comfortable three season pad, look for a rating around 3
- Shape. Not all sleeping pads are rectangular. Some lightweight versions are tapered towards the feet or are purposely short to save weight
- Size. Tall? Or move a lot in your sleep? Some sleeping mats have ‘long’ and ‘wide’ (and even ‘long and wide’) versions
- Utility. Double sleeping mats can save weight in a pack for couples. Alternatively, it is possible to buy systems (basically straps) to join pads together
JR and I share an Exped Hyperlite Duo. We really like being able to cut down on pack weight with a double sleeping mat. It’s also exceptionally comfortable and durable!
Sleeping mat maintenance
Always inflate sleeping pads before going on a trip to check for leaks and other defects. I made the mistake of not doing this once and had to sleep on a partially inflated mat for the next three nights!
Be sure to carry a repair kit (these are usually included with air pads) in case of small holes or leaks while backpacking.
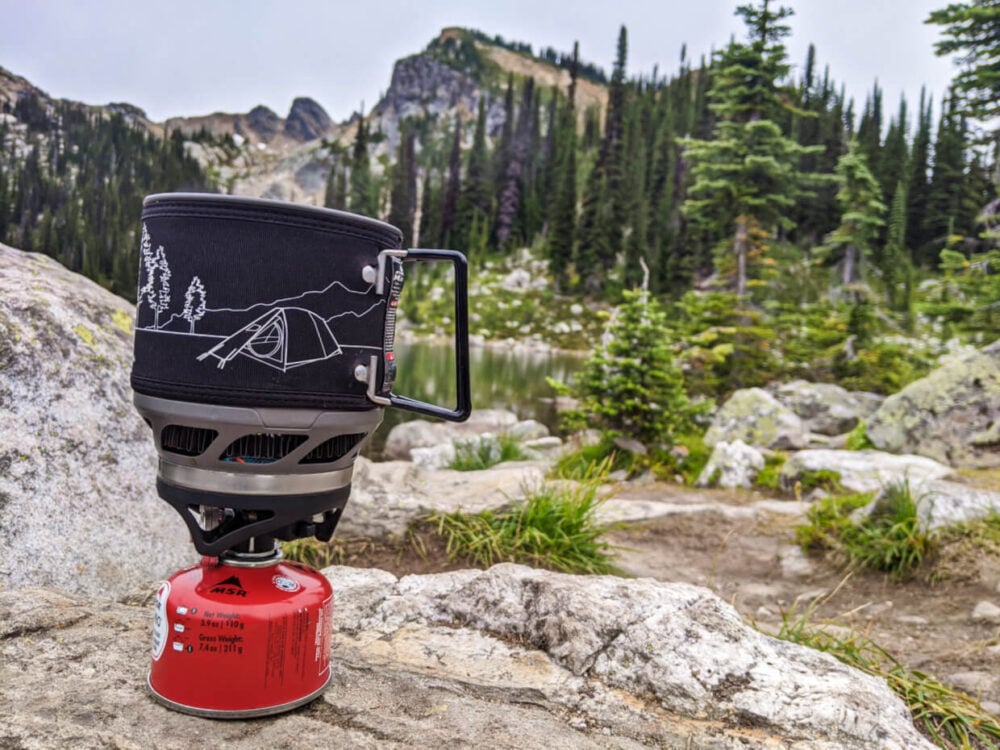
Backpacking stove
Cannister stoves are the most commonly used while backpacking as they are easy to use, lightweight and pack down small.
If you’re planning to eat mainly dehydrated or freeze dried meals for dinner, I’d recommend a Jetboil. The integrated pot design means that water boils exceptionally fast.
There are a few different Jetboil models, with the Minimo (the one we use) having a regulator for better temperature control as well as a wider pot. It’s a little more expensive than the Flash but I think these features make it worth the extra.
Canister stoves use a mix of propane and isobutane gas. Available in outdoor stores, gas canisters are sold in three different sizes. Stove manufacturers will recommend their own brand but they’re all relatively interchangeable.
Liquid fuel stoves connect to refillable fuel bottles. These are often used with white gas but some stoves will give you the flexibility of using other type of liquid fuels like diesel and kerosene.
These stoves are usually heavier and more difficult to use than canister stoves but have better heat control and stability. They also perform better in colder temperatures and higher elevation. Another major advantage of liquid fuel stoves is that you can fly with the empty canister, making it the most convenient option for international trips.
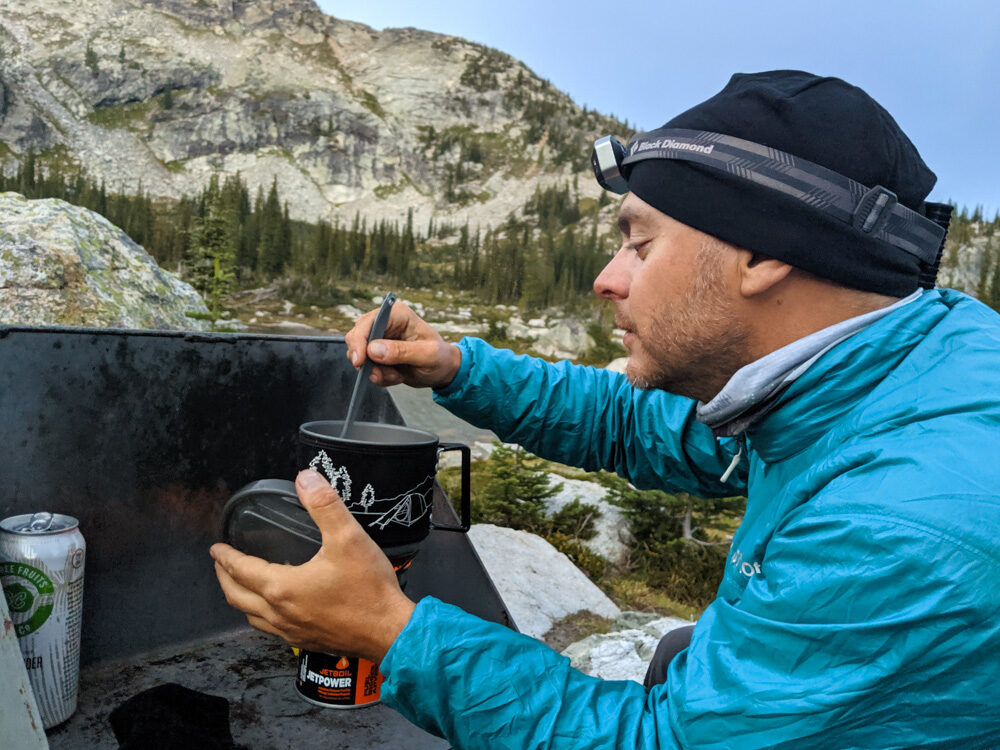
Some backpackers like to bring lightweight plates and bowls. It may seem a little lazy but we prefer to eat out of the cooking pot/freeze dried food packet. It saves extra washing up and saves weight too. We carry a long plastic spoon for this purpose.
Washing up kit
If you plan to do anything more than boil water at mealtimes, you’ll also need to bring a small cleaning kit.
This would typically include a container of biodegradable soap and a small scrubber/scraper. Prepare to air dry or bring a small dish cloth.
Be sure to secure all of your cooking items when not in use as they are potential attractants for bears and other wildlife.
Water purification equipment
Water is essential for the body to perform well. Dehydration is dangerous! Drink plenty of water before setting out and bring plenty with you. I’ll talk more about this later.
Unlike at home, however, water in the backcountry isn’t always safe to drink. While it may look fine in appearance, it could be carrying bacteria that has the potential to make you very sick.
To make the water safe to drink, you can use a filter, UV light or water purification tablets.
We like to bring two variations of filtering/purification systems (usually the BeFree), one being a handful of ultralight Aqua Tabs as a backup.
To store water, we both prefer to use a hydration bladder (2l). I find these to be way more convenient than a bottle for drinking water while on the trail.
Headlamp
The stars may be bright in the backcountry, but you’ll still need to bring some lighting of your own.
A flashlight will do but it’s much easier to use a headlamp. This will free up your hands and make it much easier to find items in the tent, cook food or use the outhouses at night.
Headlamps usually run on regular batteries or lightweight Lithium-ion batteries (recharged by USB). The one we personally use, the Petzl Actik Core, runs on either.
When shopping for a headlamp, look are the amount of lumens. This indicates how bright the headlamp’s beam will be. Around 200-300 lumens is satisfactory for most backpacking requirements.
Other distinguishing features include beam patterns, sensors, size, strap styles and red light function (great for preserving night vision).
First Aid kit
A First Aid kit is invaluable for every-day irritations (bee stings, small cuts) to major injuries.
Consider purchasing a basic camping first aid kit and then individually customizing it to your own needs. Be sure to check expiry dates on items before each trip.
Some essential items we have in our kit include bandages, blister plasters, surgical tape, oral rehydration salts, tweezers and antihistamines.
Taking a Wilderness First Aid course is also a good idea.
Food storage
Storing food properly helps ensure that animals can’t get access to it. If they do, they may continue to seek out human food. This can cause major problems for both animal and human.
When not in use, food, toiletries, cooking equipment and garbage should be stored securely, away from your tent.
- Some established backcountry sites will have a food cache (a metal bear-proof container) or bear pole system. Always research the campground ahead of time to see what system is in place
- Be prepared to create a bear hang, in the situation there is no food storage system provided at the campground (or it is unusable). You’ll need a carabiner, dry/stuff sack and at least 15m (50 feet) of nylon cord
Alternatives include:
- The Ursack – a lightweight, collapsible puncture-resistant bear bag, particularly useful in alpine areas where large trees suitable for bear hangs are scarce
- A bear barrel/canister – a thick plastic container with a bear-resistant lid, an effective but bulky solution
Read More: Bear Safety While Backpacking

Hiking poles
Hiking poles are great for stability. They also help to reduce pressure on the knees when descending.
The carbon version are the lightest, but also the most expensive. Aluminum hiking poles are cheaper and also more durable.
I almost religiously use (and love) Black Diamond’s Distance Carbon Z poles – they are foldable and incredibly lightweight.
While I almost always bring both poles (just in case JR wants one or there is a particularly tricky descent), I typically only use one.
Communication devices
There is no cell phone signal in large areas of Western Canada. That’s when satellite devices come into play. A satellite communication device makes it possible to request assistance in remote locations.
Popular devices include the Spot or InReach (both brands are recommended by Search and Rescue organisations).
We have the InReach SE+, which works on a subscription system. In the winter, we turn the service off and pay a minimal fee to keep the contract.
If you bring a cell phone, charge it fully, turn it off and then store it somewhere waterproof.
Reserving the battery is important in case of emergency. If your phone is also your camera, bring a portable battery charger (don’t forget the cable).
Navigation
Always carry a detailed map identify your location and how far you need to travel. Make sure your map is in some kind of waterproof container (even a Ziplock bag would do). In areas with a less defined trail, you’ll want a compass too.
Not sure how to use a map and compass? For hands-on lessons, check local hiking clubs and large outdoor gear retailers.
Even if using a GPS unit or phone app, always have a map as a back-up.
Sun protection
Sun protection is one of the 10 Essentials and is a must when backpacking at any time of year. Even on cloudy days, it is so easy to get burnt.
We usually decant 50SPF rated sunscreen into a smaller 100ml bottle for backpacking trips.
As mentioned later in this guide, sunglasses and a sun hat are also indispensable for sun protection on backpacking trips.
Repair kit
Duct tape is an all-purpose, fix everything lightweight saviour. You can use it to fix tent holes, broken poles, ripped clothing, broken backpack buckles and more. Here’s an idea how you can bring a small amount on your trip.
Tenacious tape is a great alternative and is easy to pack.
Having a knife or multi-tool is also immensely useful for a range of tasks including building shelter, creating kindling and assisting with first-aid.
Other useful items
- We pack almost all of our backpacking gear into lightweight, soft dry bags. This helps with organisation and also ensures that none of our clothing and equipment gets wet
- A waterproof backpack cover offers extra protection during snow, rain and hail. They can also help to keep backpacks clean in muddy environments
- Don’t forget all of your personal necessities such as toothpaste, toothbrushes and medication. Store any smelly items (yep, such as toothpaste) with your food at night to avoid issues with bears
- Bring a whistle as a signaling device (some backpacks already have these on the sternum strap). If lost or injured, yelling is tiring and also difficult for rescuers to hear. Whistle blasts are much more effective.
- A tarp can provide shade on sunny days and shelter on rainier ones. It’s a good idea to have some practice at home first before taking one on a backpacking trip
- Using repellent is the easiest way to ward off insects, but other options include mosquito coils, citronella candles, portable mosquito repellers and head nets
- A fire can be a lifesaver for backpackers needing to signal for help or suffering from hypothermia. Bring matches at a minimum, preferably of the waterproof kind or in a waterproof container
- Consider buying the footprint for your tent. It’s extra weight but can really help to prolong the life of the tent
- Bear spray is an absolute essential when backpacking in Western Canada. Carry it in a holster to make access easy
- Planning to camp outside of an established campground? Bring a trowel so you can dispose of human waste properly

What to wear backpacking
When spending time in the outdoors, it’s important to wear clothing that will keep you warm, dry and comfortable.
The key to this is wearing layers of clothing, made from moisture-wicking and quick-drying fabrics.
- Wearing multiple layers makes it possible to adapt to changing temperatures, weather conditions and hiking intensity. Trapped air between clothing layers also act as an insulator, keeping you warmer
- Moisture-wicking is the process of sweat being moved away from your skin. Keeping your skin dry is crucial to remaining warm.
Other features to look out for when considering your backpacking wardrobe are:
- Sun protection (long sleeves, UPF rating)
- Antimicrobial (to avoid odours)
- Weight (lighter items are easier to carry but likely less insulating)
- Pockets, zippers, hood and other details (preference, utility)
- DWR coating (Durable Water Repellency, to help rain bead off)
Bring clothes and accessories for the coldest possible conditions during the season you are travelling in. Weather can change very quickly, especially in the mountains.
Never assume that the weather at the trailhead will be the same at your destination.
The best outdoor fabrics
Nylon, polyester and merino wool are good examples of fabrics that layer and wick well. They also dry quickly.
I personally wear a lot of merino wool clothing when backpacking (tshirts, base layers, socks). I prefer it to synthetic materials such as nylon and polyester for a number of reasons:
- Merino wool is softer than regular wool (itch-less too!)
- The clothing is lightweight yet still warm when needed (natural temperature regulation)
- Provides warmth even when wet (more than polyester)
- Doesn’t stink as much as its synthetic versions (less washing, hooray!)
- Natural material (available from sustainable, ethical sources too)
The downside is that some people find it itchy. Clothing made from merino wool is usually less durable than polyester and nylon. Merino wool is also more expensive.
You may already have some suitable clothing for backpacking in your wardrobe – fitness wear, for example, is often made from polyester.
Whatever you do, avoid cotton. As well as being a heavy material, cotton is absorbs water easily, doesn’t dry quickly and does not insulate when wet.

The layering system
In this section, I’m going to take you through the ideal layering system for backpacking.
Base layer/first layer
The next-to-skin layer should always be moisture-wicking, to keep you dry and warm. Choose between synthetic or wool variations (see above for details).
Base layers, also known as thermals, are ideal for this purpose, especially in Western Canada where the climate is fairly cool.
Top base layers often feature long sleeves and are usually form fitting (but not skintight) so you can easily add other clothing on top. Bottom base layers are similarly slim in style, full length and are often referred to as ‘long underwear’ (or ‘long johns’ for short).
I always bring base layers (specifically the Icebreaker brand) on backpacking trips, no matter the time of year. On cooler days in the mountains, I’ll be wearing a top base layer (and sometimes a bottom layer) during the day. On warmer trips, I’ll only wear base layers in the evening and at night.
If base layers are not needed, your first layer will be a t-shirt or long sleeved shirt. On the bottom half, hiking pants or shorts. Yoga pants or leggings/tights (like these) can be good but offer less protection against mosquitoes and rocks/brush.
Mid layer
The middle layer is all about insulation. The type of mid layer you’ll want will depend on your backpacking destination.
For most of my backpacking trips in Western Canada, I bring two mid layer tops – a thicker merino long sleeve (like this) and and a light insulated jacket.
The long sleeve top is great to hike in on cooler days, while the insulated jacket (also known as a ‘puffy’) is perfect for evenings around the campground.
Fleece tops are very popular for mid-layers as they provide warmth without much bulk.
Puffy jackets are typically insulated with synthetic, down (feathers), wool or a blend. Down is generally considered to be the warmest jacket insulator. It does, however, lose its insulation power when moist or wet.
Synthetic insulated jackets have a lower price tag than down jackets but perform better when damp/wet and also dry faster.
Shell layer
This is the last layer of protection against the elements. A fully waterproof shell jacket is ideal for wind/rain/snow protection.
Depending on your destination, you may also want to bring waterproof pants (like these or these) to pull on quickly when full wind and rain protection is required.
In dry, cooler conditions, you’ll be able to use your mid layer as an outer layer. For example, I use my synthetic Arc’teryx Atom LT as an outer layer during dry weather and then a mid layer underneath a waterproof shell when raining.
Hiking boots
It would be easy to get overwhelmed with the huge choice of hiking shoes. It’s important, however, to take the time to find the right pair for you as it is key to enjoying your first backpacking trip.
The best plan of action is to visit an outdoor store and try on different types of hiking shoes
- Bring a clean pair of hiking socks (see info below) and orthodontics, if you use them
- I would suggest starting with backpacking boots. These are designed to carry heavier loads, with stiffer midsoles and a high cut covering the ankles
- Some experienced backpackers prefer to wear lighter hiking shoes or trail runners. There are benefits to this but also disadvantages
- The fit should be snug, but not tight. Your toes should not touch the end of the shoe
- Take the time to walk around the store to really get a feel for the shoes. If there are stairs in the store, use them!
- If you’ve ever had problems with your feet, you may want to replace the factory insoles with supportive footbeds (like these Sole ones)
- After purchasing, wear your new shoes around the house for a few days to ensure it’s a good fit for you. Returns aren’t usually possible after you’ve worn them outside
- Before your trip, make sure you get in a few good hikes with your new boots. This will allow the shoes to mold to your feet better. Pay attention to any hot or sore spots
On most backpacking trips, I also bring a pair of ‘camp shoes.’ It feels SO good to get out of my boots at the end of a long hike!
Depending on the trail, I may bring my hut booties or a pair of flip flops. In 2021, I discovered Teva’s Hurricane Drift sandals. These are perfect for hanging out in camp (with or without socks!) and also for crossing creeks and rivers.

Hiking socks
Wearing a decent pair of socks is almost as important as the footwear you use! I swear by lightweight merino wool socks. Not only do they feel soft and cosy, but they never get too hot or stink terribly! I always keep one fresh pair for sleeping in.
Icebreaker socks have long been a favourite of mine (specifically the Hike+ Light series), but I also like Darn Tough and Smartwool. $25+ may sound like a lot for a pair of socks, but the cushioning and quality construction is worth it.
Accessories
For additional warmth and comfort, I always bring this trio of warm accessories when backpacking in Western Canada.
- Heat is lost from any body part not covered, which means wearing a wool toque an easy way to stay warmer on cooler days and evenings
- A neck gaiter is effectively a stretchy neck warmer, but can also be used for sun protection. The most popular brand is Buff. I love the merino wool ones for hikes in cooler climates
- For most backpacking trips, a light pair of gloves is helpful for additional warmth in the evenings. I sometimes wear mine overnight if the temperature drops significantly
Sun protection is important too, with my essentials being:
- Sunglasses, with polarized lenses. I tend to bring an older, cheaper pair on backpacking trips, in case I lose or damage them
- A sunhat. I usually go for a baseball cap but JR prefers his Tilley hat for 360 degrees of protection
Example backpacking clothing list
I usually bring the same clothing on every backpacking trip:
- 2 x merino wool t-shirts
- 1 x merino wool base layer top (for cool hiking)
- 1 x merino wool base layer top (to sleep in)
- 1 x hiking pants
- 1 x shorts
- 1 x merino wool base layer pants
- 1 x light synthetic jacket
- 1 x shell jacket
On longer trips (4+ days) I will bring an additional t-shirt or be prepared to wash the one I have at some point. For colder adventures, I would bring an extra long sleeve top.
Backpacking food and drink
Food is fuel – this is particularly true when backpacking! But it also requires a little more thought, especially since you have to carry it on your back.
This section will guide you through the basics of meal planning for backpacking trips, starting with the importance of hydration.
Hydration
Adequate hydration should be a priority on the trail. With too little water, you’ll soon be feeling dehydrated, lethargic and weak.
The amount of water needed varies on the climate, the difficulty of the trail and your own requirements. No two hikers are the same! Whatever you do, Don’t wait to be thirsty as that means you’re already dehydrated.
A good benchmark is to aim to drink around half a litre of water per hour (moderate temperatures, moderate exertion).
It’s also crucial to hydrate before and after hiking as well. Be sure to have some water available in the tent too.
Another contributor to fatigue is the loss of electrolytes (such as potassium, sodium, magnesium) through sweating. A lot of hikers like to help replenish these by adding electrolyte-rich tablets (like Nuun, my personal favourite) or powders to drinking water.
Backpacking food
The best backpacking foods are:
- Nutritious – A balance of protein, healthy fats, carbohydrates, fiber and vitamins is essential for energy and good health
- Calorie dense – Lightweight items are easier and less tiring to carry while backpacking. Calorie dense items provide a high number of calories relative to weight
- Shelf stable – There’s no refrigerator in the backcountry! Safe storage at room temperature is a must to avoid food spoilage or sickness
Some of the most popular backpacking foods include:
- Granola or oatmeal for breakfast
- Tortillas, peanut butter, tuna, jerky (vegan or meat), cheese, crackers for lunch
- Pasta or rice based dehydrated or freeze dried meals for dinner*
- Dried fruit, nuts, trail mix, seeds, protein/granola bars, M&Ms, sesame sticks
All of these foods are calorie dense, shelf stable and lightweight. Combined, they provide a nutritious diet for backpacking purposes.
*These can either be made at home (DIY) or purchased from grocery stores, specialist outdoor stores or online.
How to meal plan
If you’re not sure where to start meal planning, I’d suggest using a hiking calculator to first work out an estimate of many calories you will be burning on your backpacking trip. There’s quite a few options online for this, but I personally like the ‘Calories Burned HQ’ calculator.
While there’s no need to get super technical about calories when just starting out, this calculation will give you a really good idea of how much you will need to fuel your body while backpacking. Spoiler: it’s a lot!
Remember that you’ll also need to factor in average calories burned per day while resting too – that’s the figure you see mentioned on nutritional information on food packets. It varies from person to person, with the average being 1,600-2,400 calories for women and 2,000-3,000 for men.
Backpacking meal ideas
Food is always subject to a lot of personal preference and backpacking food is no different!
The good news is that there are SO many options for backpacking food. And there are so many awesome websites out there offering ideas and inspiration for backpacking food and meal planning (my partner recently started TrailGourmet for this purpose!) as well.
For your first backpacking trip, I would recommend purchasing mainly grocery store items for breakfast/lunch/snacks, with freeze dried meals for dinner.
This keeps things simple in terms of planning and will help you discover what your preferences are for future backpacking adventures.
Freeze dried meals are on the pricey side, but for a first time trip, I think you’ll find the convenience (simply add boiling water and wait) very helpful after a long day of hiking.
How to stay safe when backpacking
No-one sets out on a backpacking trip thinking that they’re going to get into a dangerous situation. But it does happen. And it could happen to you.
Thankfully, there are ways to reduce the probability of a dangerous situation while backpacking. It’s all about preparation. The more prepared you are, the safer you’ll be.
Being prepared means having the right experience, knowledge and equipment to prevent small issues (injuries, changes in weather, other unexpected events) from developing into dangerous situations.
Being prepared also means knowing what to do when dangerous situations do happen and how to survive. This includes getting lost.
Some of this preparation has already been covered in this guide, such as:
- Trip research – trail route, weather, wildlife, conditions, difficulty
- Appropriate clothing and shoes
- 10 Essentials
- Hiking gear and camping equipment
In this section, we’ll go beyond these topics to discuss what else you can do to keep yourself safe while backpacking.
Read More: How to Stay Safe in the Outdoors
Physical preparation
Backpacking is physically demanding. And that’s true no matter how light your pack is!
Making the effort to improve your fitness and flexibility will really help you feel less sore and exhausted while backpacking. It’ll also lessen your chances of getting injured on the trail.
The ideal time to start conditioning training is around eight weeks before your first backpacking trip. If you don’t have that much notice, even a few weeks of preparation is better than nothing.
Practice makes perfect! If you don’t already regularly hike, start going on walks and hikes at least three times a week.
- Keep to a brisk speed to get your heart rate up
- Gradually extend the length and difficulty of your hikes over time
- Be sure to bring a backpack and add more weight to it on every hike
- Wear the same shoes/boots as you will on your backpacking trip
If your first backpacking trip is going to take place at a significantly higher elevation than your home, you may also want to practice hiking at elevation too. Thinner air pressure means that it is harder to breathe.
Improving your strength and balance can help immeasurably on the trail. REI has an awesome guide with strength training videos demonstrating eight different exercises, from jump squats to single leg deadlifts.
Alongside these more active pursuits, also take the time to try some breathing exercises. This, combined with cardio and strength training (as above) can help to improve your lung capacity, which will enable you to power up hills and mountains better! The Nest has some good tips here.
Stretching exercises can also help with lung capacity in addition to flexibility and balance. Many of the most effective stretches for hiking are actually yoga poses (so, bonus, if you happen to already practice yoga!)
Of course, it’s always a good idea to check in with your doctor before starting a new training program.
Share your trip plan
A trip plan is a typed or written outline of your intended backpacking trip. It should include the details of where you’re going and when you plan to be back.
Sharing your trip plan with a reliable friend or family member is one of the easiest yet most important things you can do to be safe while backpacking.
If you do not return on time, your friend or family member should alert the emergency services and provide details from the trip plan to help locate you.
Our trip plan includes:
- Purpose of our trip (e.g. multi-day hiking)
- Our destination and route to get there
- Additional group members (as appropriate)
- Departure date, approx time
- Intended return date, approx time
- The location of our parked vehicle plus make, model, colour, licence plate number
- Colour of our equipment – tent, jackets, backpacks
More advice available on creating a trip plan on AdventureSmart
Trail safety
The following quick tips will help you avoid most common causes of outdoor emergencies while on the hiking trail:
- Take time to observe your surroundings
- Stay on the trail
- Check progress (using your map/GPS) often
- Know what the daylight hours are
- If you arrived as a group, stay as a group
- Take extra care around waterfalls and rivers
- Stay hydrated and snack regularly
- Respect closures and restrictions
- Remain vigilant of changing conditions and weather
- Observe wildlife from a distance and do not approach
- Extinguish campfires (and keep them small)
- Keep pets under control
- Learn to keep your ego in check
Wildlife encounters
It’s always exciting to spot wildlife in their native habitat. It does, however, come with risk and danger, to both animal and human. Be considerate to animals by:
- Not feeding wildlife. Not only can human food can make animals sick, but it may encourage them to keep looking for it
- Storing food properly (and packing ALL trash out with you) This helps to ensure that animals can’t get access to it. If they do, this counts as feeding them
- Observing from a distance. This allows animals to continue their natural behaviour and the chance to escape if they need to
Besides respecting the presence of animals, you should also know how to proactively avoid having a negative encounter with a predator.
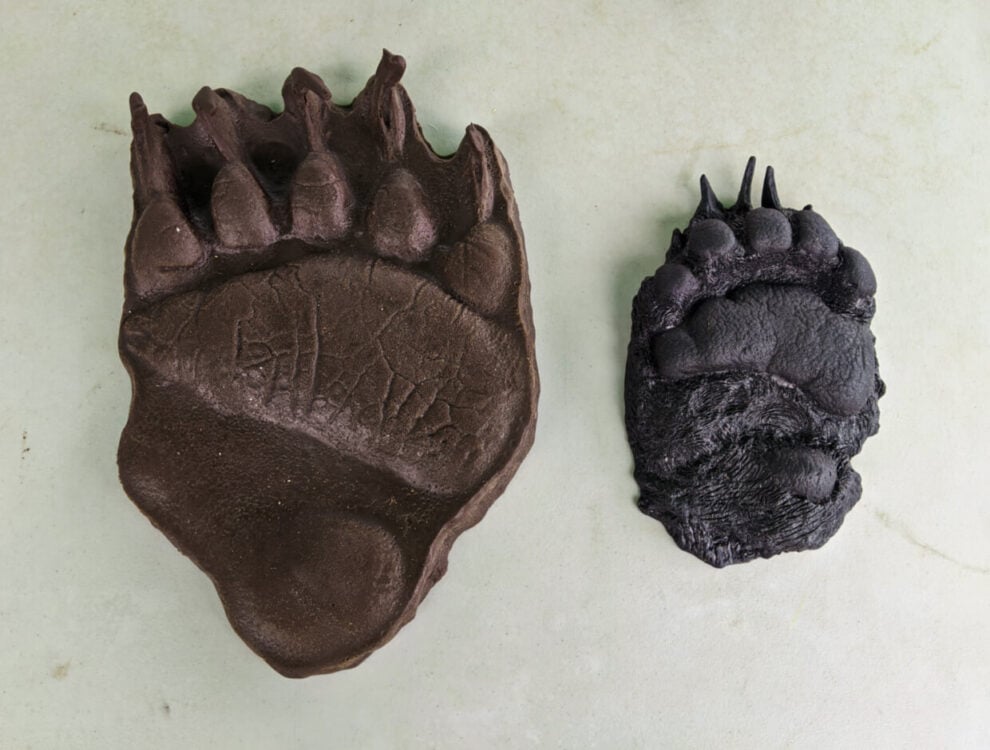
Here in Western Canada, this includes grizzly bears, black bears, cougars and wolves. When backpacking, you should be sure to:
- Be alert at all times
- Make noise
- Travel in daylight hours
- Keep pets on a leash
- Cook away from camping areas
- Store food where animals can’t get it
- Travel as a group whenever possible
It is a good idea to bring bear spray as a precaution and carry it in an accessible place (a holster can help).
Bear spray is an aerosol deterrent made with chili pepper oil, designed to be deployed at close range (less than 10m) towards the face of an aggressive or charging bear.
The vast majority of people never have to use it. But if you do, you’ll be glad you have it. Personally, we bring bear spray on every hike.
For more information about bear safety and what to do if you see a bear while backpacking, please read our dedicated guide here

What to do if things go wrong
Outdoor survival is a huge topic and it would be impossible to cover it in reasonable depth here – do check the additional resources section at the bottom of this guide for helpful links.
Think STOP
In a situation when no-one in your group is in immediate life threatening danger, think STOP:
- Stop – sit down, have a drink of water, eat a snack, concentrate on your breathing
- Think – evaluate the problem(s) and your equipment/supplies
- Observe – look carefully at surroundings, consider options
- Plan – form a strategy and implement it
The best strategy in most situations is to stay where you are. Continuing on after becoming lost or injured is risky as you may move even further away from the trail and rescuers. Make yourself visible and use signaling devices and your voice to alert rescuers to your location.
Don’t wait to ask for help
It is much better to call for help earlier than later. As night falls or weather conditions worsen, rescue comes more difficult. It can also become more complex if you get even more lost or injured.
The fastest way to request help is to call 911. If the signal is spotty, move to higher ground and away from dense forest cover. The 911 dispatch centre will connect you with local RCMP and Search and Rescue.
Search and Rescue is always free in British Columbia.
Many wilderness areas have no phone signal. That’s when satellite devices come in handy.
Always remain positive
Having a positive attitude is so important in any emergency or survival situation. If you’re able to keep a clear head and adapt to the situation, you are more likely to be able to overcome challenges and solve problems.
Backpackers who have done the appropriate preparation for their trip should have the necessary tools and knowledge to reduce the severity of most emergency situations.
If you’re lost, for example, your life should not in immediate danger since you have a shelter, extra food, extra layers etc.
How to Leave No Trace
When backpacking, you should be prepared to Leave No Trace. But what does this mean? Leave No Trace is the closest thing to an ethics code for people exploring the great outdoors.
The idea is to minimise our impact on nature as much as possible, ensuring that the beautiful places we love remain pristine and also safe for wildlife.
Leave No Trace has seven core guidelines:
- Plan ahead and prepare – The more prepared you are, the more likely you are to have a fun, safe and low impact outdoor adventure
- Travel and camp on durable surfaces – Outdoor activities cause erosion, especially on delicate terrain such as alpine meadows
- Dispose of waste properly – Be sure to take ALL of your trash home with you, dig a cathole in places without outhouse facilities and wash dishes and yourself away from water sources
- Leave what you find. Take only memories and photos with you, to help preserve the natural environment
- Minimise campfire impacts. Keep campfires small and in existing fire rings. Use a stove for cooking food instead
- Respect wildlife. Observe animals from a distance only, store food properly and never fed wildlife
- Be considerate of others. As well as respecting wildlife, we should respect other people too. Give other people space, be considerate and let the sounds of nature rule
For more info, read my dedicated Leave No Trace post which features actionable ways to reduce your impact on nature when backpacking
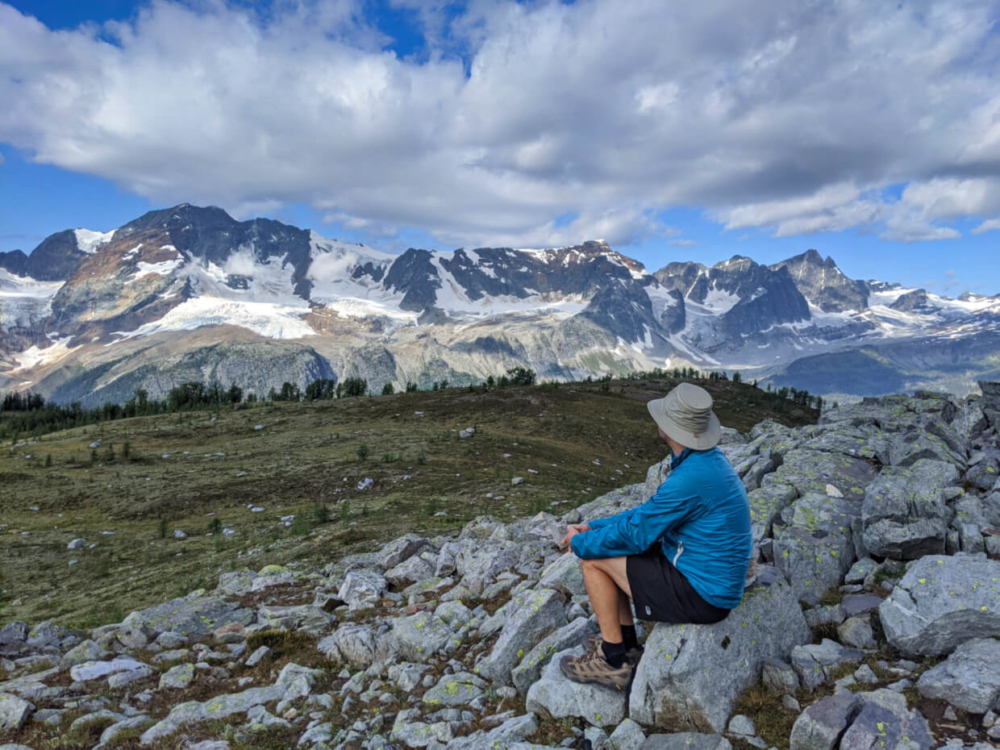
Backpacking trip inspiration
25 of the Best Overnight Backpacking Trips in British Columbia
13 of the Best Shoulder Season Backpacking Trips in British Columbia
West Coast Trail Alternatives: Best Coastal BC Backpacking Trips
Backpacking trip guides
Eva Lake Trail, Mount Revelstoke National Park, BC
Della Falls Trail, Vancouver Island
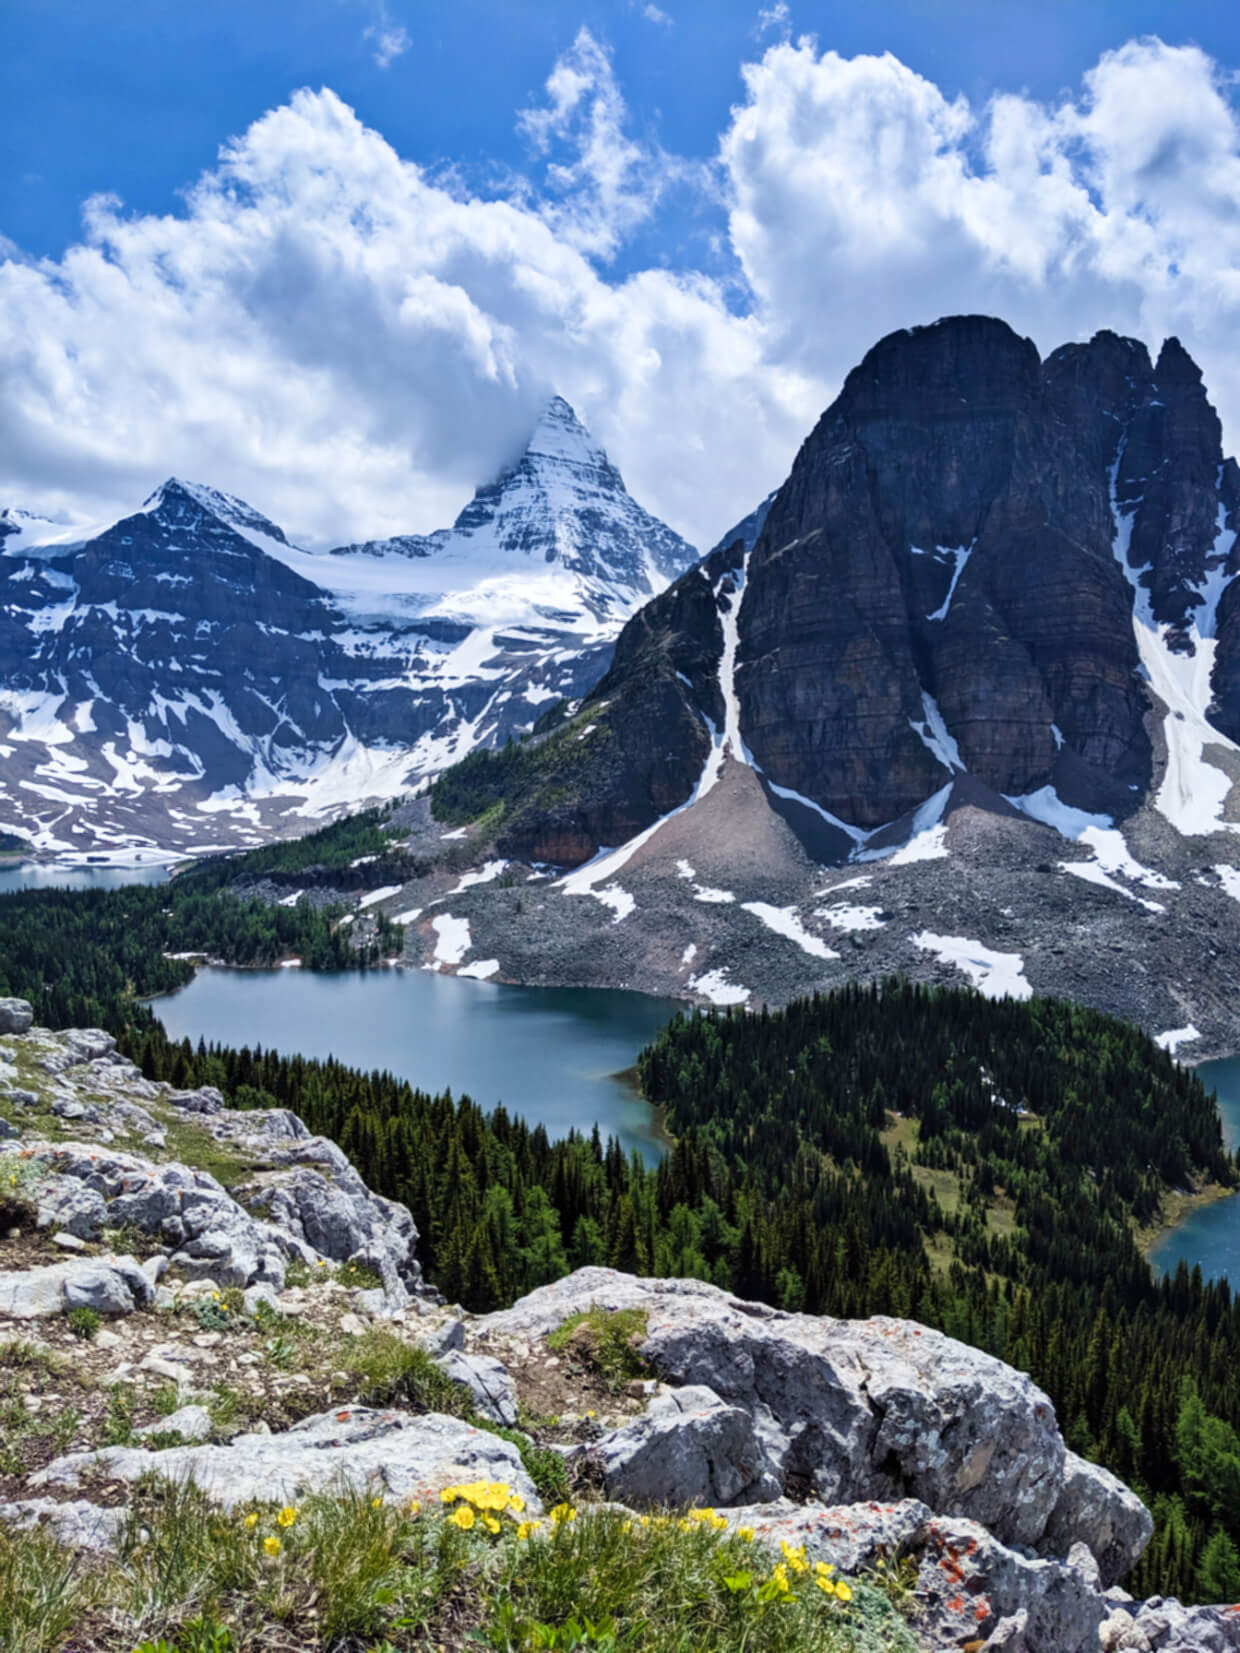
Mount Assiniboine Provincial Park, BC
Lake O’Hara, Yoho National Park, BC
The Heather Trail, Manning Park
Additional resources
AdventureSmart – Survive Outside
Backpacker.com – Backcountry Survival
Backpacker.com – The First 30 Seconds
Colorado Outdoors – Controlling Panic
I’d also recommend watching Search and Rescue: North Shore Rescue on the Knowledge Network (available for free online streaming).
The series provides an excellent insight into the work of search and rescue teams as well as sharing fundamental advice on outdoors safety.


One half of the Canadian/British couple behind Off Track Travel, Gemma is happiest when hiking on the trail or planning the next big travel adventure. JR and Gemma are currently based in the beautiful Okanagan Valley, British Columbia, Canada. Consider buying us a coffee if you have find any of our guides helpful!