No-one starts their day thinking that they’re going to get into a dangerous situation.
This is also true for anyone venturing into the wilderness for an exciting outdoor adventure.
But it does happen. With more and more people exploring the backcountry of Canada, calls to Search and Rescue are increasing.
There are, however, ways to reduce the probability of a dangerous situation. It’s all about preparation.

The purpose of this post is to provide an overview of the best practices to stay safe (or rather, be safer) in the backcountry.
It’s written with multi-day hiking trips in mind but the principles are the same for any type of outdoor adventure.
Though there are a few specific references to my home province of British Columbia (where most of my own backcountry trips take place), it is still relevant for any outdoor destination.
This post includes some affiliate links. If you make a purchase via one of these links, I may receive a percentage of the total sale at no extra cost to you.
A quick review of the basics
To give you an idea of what this guide is going to cover, here are the basics:
- Research first – route, weather, wildlife, conditions, difficulty
- Then evaluate your experience, physical fitness, skills, equipment
- Always bring the 10 Essentials
- Wear appropriate clothing and shoes
- Travel in a group
- Create and share a trip plan with someone before leaving
- Understand how to avoid the common causes of outdoor emergencies
- Know what to do if things go wrong
Related articles you may find helpful
- How to Leave No Trace When Exploring the Outdoors
- The 10 Essentials for Exploring the Backcountry
- Bear Safety in Canada: What You Need to Know

Preparation
The more prepared you are, the safer you’ll be.
Being prepared means having the right knowledge, experience and equipment to prevent inconveniences (changes in weather, injuries, other unexpected events) from developing into dangerous situations.
Being prepared also means knowing what to do when dangerous situations do happen and how to survive. This includes getting lost.
Research, research, research
The first step of outdoor adventure is research. Read trail descriptions and look up the route on a detailed topo map. Then consider:
- Is the trip within your physical limits?
- Do you have the required skills and experience to be safe?
- What are the dangers/risks and are you prepared for them?
- Do you have the appropriate equipment and clothing?
- Will you be able to navigate the route?
If the answer to any of these questions is ‘no’ or ‘I don’t know,’ then you have more work to do before heading out. This could involve developing your knowledge, practical experience and/or physical fitness.
If your answers were ‘yes,’ then more questions come into play:
- What does the weather forecast look like?
- What are the current trail conditions?
- Are there any closures or restrictions?
The more you know about the trip you are attempting to take, the better prepared you will be.
When considering physical fitness, consider elevation and terrain as well as kilometers.
Many new hikers make the mistake of assessing hikes on distance only, not realising how much of an impact elevation and terrain can have.
Spoiler: it’s A LOT. On flat, I hike 5km/hr. On challenging terrain with changing elevation, it can be more like 1km/hr.
Training
This post is intended to be a starting point for outdoor safety. The easiest way to get hands-on experience is to take a course.
MEC retail stores usually run introductory courses for most backcountry activities including hiking and climbing.
Local guiding companies are a go-to for intro and advanced courses for rock climbing and backcountry skiing.
Wilderness First Aid is a must for anyone serious about the backcountry. The intro course is usually two days long.
Beyond formal training courses, you can also improve your own knowledge by practising outdoor skills in a controlled environment.
This could be your garden or an urban park (where allowed), somewhere close to home. Example skills that could be practised include navigation and first aid.

Wildlife
Spotting wildlife in their native habitat is always exciting. It does, however, come with risk and danger, to both human and animal. Be considerate to animals by:
- Observing from a distance. This allows animals to continue their natural behaviour and the chance to escape if they need to
- Not feeding wildlife. Not only can human food can make animals sick, but it may encourage them to keep looking for it
- Storing food properly (and packing ALL trash out with you) This helps to ensure that animals can’t get access to it. If they do, this counts as feeding them
Besides respecting the presence of animals, you should also know how to proactively avoid having a negative encounter with a predator. In British Columbia this includes grizzly bears, black bears, cougars and wolves. Some ways you can do this include:
- Making noise
- Being alert at all times
- Traveling in daylight hours
- Keeping pets on a leash
- Cooking away from camping areas
- Travelling in a group
An aerosol deterrent, bear spray is designed to be deployed at close range (less than 10m) towards the face of an aggressive or charging bear. It causes the eyes, nose and lungs of a bear to swell, encouraging them to retreat.
When used properly, bear spray can be extremely effective. We always carry bear spray, ‘just in case.’
For more information about bear safety, please read our dedicated guide here
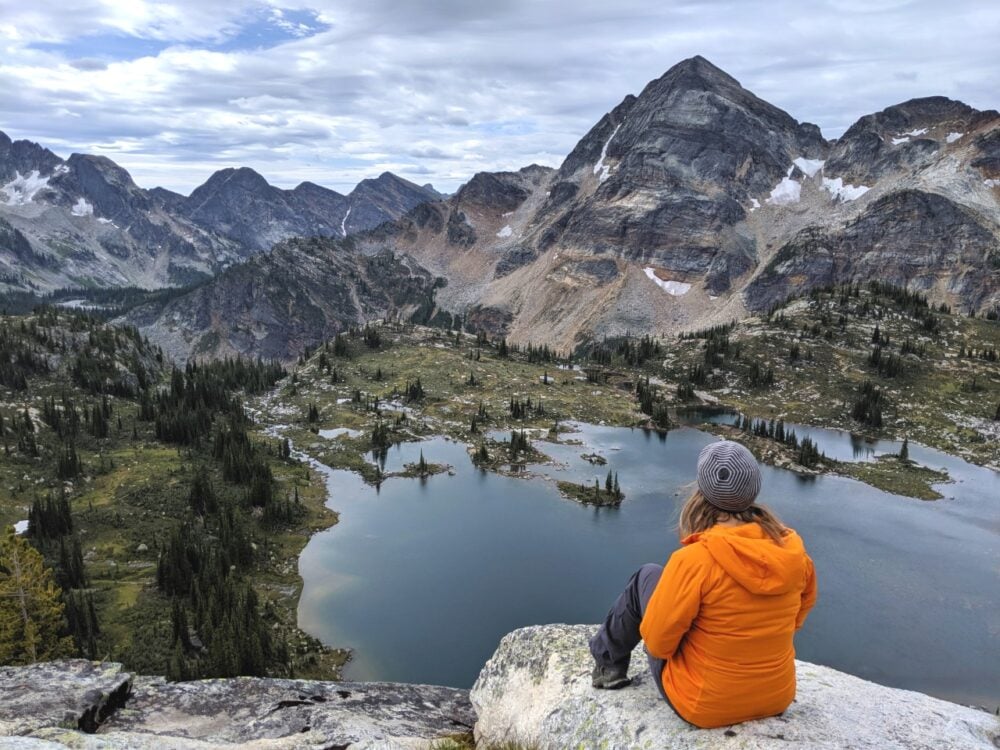
Weather
While it’s important to always consult the weather forecast before heading into the backcountry, never expect it be 100% accurate.
Weather can change quickly, especially in mountainous areas. Do not assume that the weather at the trailhead will be at the same at your destination, or even on the journey. Bring clothing and gear to suit all possible weather conditions.
Hope for the best but always prepare for the worst.
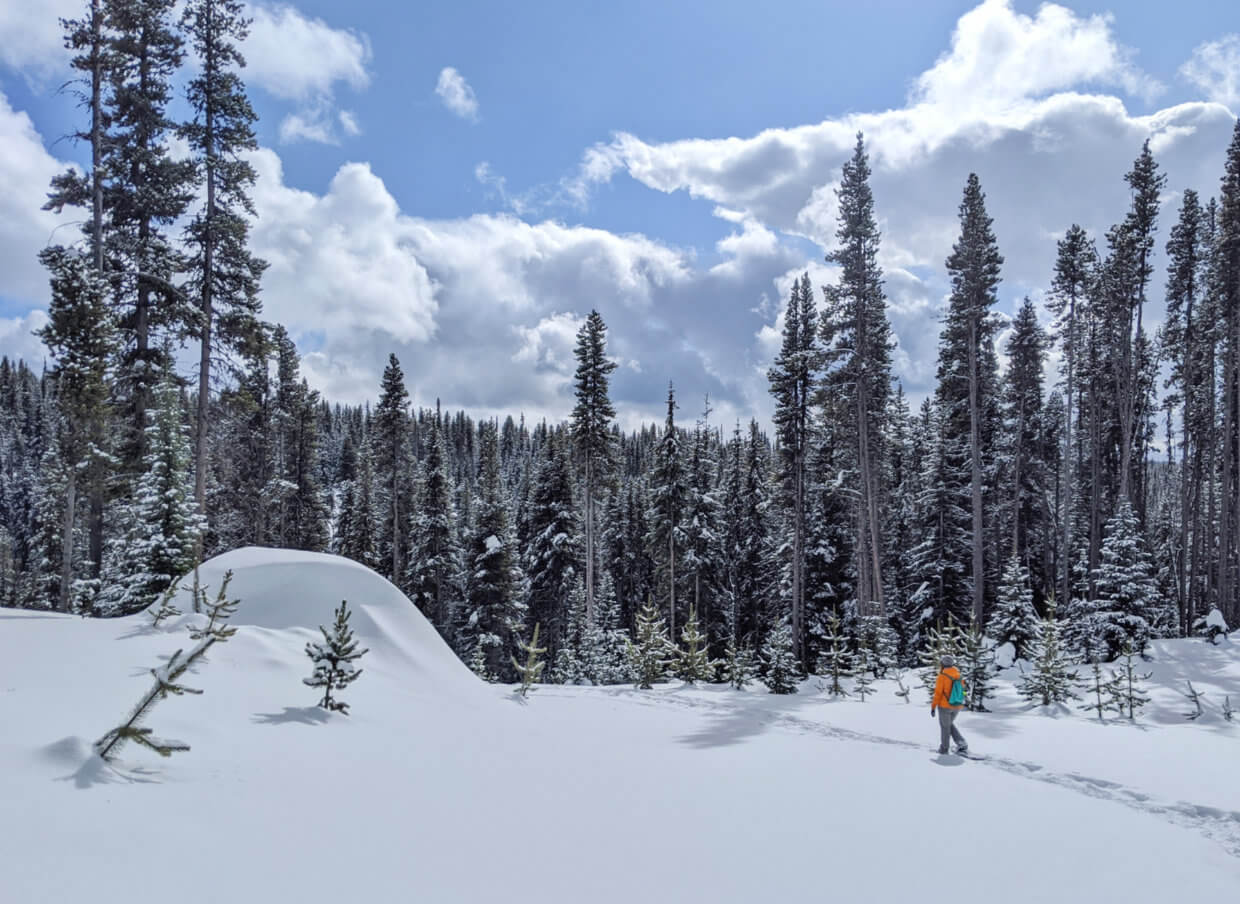
Winter
Winter is a whole other ball game, especially in mountainous regions. It changes so many aspects of an outdoor adventure, from the difficulty of the terrain to the scarcity of water. Cold temperatures increase the danger of exposure and hypothermia exponentially.
If you plan to explore outdoors in the winter, be prepared to take the extra steps needed to stay safe. Depending on where you are, this may include taking an avalanche course.
The 10 Essentials
The 10 Essentials should be brought on every outdoor adventure. These items will help prevent small incidents turn into life threatening emergencies.
Check out the dedicated post I wrote about the 10 Essentials here and make sure you bring them on your next backcountry adventure! This is the bare minimum of items you should have with you.
Bring the right gear
The 10 Essentials are just the beginning. It is crucial to bring appropriate gear for your planned adventure, based on anticipated conditions (expect the worst!)
You can find all of our outdoor gear recommendations on our Resources page. JR and I used to manage an outdoor store together, so we’ve tried and tested a lot of gear over the years.
Regarding communication, always bring a charged cell phone with backup battery.
In British Columbia, assume no cell phone signal and consider purchasing a satellite communication device such as the Spot or InReach (recommended by Search and Rescue organisations).
A few pointers once you have your set-up sorted:
- Always test and inspect your equipment before heading out
- Create and use a checklist to make sure you don’t forget crucial items*
- Understand how to field repair items (e.g. water filter, sleeping mat)
*If you sign up to our monthly newsletter, I’ll send you pre-made multi-day paddling and hiking checklists for free
Practice makes perfect
If you’re brand new to multi-day backcountry trips, I would suggest trying out your gear in a frontcountry campground (or garden!) first.
This way, you can work out how all your equipment works and whether you’ve forgotten anything before it really matters.
Alternatively, you could go on a short, overnight backpacking trip that would allow you to bail without too much trouble. Discover 20+ examples of overnight backpacking trips in BC.

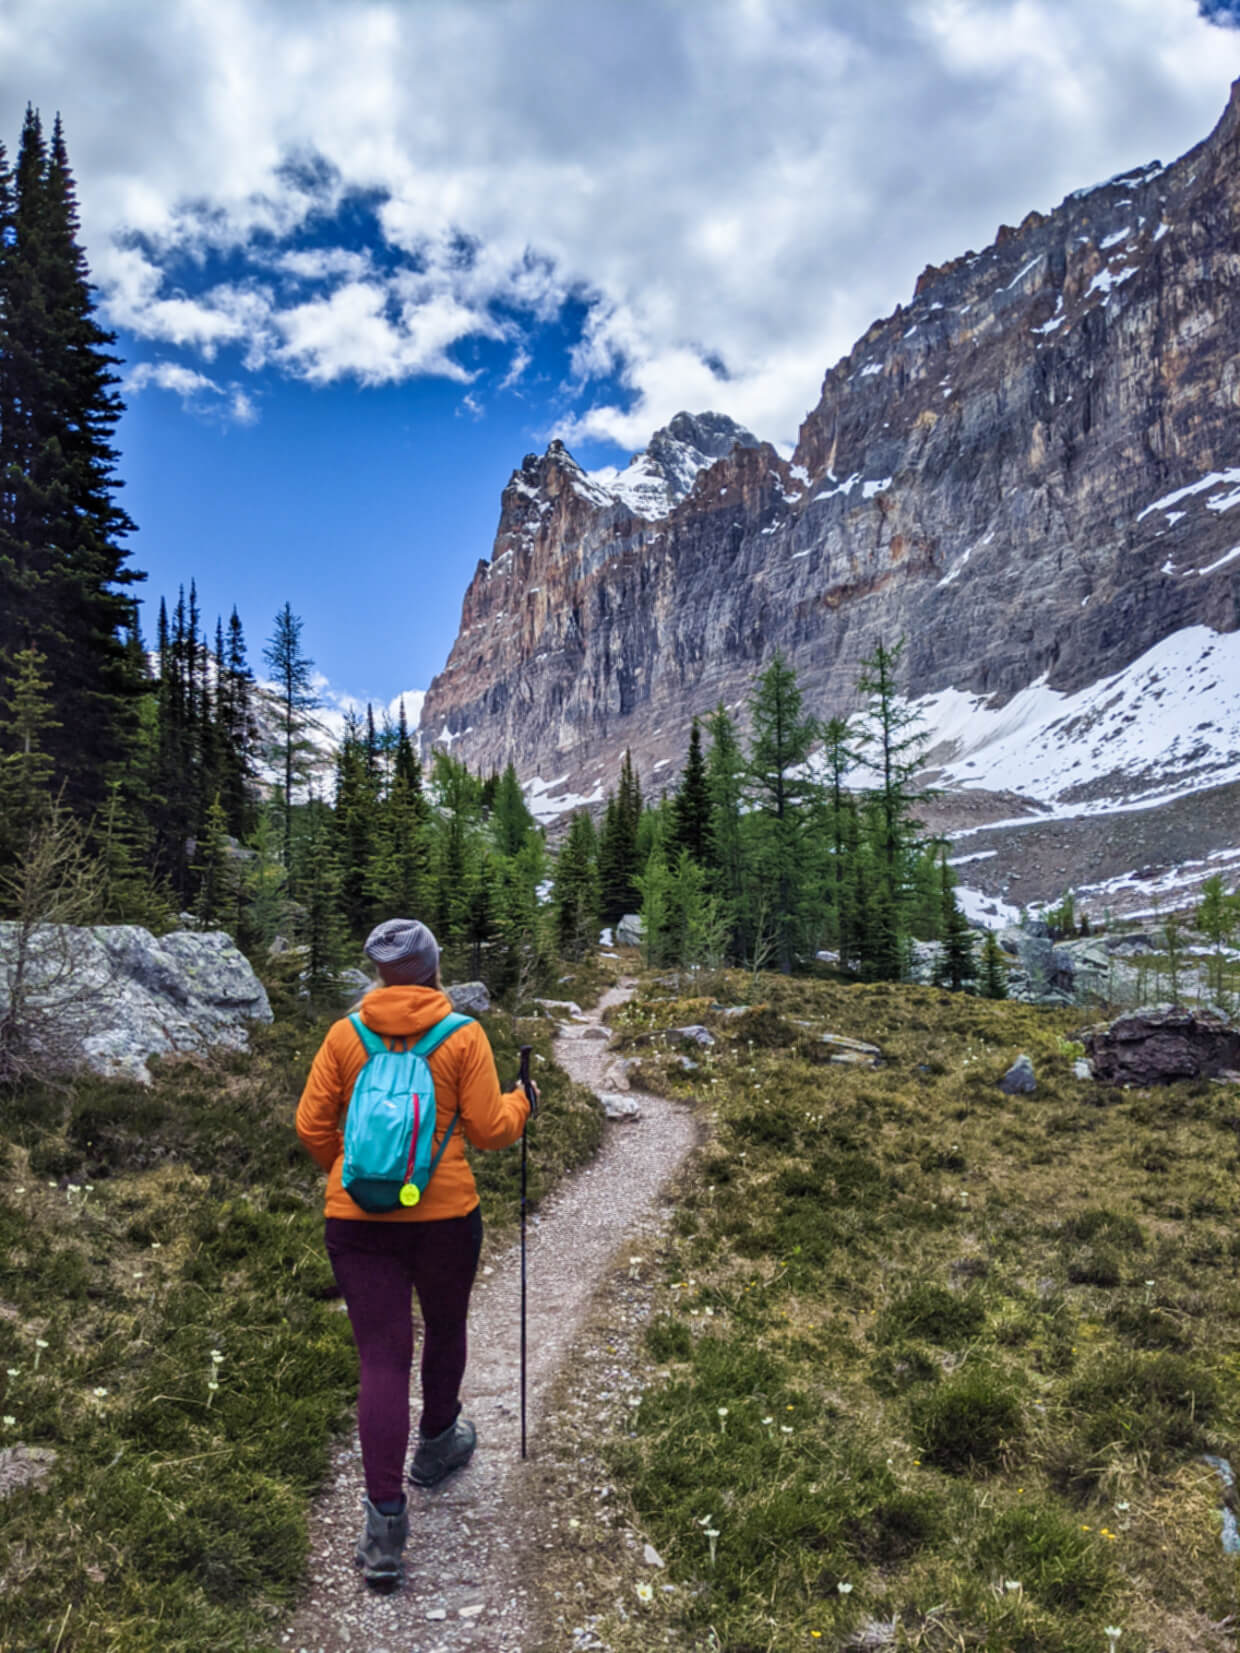
Wear the right clothing
Choosing the right clothing to wear outdoors is so important since it is what helps keep you dry and warm.
Whatever else may happen, you’ll be in a much better situation if you’re dry and warm.
Being cold is a side effect of getting wet so these two concepts are intrinsically connected.
As well as wearing appropriate clothing, using the right shoes are incredibly important for safe outdoor recreation.
Hiking shoes/boots, for example, are designed for grip, breathability and support on trails. Flipflops and street shoes are not suitable for anything beyond a roadside lookout.
Staying dry
The key to staying dry is to wear clothing made from materials that:
- protect against moisture
- dry reasonably quickly when wet
- breathe well
The best fabrics to do this are divided into synthetic and natural categories. I’ll talk about them in a second after I’ve explained more about how to stay warm.
Please note that cotton is NOT suitable for outdoor use. When cotton gets wet (from sweat or weather), it stays wet and doesn’t provide any insulation. It’s common to say that ‘cotton kills’ – it’s that dangerous to wear for outside activity.
The importance of layers
Besides staying dry, the other secret to staying warm is to wear layers of clothing. Trapped air between clothing layers act as an insulator, keeping you warmer.
Wearing multiple layers also makes it possible to adapt to changing weather (i.e. you take them on and off!). This helps to regulate your temperature.
- The best layering system for the outdoors starts with a base layer, which is the one you wear next to your skin. The main purpose of the base layer is to wick sweat away from your skin, keeping you dry even when working hard.
- The next layer is the mid-layer, which is all about insulation. This traps air and provides warmth. Some popular mid-layers include fleece pullovers or an insulated jacket.
- The outer layer is the one that protects you from the elements. A waterproof shell (jacket, pants or both) blocks rain, wind and snow, keeping you warm and dry while also allowing heat and moisture dissipate from the other layers when needed.
Synthetic vs. natural
Remember when I mentioned the two main categories of fabrics suitable for the outdoors – synthetic and natural? Here’s a quick overview of the differences.
Polyester is an inexpensive and common synthetic fabric, ideal for base and mid-layers. Polyester clothing wicks away sweat well, is easy to care for, has good stretch and is usually quick to dry. One downside, however, is that polyester can retain odours, even after washing.
For base and mid-layers made from natural fabric, merino wool is an excellent choice. It’s actually my preferred material. Merino has a better warmth to weight ratio, is highly breathable and also naturally odour resistant. It stays dry after absorbing up to 35% of its weight in moisture. In terms of disadvantages, it takes longer to dry than synthetic materials and is more expensive.
Insulated jackets are often used as mid-layers. These can be filled with synthetic materials or natural materials (merino, down feathers). Down is typically warmer but loses its insulating value when wet so more care is needed. Synthetic insulators are cheaper and also heavier.
Share your trip plan
A trip plan is a typed or written outline of your adventure. It should include the details of where you’re going and when you plan to be back.
Sharing your trip plan with a reliable friend or family member is one of the easiest yet most important things you can do to be safer in the backcountry.
If you do not return on time, your designated person can contact emergency services and provide accurate information to help locate you.
We usually give a family member a detailed trip plan (see below) and then let a neighbour know how long we’ll be gone and who our main contact is. The neighbour has the contact details of our main contact and vice versa. That way, we have two sets of people looking out for us.
Our trip plan includes:
- Purpose of our trip (e.g. multi-day hiking, base camping paddling trip)
- Our destination and route to get there
- Additional group members (as appropriate)
- Departure date, approx time
- Intended return date, approx time
- The location of our parked vehicle plus make, model, colour, licence plate number
- Colour of our equipment – tent, jackets, backpacks, canoe, kayaks
Most of our trips are located in areas of British Columbia without cell phone signal. For this reason, I usually advise when we plan to complete the trip and when we are likely to have phone signal again as there can be a delay between the two events.
I also mention whether we have any commitments immediately after the trip such as work or meetups with friends.
When creating your own trip plan, think:
- Why (purpose of trip, what mode)
- Where (specific location, intended route)
- When (departure date, return date)
- Who (group members, training/experience, medical conditions)
- How (transport to trailhead, parking area, vehicle details)
- What (equipment details)
More advice is available on creating a trip plan on AdventureSmart

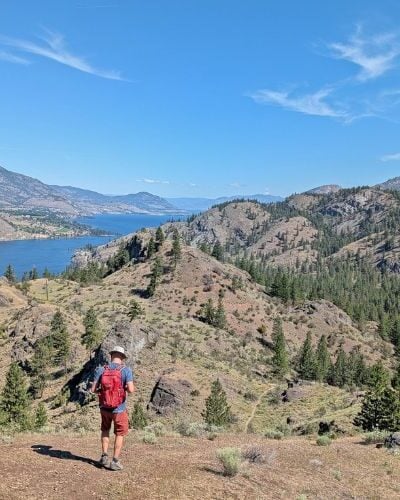
Prevention
While preparation itself is a form of prevention, here I will be talking about prevention during your adventure. The following tips will help you avoid most common causes of outdoor emergencies:
- Stay on the trail
- Adhere to pre-arranged turnaround times
- Check progress (using your map/GPS) often
- Know daylight hours
- Arrive as a group, stay as a group
- Take extra care around waterfalls and rivers
- Expect no cell phone signal
- Stay hydrated and snack regularly
- Take time to observe your surroundings
- Respect closures and restrictions
- Remain vigilant of changing conditions and weather
- Observe wildlife from a distance and do not approach
- Extinguish campfires (and keep them small)
- Keep pets under control
- Learn to keep your ego in check
Check your ego
To expand a little on the last point, it is so important to prevent your ego from getting in the way of safety. The compulsion to achieve something or save face is often the catalyst for a series of bad decisions. Some examples:
- Pushing on to summit a mountain when the conditions are clearly too dangerous to continue (lack of daylight, deteriorating weather)
- Continuing to walk after the realisation of being lost (backtracking or staying put is a better idea)
- Being uncomfortable in a situation but being too embarrassed to tell the other group members or call for help
The best outcome of any outdoor adventure is coming back safely.
Be ready to adapt and change your trip if necessary – there will be another chance to reach that summit another day.
Be honest with yourself and don’t be afraid to communicate concerns with the rest of the group.
What to do if things go wrong
Outdoor survival is a huge topic, with many different aspects and techniques. The basics are:
Do not panic
Panic is a normal physical reaction but often leads to rushed decision-making. It can also cause mistakes in judgment and hinder proper observation.
In a situation when no one in your group is in immediate life-threatening danger, think STOP:
- Stop – sit down, have a drink of water, eat a snack, concentrate on your breathing
- Think – evaluate the problem(s) and your equipment/supplies
- Observe – look carefully at surroundings, consider options
- Plan – form a strategy and implement it
Following the STOP method allows adrenaline to subside, breathing to relax and rational thought processes to resume.
Remain positive
Having a positive attitude can go a long way in an emergency or survival situation. Those who are able to keep a clear head and adapt are more likely to overcome challenges and solve problems.
If you’ve done the appropriate preparation, remember that you have the necessary tools and knowledge to reduce the severity of the situation. If you’re lost, for example, your life should not in immediate danger since you have a shelter, extra food, extra layers etc.
Call for help
Decision making becomes more difficult when you’re cold, scared and hungry. It is much better to call for help earlier than later, when it becomes dark or weather conditions worsen. Or you become more lost or injured!
The fastest way to request help is to call 911. This will contact you with a centralised dispatch center. They will then contact the local RCMP and Search and Rescue (if necessary) for you.
If you’re in an area with spotty or intermittent signal, move to higher ground and away from dense forest cover.
Many areas of the backcountry have no phone signal. That’s when satellite devices come into play (see preparation section).
Search and rescue service are completely free in British Columbia and Yukon. If you need help, ask for it.
Stay put, signal and build a shelter
So you’ve managed to contact the emergency services. Now what?
- Stay where you are. Moving location will make it hard for rescuers to find you and may result in becoming more lost or hurt. Staying put also helps to conserve energy
- Be visible – Wear or display your brightest or most reflective clothing and equipment (e.g. orange bivvy bag, emergency blanket) to help guide rescuers to you
- Make a symbol – If possible, draw a large SOS or ‘X’ in dirt (or create one with stones/sticks) an open area to help signify your location to air rescuers
- Build a (controlled) fire – A fire is useful for warmth and signaling (and as a source of comfort) but should be carefully controlled and monitored to avoid starting a forest fire
- Assist the rescuers – Use signaling devices and call out to rescuers when close
- Build or seek shelter – Protect yourself from the elements to stay dry and warm, but remember to stay visible as much as possible
Please see below resources for more information on survival techniques, rescue procedures and more.
Additional resources
Besides the courses already mentioned in this post and websites linked below, I would also highly recommend watching all five episodes of Search and Rescue: North Shore Rescue on the Knowledge Network (available for free online streaming).
The series provides excellent insight into the work of search and rescue teams as well as sharing fundamental advice on outdoors safety.
North Shore Rescue – Education
Backpacker.com – Backcountry Survival
Backpacker.com – The First 30 Seconds
Colorado Outdoors – Controlling Panic


One half of the Canadian/British couple behind Off Track Travel, Gemma is happiest when hiking on the trail or planning the next big travel adventure. JR and Gemma are currently based in the beautiful Okanagan Valley, British Columbia, Canada. Consider buying us a coffee if you have find any of our guides helpful!
Wow! That’s a lot! But it is really important to keep that in mind to stay safe while outdoors! Being prepared and knowledgeable in the first place can give you advantages, but you still need to be cautious and alert! In that way, we can really enjoy our travel outdoor adventures! Cheers!
Thanks Teo!