The Rockwall Trail in Kootenay National Park is, without a doubt, one of the best backpacking trips in the Canadian Rockies.
The huge limestone cliff that lends its name to the trail is just the beginning of the beauty found on this spectacular 4 to 5 day 54km hiking route.
Climbing three alpine passes, the trail provides truly spectacular views of surrounding mountain peaks, wildflower-filled meadows, waterfalls and turquoise lakes.
The Rockwall Trail had been on our ‘to do’ list for quite a few years and I can confirm that it lives up to the hype. If you only have time for one backpacking trip in British Columbia, this is an excellent choice.

This super comprehensive guide will help you prepare to hike the Rockwall Trail. I will also share our day-by-day experience on the trail so you have an idea of what to expect.
The breakdown of this post looks like this:
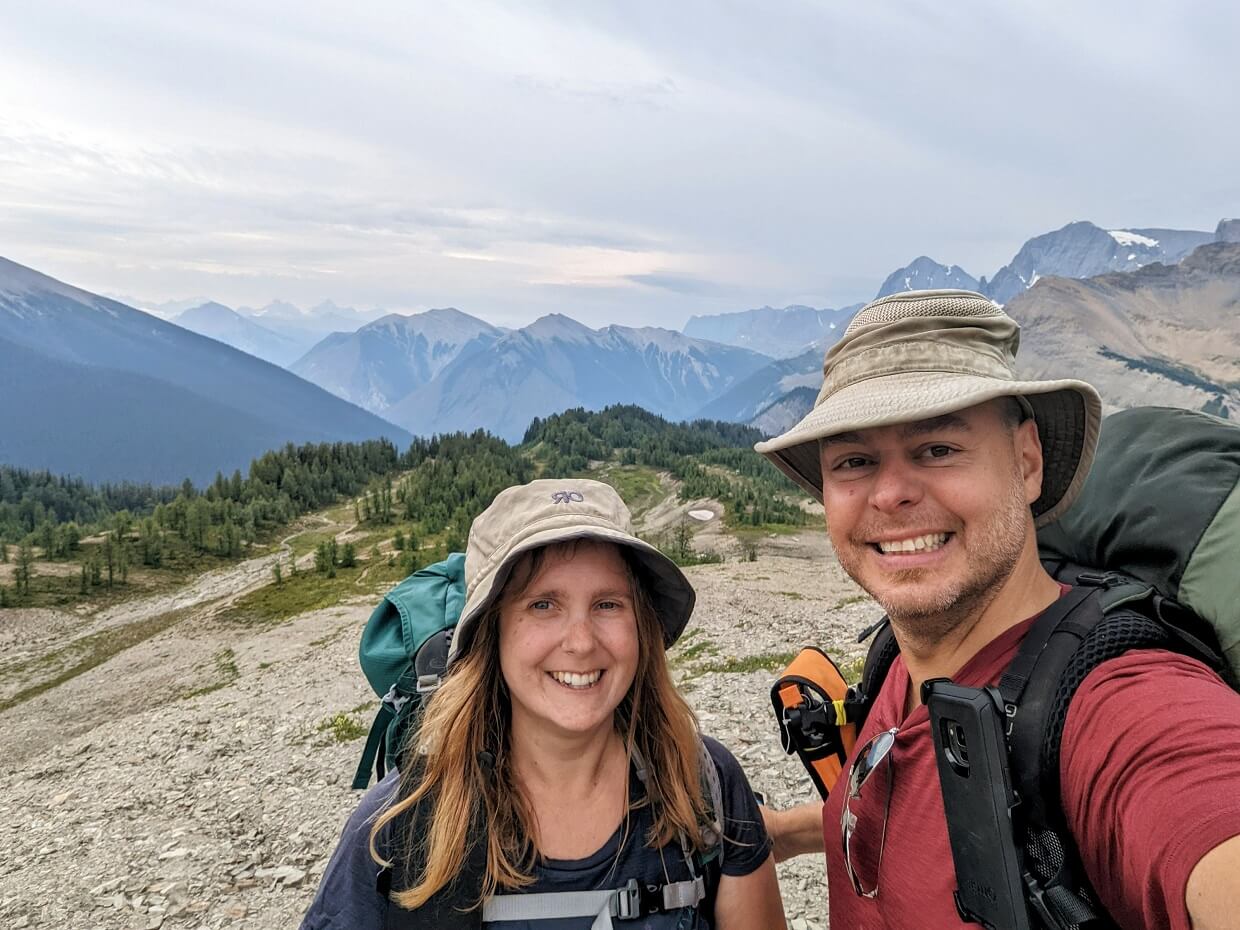
We hiked the Rockwall Trail as part of an 11 day hike along the Great Divide Trail.

Backcountry necessities
- Always bring the 10 Essentials
- Know how to stay safe in the backcountry
- Remember to Leave No Trace to help keep the wilderness wild
- Understand how to avoid negative bear encounters
- Trying out backpacking for the first time? Read Backpacking 101
- Check out our packing guide with gear recommendations
- Sign up to our newsletter for a free backpacking checklist
Introducing the Rockwall Trail
The Rockwall Trail is a 54km long backpacking trail in Kootenay National Park in British Columbia, Canada.
Kootenay National Park protects a large area of the Canadian Rockies and is situated within the traditional territories of the Ktunaxa and Secwepemc First Nations. It borders both Banff National Park and Yoho National Park as well as Mount Assiniboine Provincial Park.

The Rockwall Trail is located in the northwest corner of the park. The route starts and finishes on Highway 93, forming a sideways U. With the Rockwall not being a complete loop, hikers must organise transportation between the trailheads.
A significant portion of the trail parallels a huge rock cliff (the Rockwall).
Three out of four of the most used campgrounds are located in river valleys below the Rockwall, which means hikers must be prepared to hike up at least mountain pass each day.
It is well worth the effort, however, with the Rockwall Trail delivering some of the best, and most easily accessed, alpine scenery in the Canadian Rockies.
Rockwall Trail: quick facts
- 54km with 2100m elevation gain and 2200 elevation loss
- 4 to 5 day backpacking trip
- Moderately difficult trail with no technical features
- Can be hiked in either direction (we recommend southbound)
- Usually snow-free from late July to early September
- Reservations for the 2026 season will open on 26th January at 8am MT
- Leashed dogs are allowed

Hiking the Rockwall Trail: Our experience
We hiked the Rockwall Trail 18th to 22nd August 2022. The following is a day-by-day account of our experience. Alternatively, you can skip straight to the hiking guide.
While we had reserved a pretty relaxed five day itinerary to make the most of the experience, this turned out to be a very good decision for other reasons.
JR broke one of his toes just two weeks before the hike and, as you may imagine, we didn’t want to rush. It worked out perfectly and I would highly recommend this itinerary (broken toes or not).
Shout out to all the lovely hikers we met on the way, with a special mention to Wes and Denise’s group from Prince George who were following the same itinerary as us. We really enjoyed seeing you at the campgrounds every night!

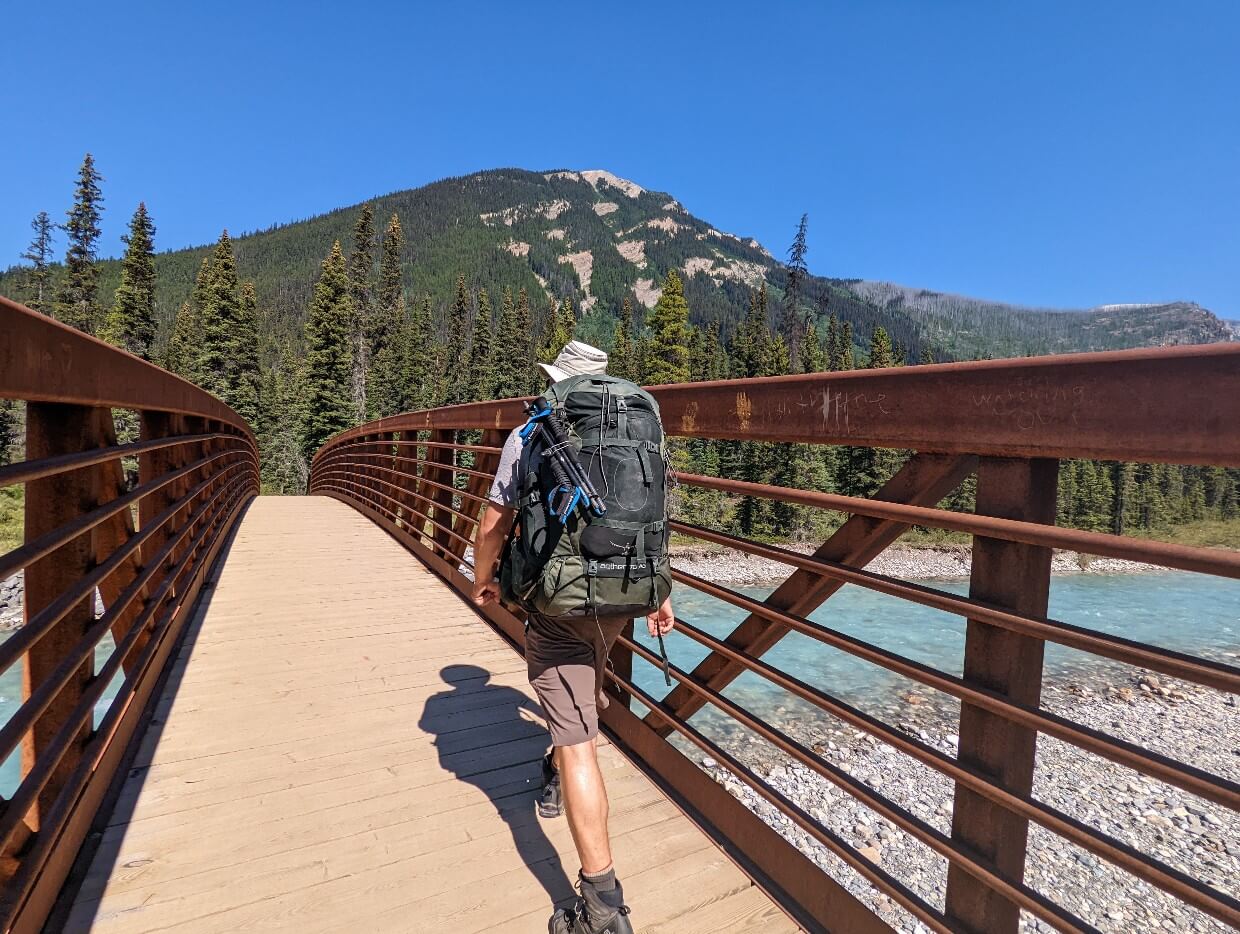
Day 1: Paint Pots to Helmet Falls
Our Rockwall experience started with a hitchhike (and a quick trip to Banff to buy a replacement sleeping bag but that’s a whole other story). Having no experience with hitchhiking, we were both a little nervous.
Luckily, we were only looking for a ride 12km up the road, from the Floe Lake parking lot to Paint Pots. After being picked up by a lovely couple (and baby) from Barcelona, we were on our way.
Setting out in a heat wave, we were glad to be in the forest (and accompanying shade) most of the day. The brief exposed areas did, however, convince us that we needed to get up early for the remaining days of the hike.
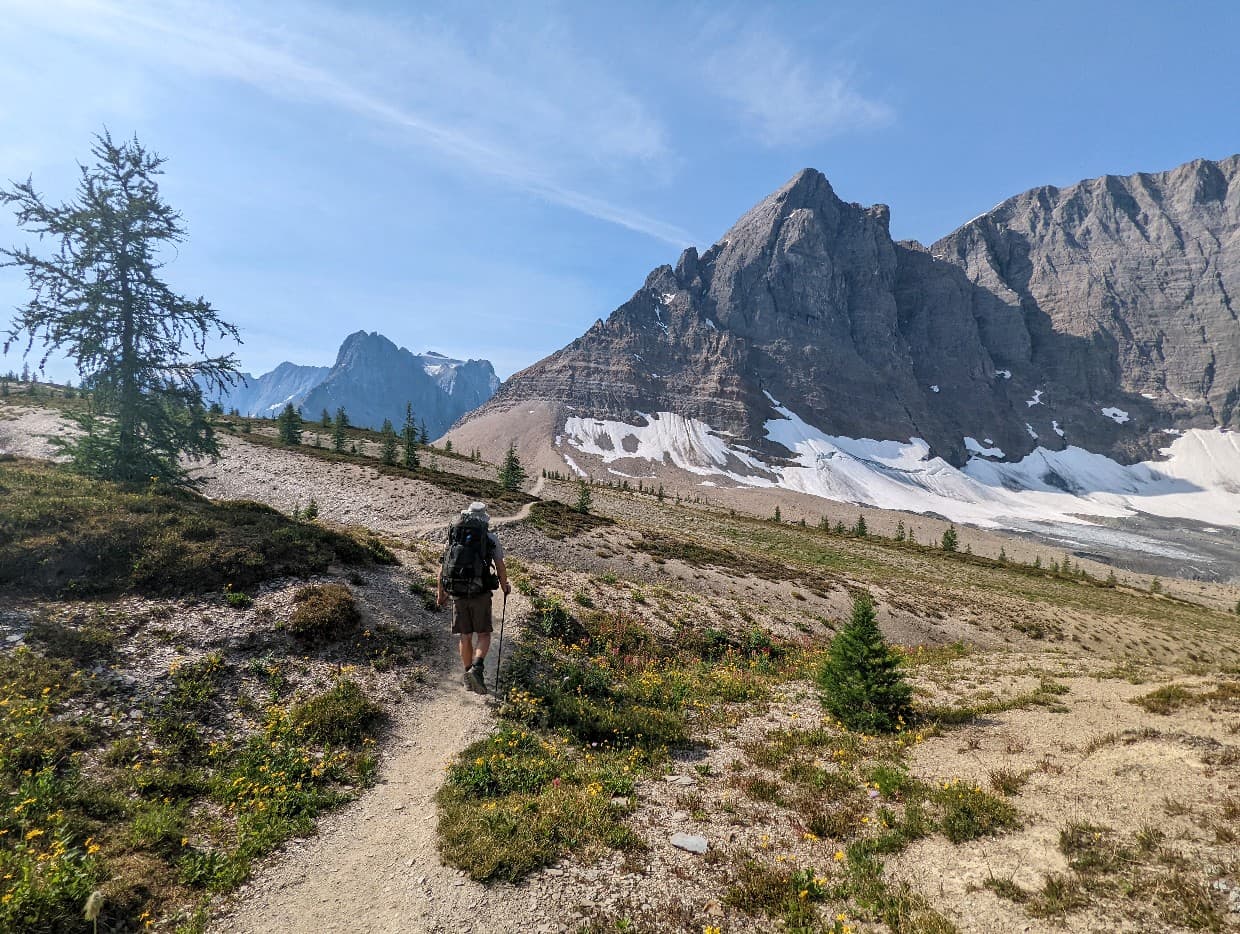
Though this day only offered the most distant glimpse of the Rockwall itself, it was still a worthwhile (and beautiful) hike.
The mineral Paint Pots provided a colourful start before we alternated between meadow and forest sections. The latter made the climb the elevation bearable, even in the heat.
Our entrance to Helmet Falls campground was less dignified, and quicker, than expected since there was a wasp nest on the bridge just ahead of it (we successfully out ran them!)
Day 2: Helmet Falls to Tumbling Creek
Staying true to our commitment to get up early, we started hiking at 7.15am. And boy did it pay off! Not only were we able to beat the heat, but the trail was absolutely deserted. We didn’t see a single other soul until 12pm.
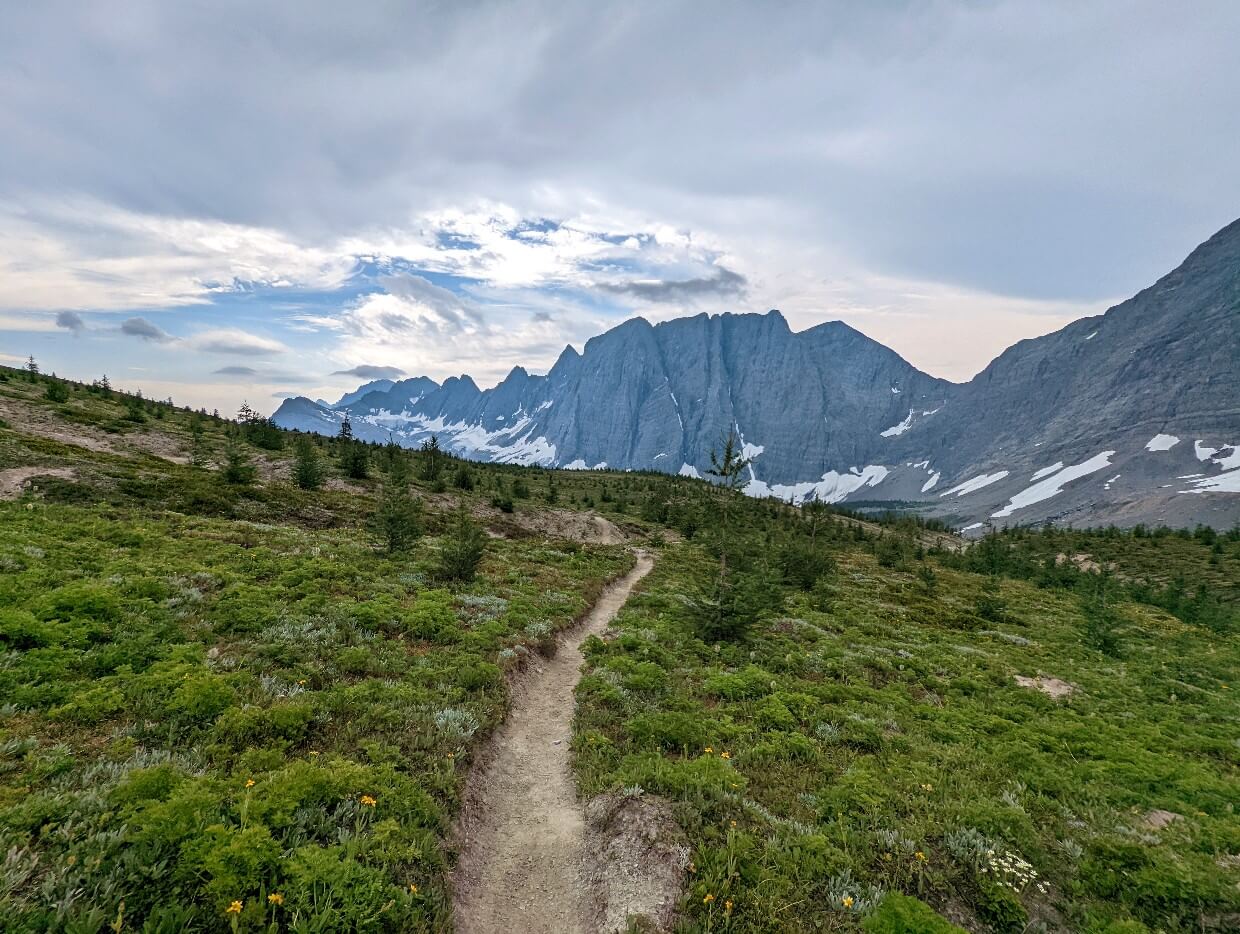
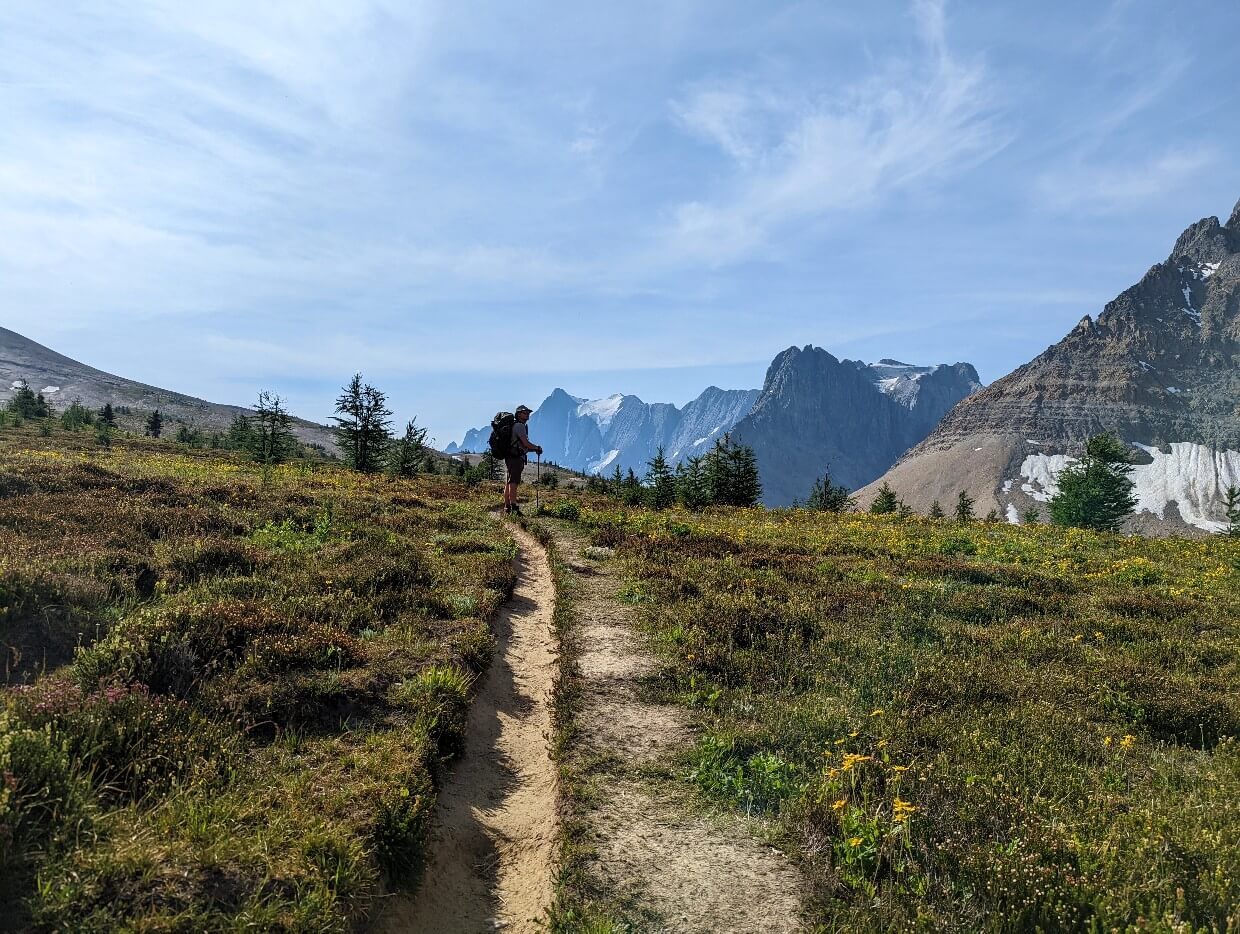
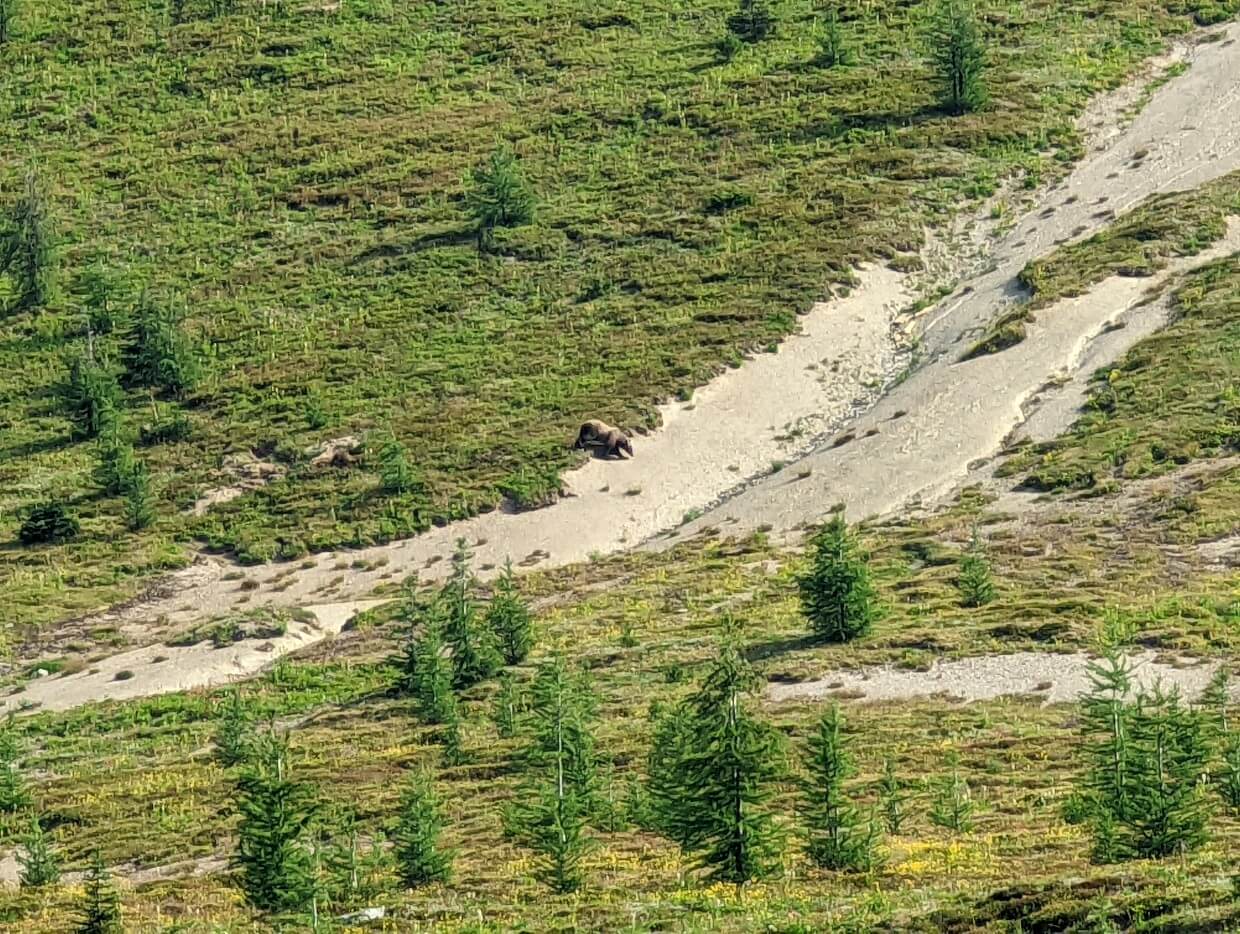
Well, unless you count a grizzly bear….but I’ll get to that. While it was sad to wave goodbye to magnificent Helmet Falls as we climbed the nearby pass, we soon experienced our first ‘wow’ moment of the hike.
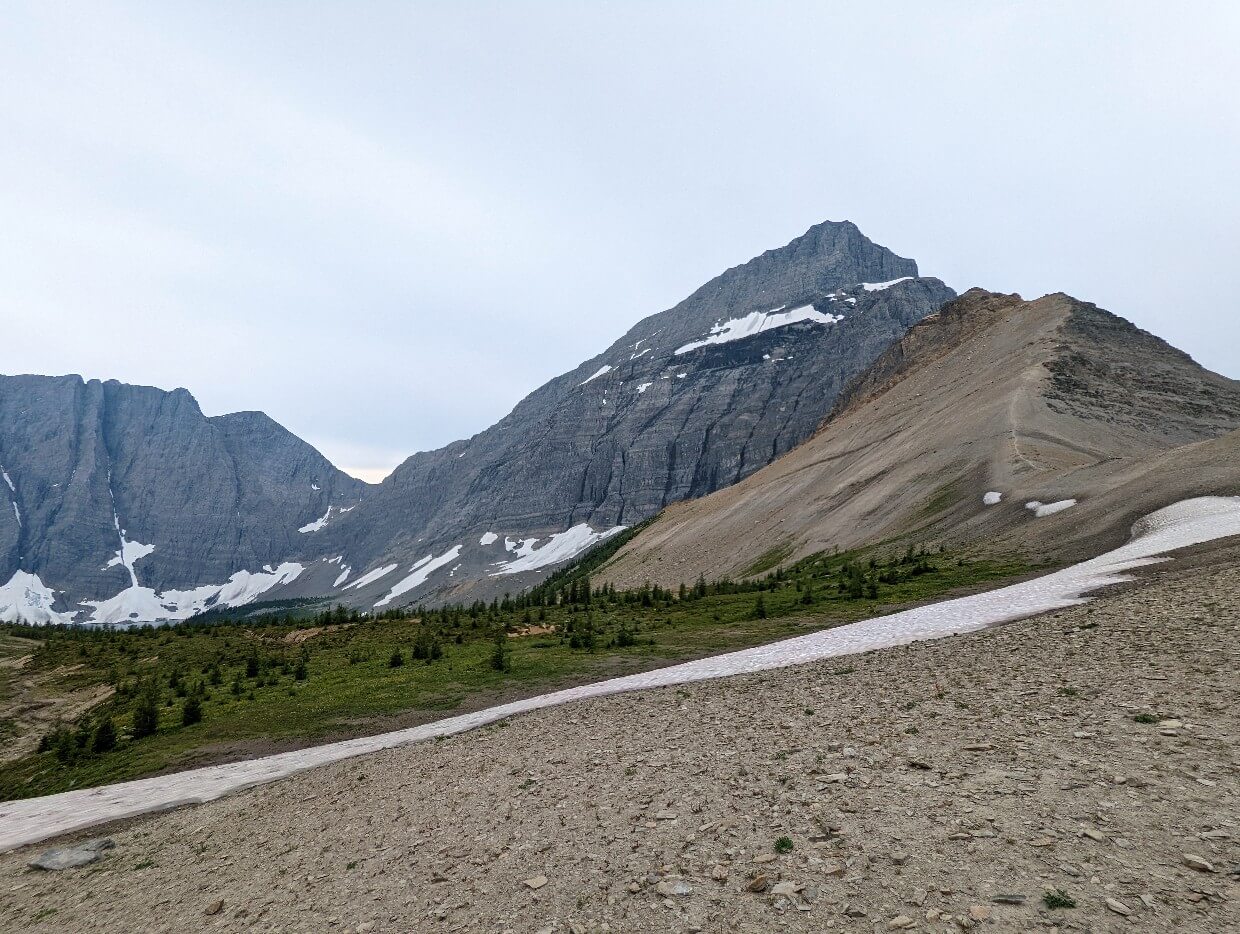
I turned a corner and there it was – the Rockwall itself, stretching out for miles into the distance. Incredible!

We followed the edge of this impressive cliff for much for the day, stopping often to take in some of the best alpine views we’d ever seen.
At our lunch spot, JR saw something moving over on the hill to our left. Yep, it was a grizzly! We watched enthralled for half an hour as he (or she) pounded the dirt in search of ground squirrels.
Starting so early meant we were only the second hikers to roll into Tumbling Creek campground that day. We had the pick of sites, eventually choosing a spot by the stream (easy water access) with views of Tumbling Glacier.
Day 3: Tumbling Creek to Numa Creek
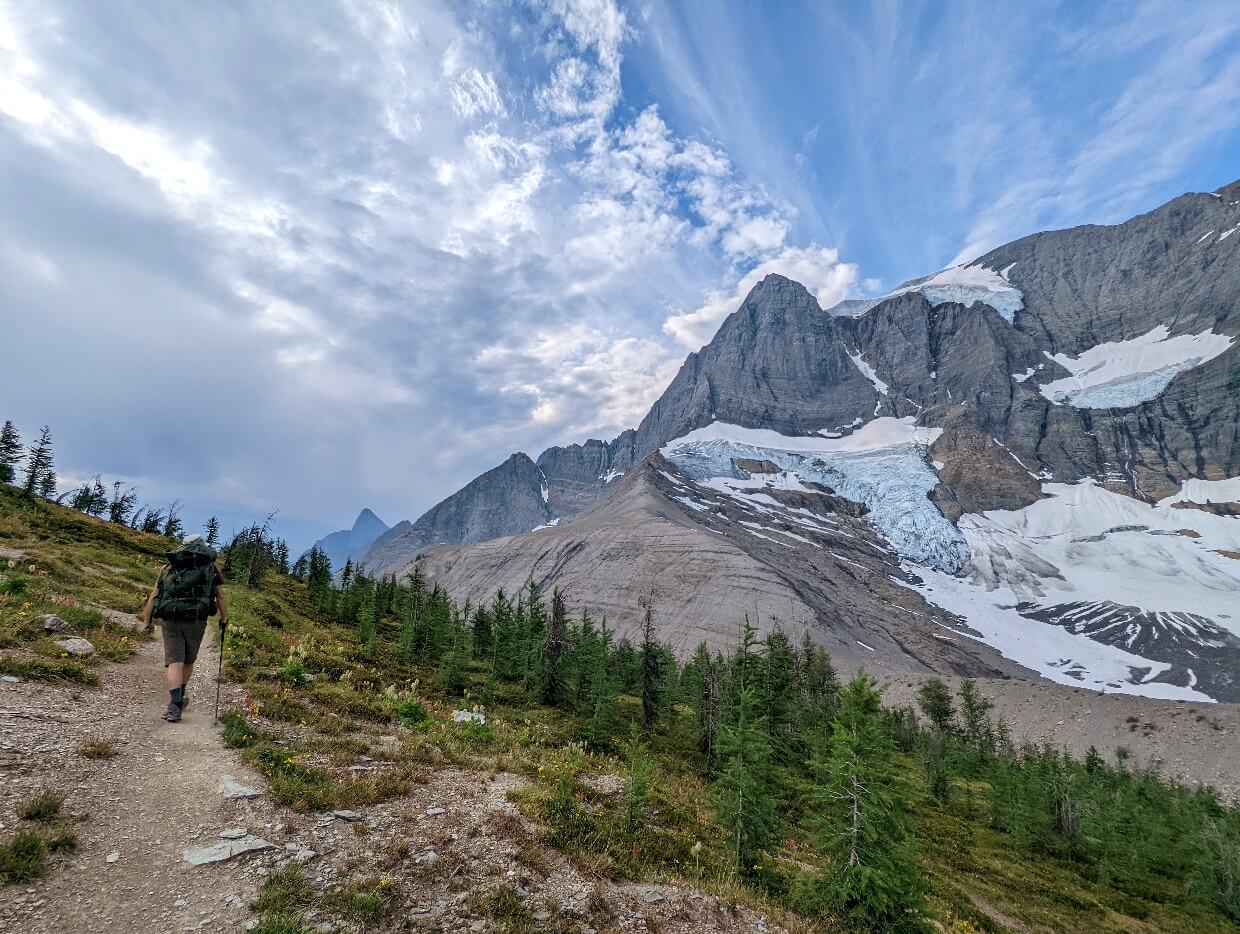
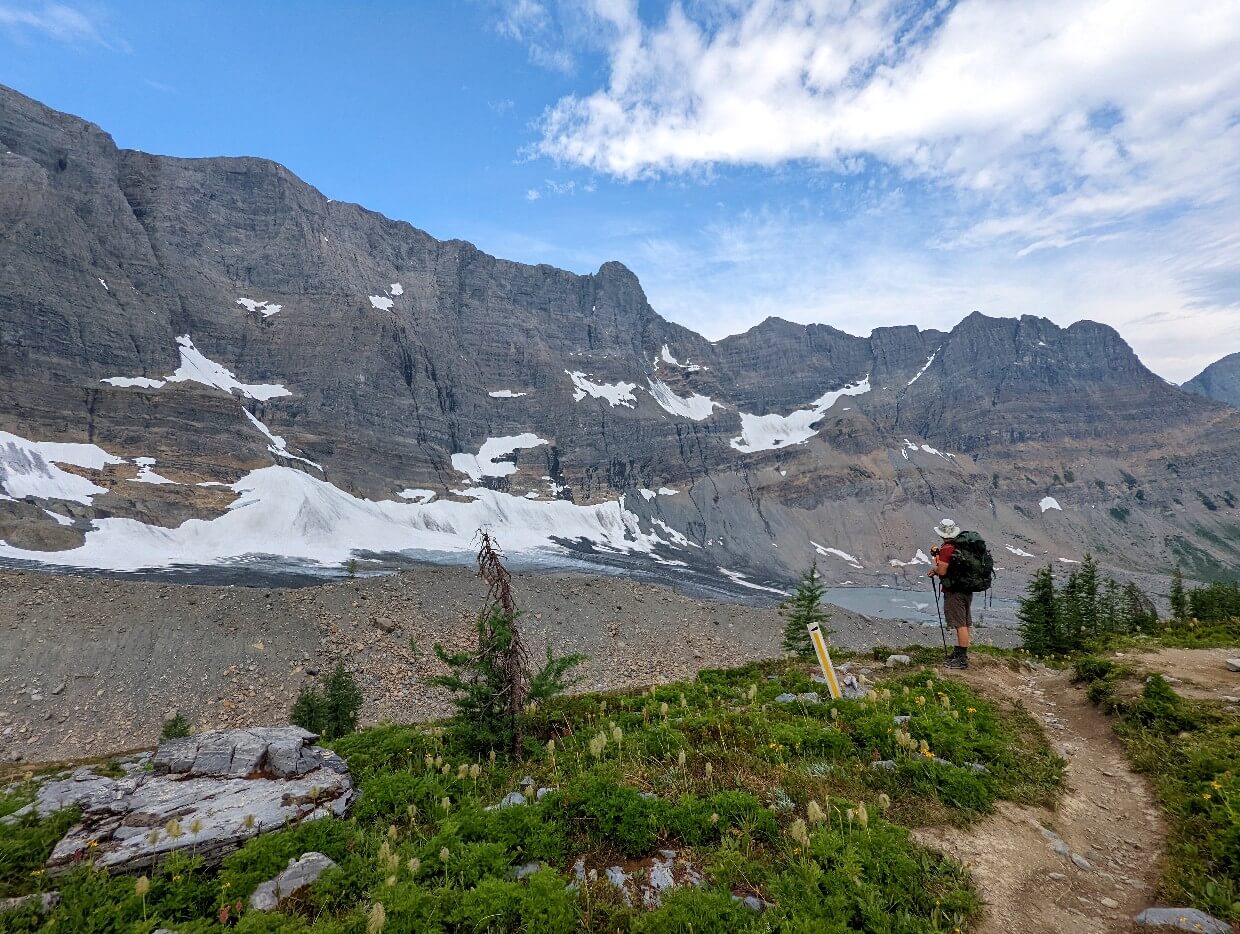
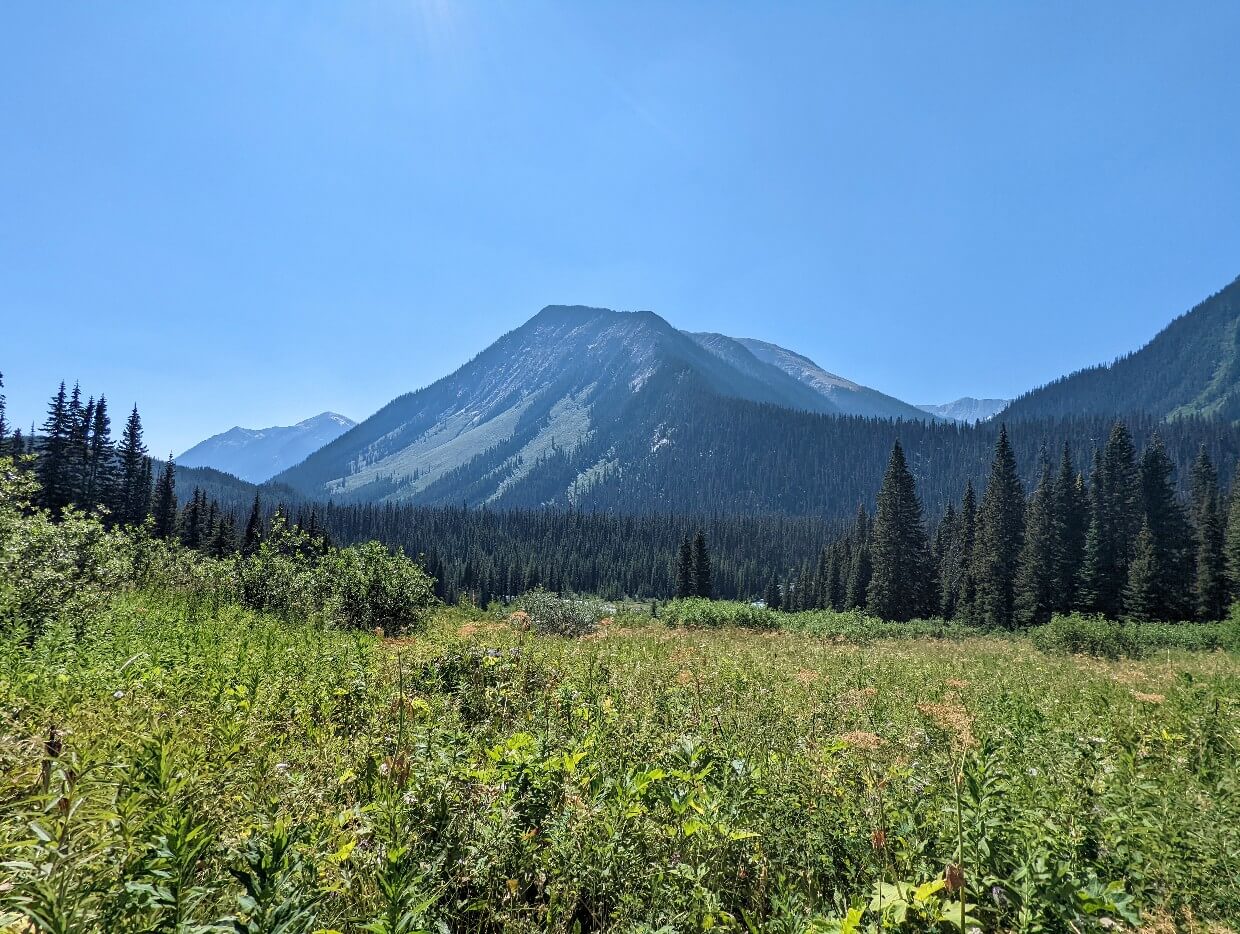
With this day being the shortest, we took our time getting up. We were still hiking by 8.30am though! Much like the day before, our hike started with a climb. But a real treat awaited at the top – Tumbling Glacier.
Hiking parallel to such a glorious glacier will long remain one of my favourite hiking memories. And it didn’t stop there. The vistas following Tumbling Glacier were glorious too, with the path ahead visible.
The second half of the day was a little anti-climatic, but perhaps only compared to the rest of the trail so far (we had pretty high standards by this point!)
Before the descent started in earnest, we were gifted a spectacular final viewpoint with far reaching views of the river basin below. While the switchbacks offered plenty of vistas still, we were soon swallowed up by brush.
The final 2.5km of this section of the trail were my least favourite of the entire Rockwall, mostly due to having no views. We received similar comments from every northbound hiker we encountered. It was lovely to relax by the rushing creek for the rest of the day.
Day 4: Numa Creek to Floe Lake
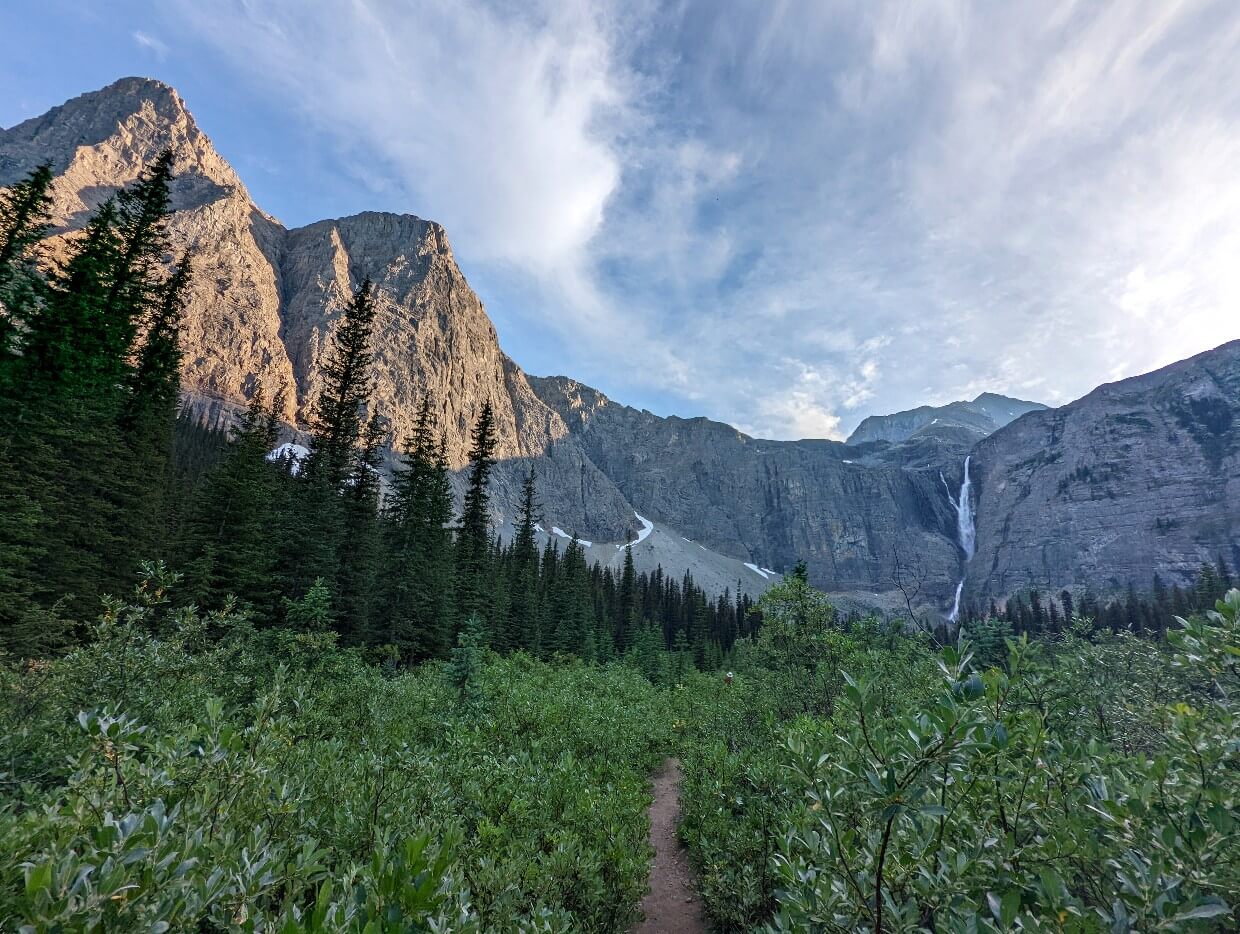
After a very chilled out afternoon at Numa Creek campground, we woke up even earlier than planned. The mountains were glowing with morning sun as we followed the river to the base of Numa Pass, passing by a number of huge waterfalls.
I was so happy to see the brand new bridge at the 3km mark – a large log had previously provided the only crossing.

With that out of the way, the last big climb of the trip commenced (approx. 790m elevation gain). While steep at times, the peek through views offered decent encouragement.
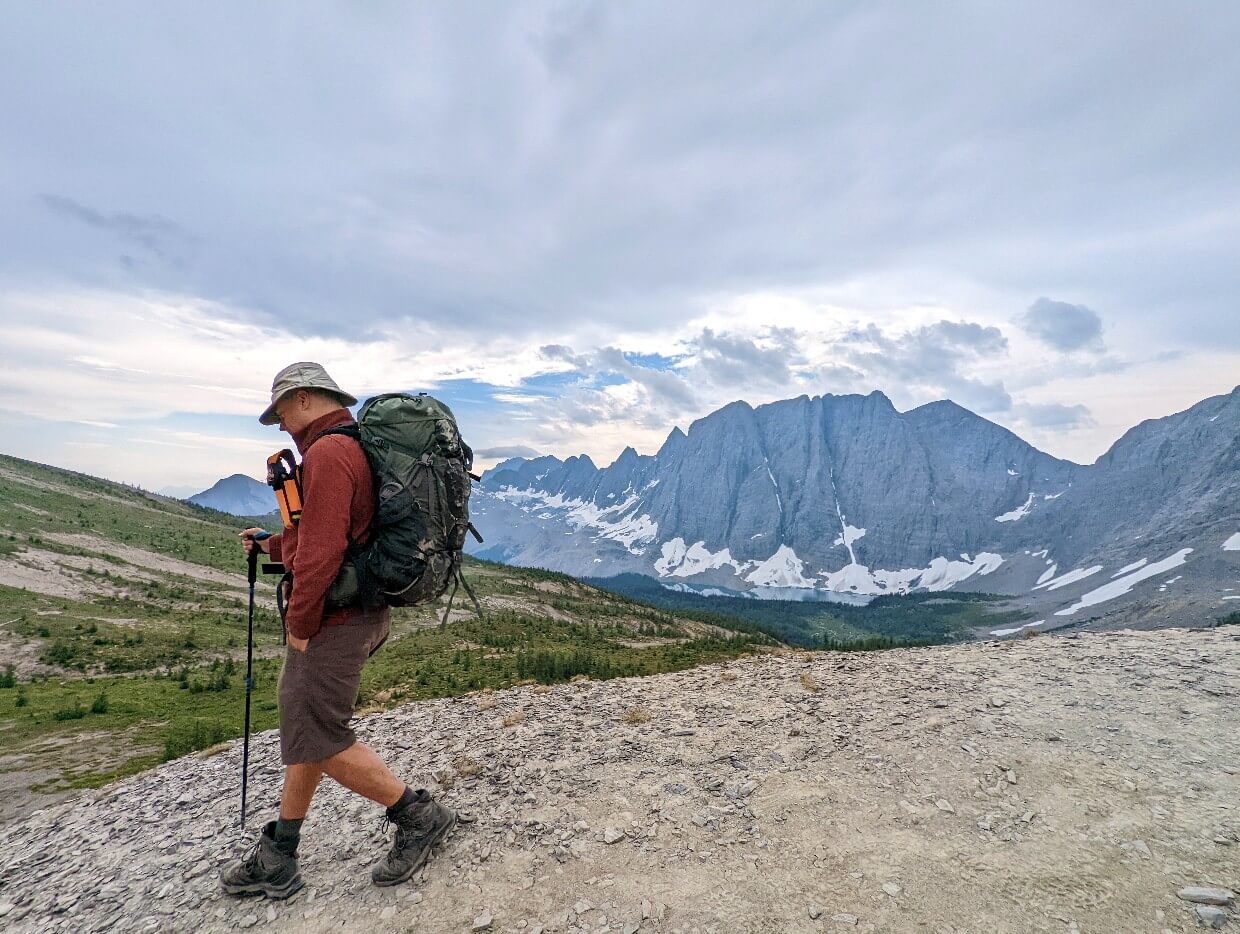
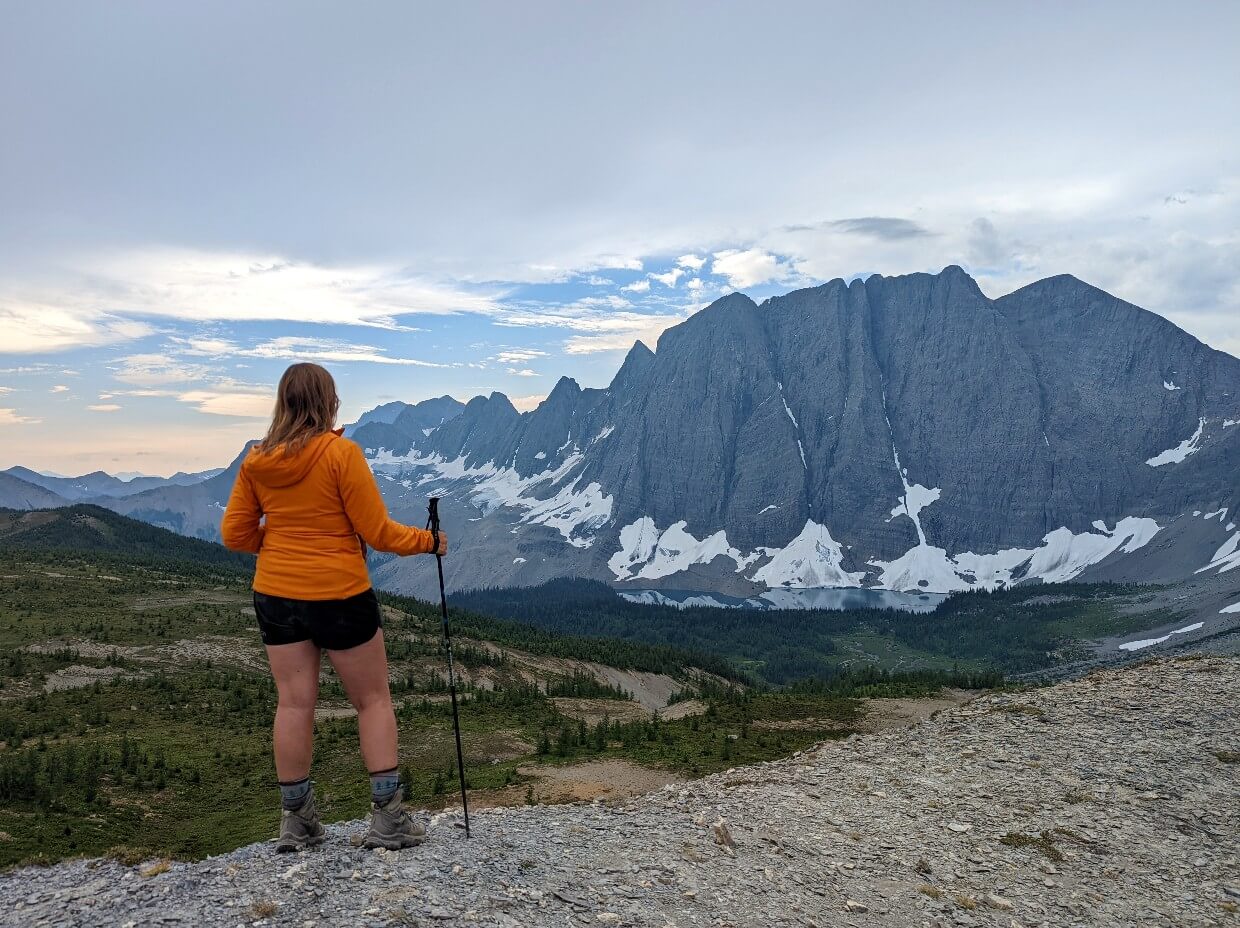
Just over two hours later, we were finally at the top of Numa Pass! I didn’t know where to look – towards the overlapping mountain ranges behind us or ahead to the iconic Floe Peak looming over the eponymous lake.
Arriving so early in the day, we took the time to hike part way up the ridge to see the turquoise colours of Floe Lake and get an even better perspective of the surrounding mountains.
It was downhill all the way to the campground, with the trail passes through some gorgeous wildflower meadows. Upon arrival, we set up our tent at the only lakeside camping spot, just in time for a thunderstorm to roll in.

Day 5: Floe Lake to Floe Lake Parking Lot
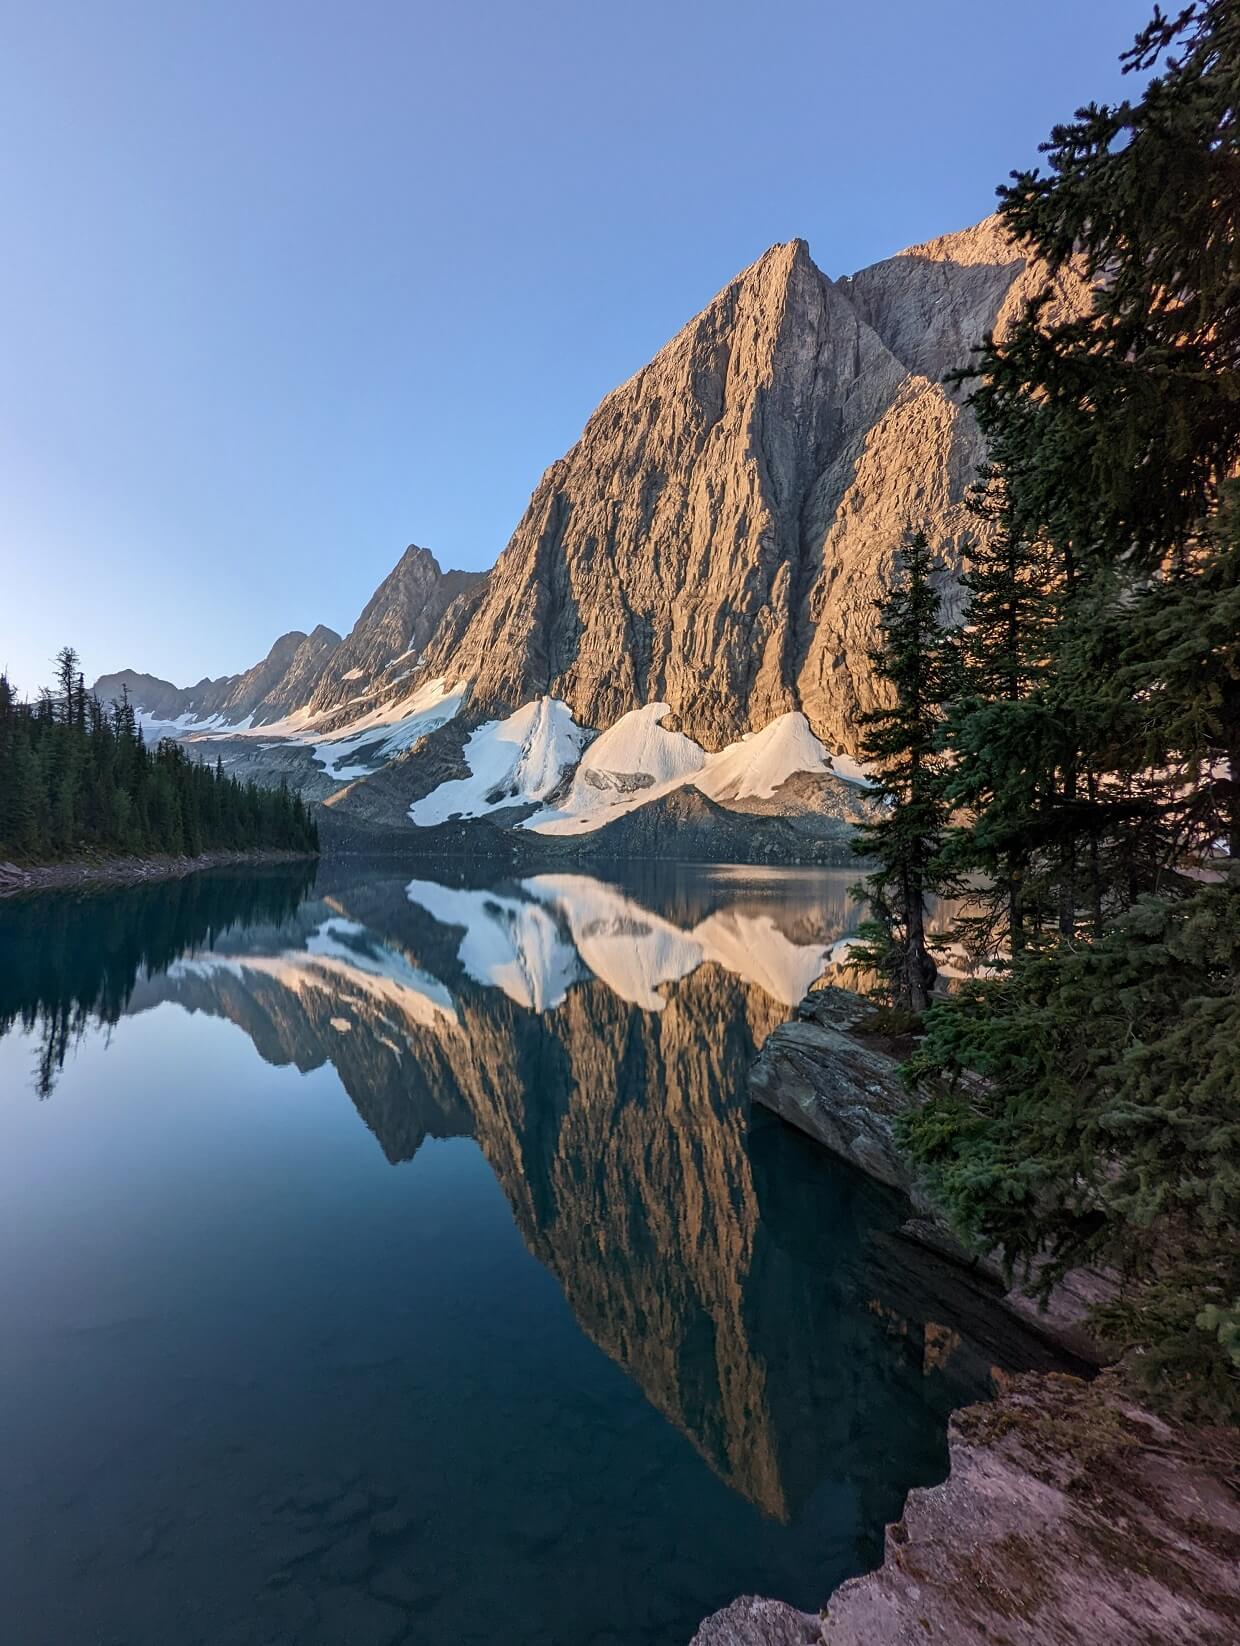
Morning at Floe Lake was everything I hoped it to be (JR even went for a swim!) The mountains towering above the lake turned golden as the sun rose, with the water providing mirror reflections.
We finally pulled ourselves away from the views at 10am and prepared for the descent to the parking lot. I knew we’d be hiking away from the Rockwall so I didn’t have high expectations for the final section of the trail.
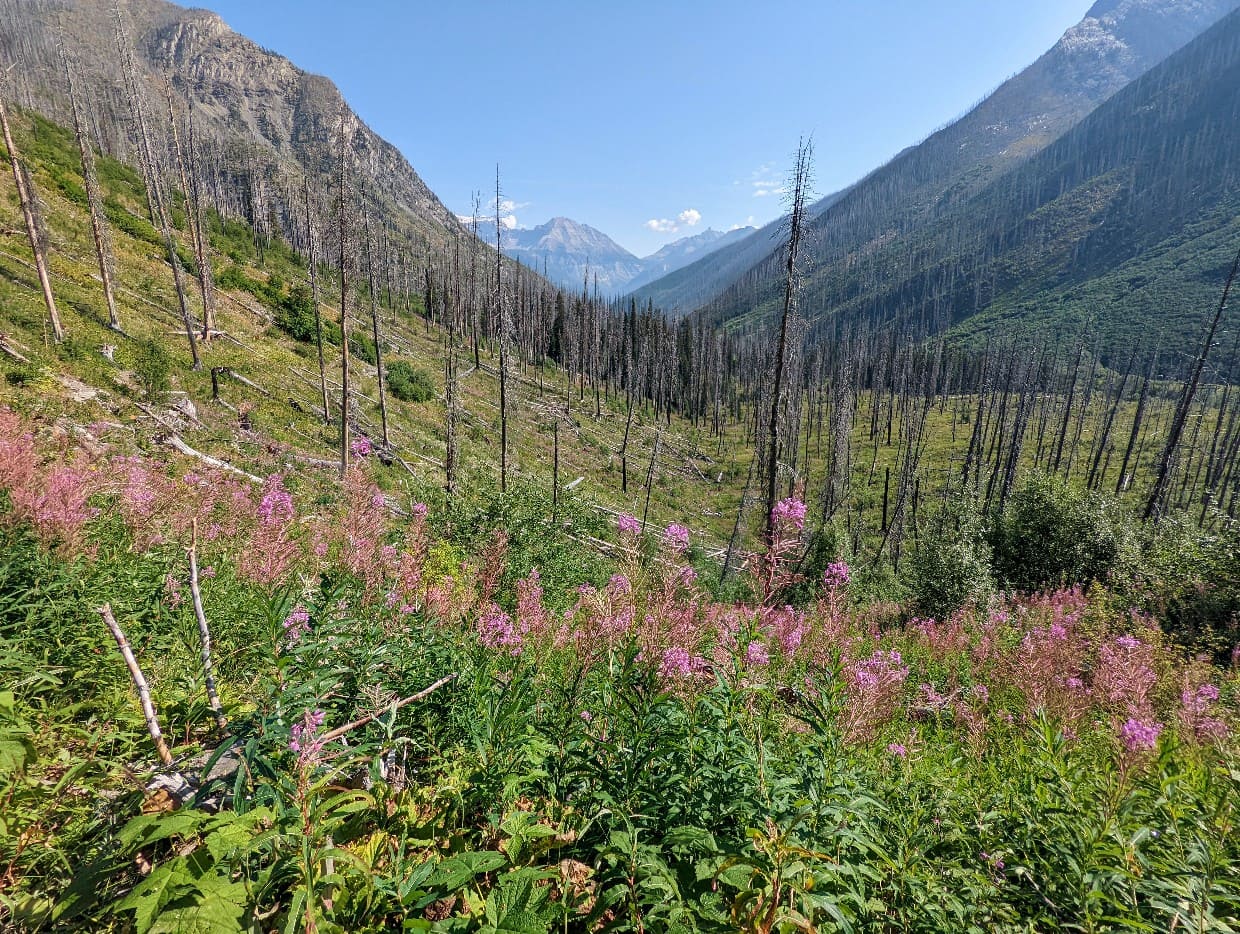
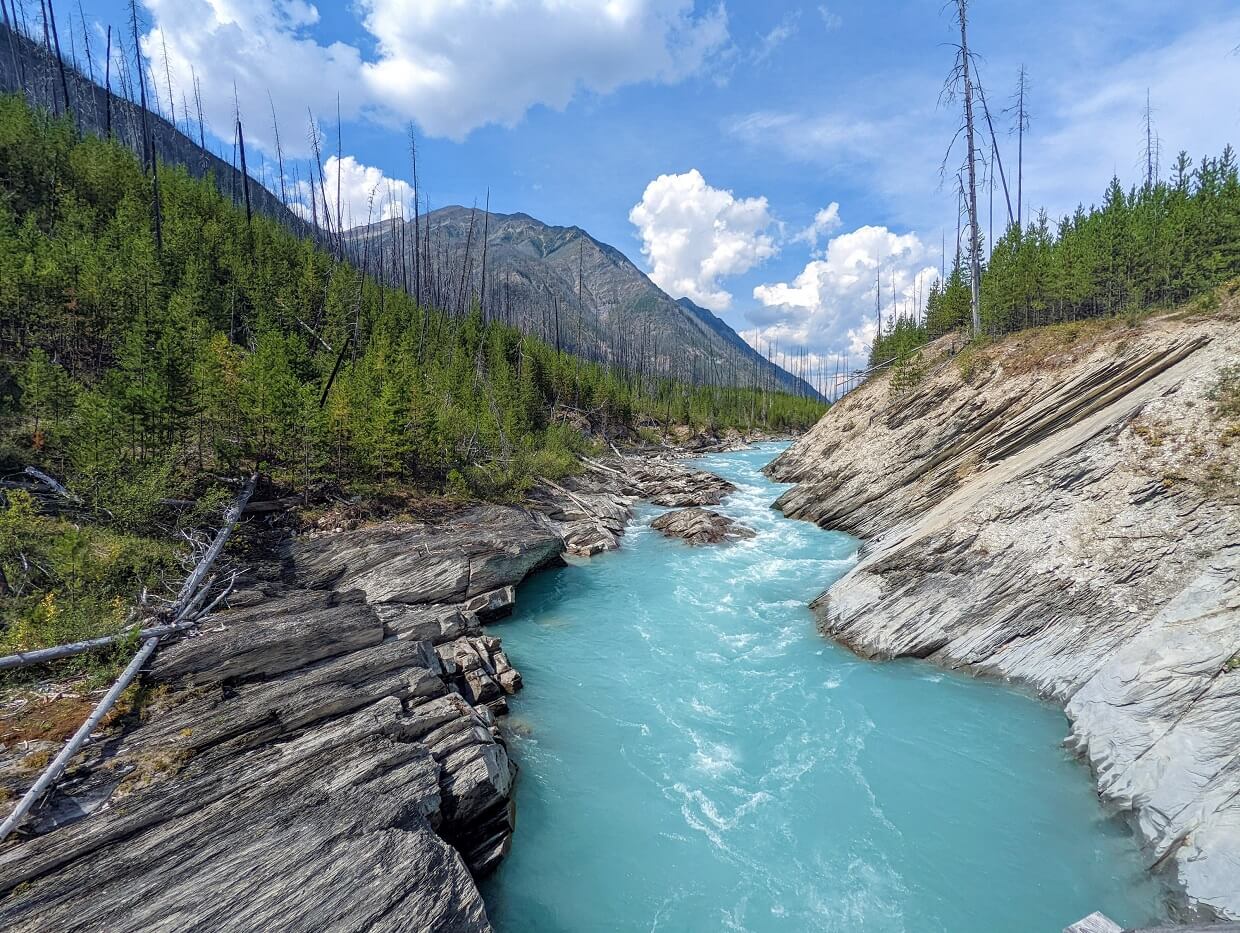
It was far prettier than I would have guessed – the 2003 wildfire completely opened up the landscape, providing wide ranging views back to Rockwall itself as well as Floe Creek, Vermillion River and Ball Pass.
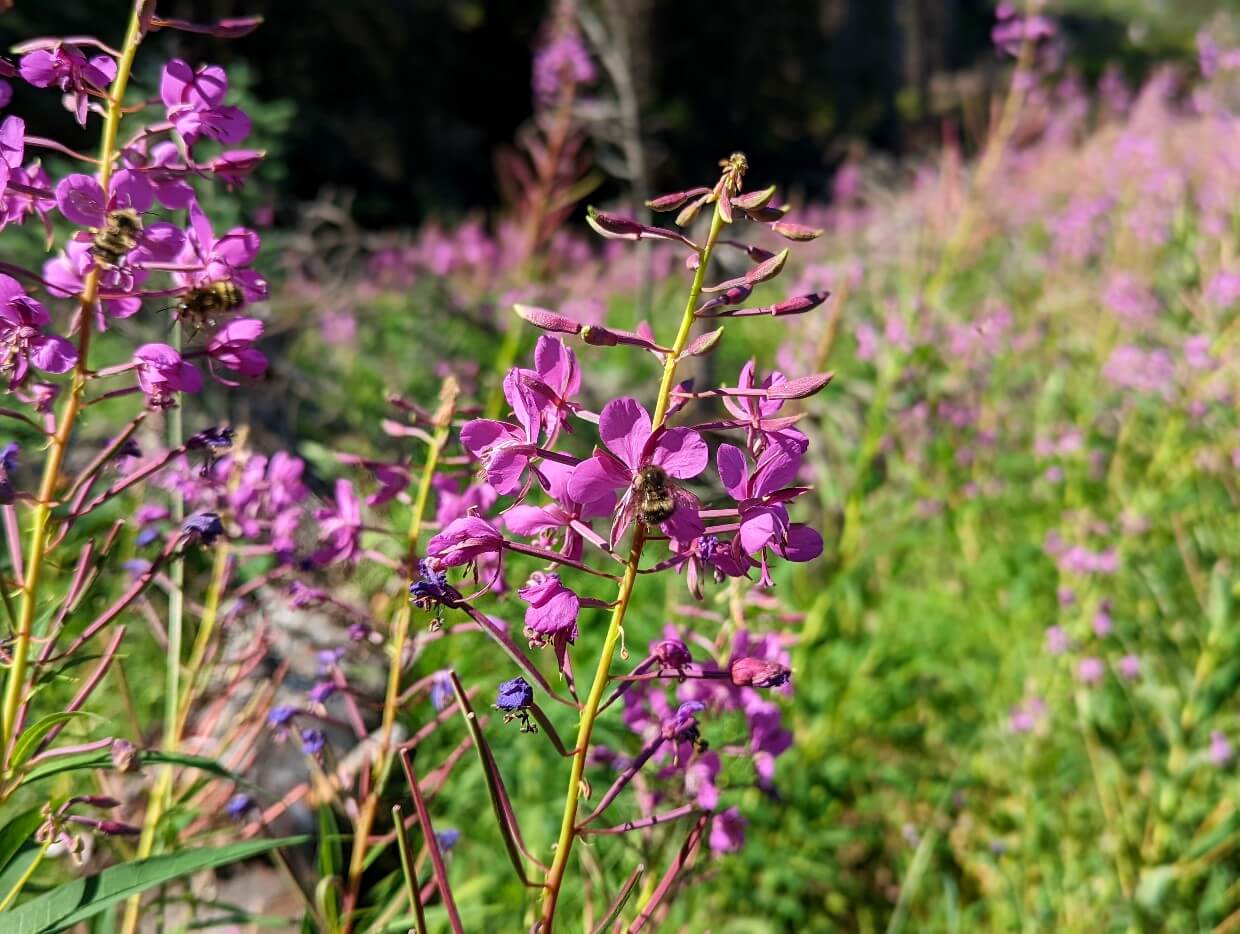
Vibrant fireweed flowers lined the path almost the entire distance. With the sun beating down on us, I was glad to be hiking down rather than up. The hikers approaching us certainly looked hot.
Minutes away from finishing, we decided to go for a quick swim in the Vermillion River. It was definitely the most refreshing way to end a hike on the Rockwall!

Beyond the Rockwall Trail
Our hiking adventure was not quite over. After a night at Johnston Canyon Campground, we returned to the Floe Lake parking lot.
Crossing Highway 93, we then climbed up to Ball Pass and continued our hike on the Great Divide Trail all the way to the Kananaskis Valley (via Egypt Lake and Mount Assiniboine Provincial Park).
If you have the time to do such a trip, I’d highly recommend it. The logistics can be tricky but the payoff is incredible.

Rockwall Hiking Guide
Inspired to hike the Rockwall Trail? In this section, you’ll discover everything you need to know to start planning a trip.
There are affiliate links in the text ahead. If you make a purchase via one of these links, we may receive a small percentage of the sale at no extra cost to you.
Location
The entirety of the Rockwall Trail is located in Kootenay National Park in British Columbia, Canada.
The provincial border is not too far away, however, with the Continental Divide (also the provincial border line) passing just to the east and north.
The map below shows the Rockwall’s trailheads and campgrounds as well as the mountain passes.

Trail breakdown: what to expect
Curious as to what expect on the Rockwall Trail? This overview will summarise each section of the route in a southbound direction (Paint Pots to Floe Lake). You can also read our day-by-day experience for more insights.
Paint Pots to Helmet Falls
Distance: 14.3km
Hiking time: 4 to 5 hours
Elevation gain: 350m
Elevation loss: 50m
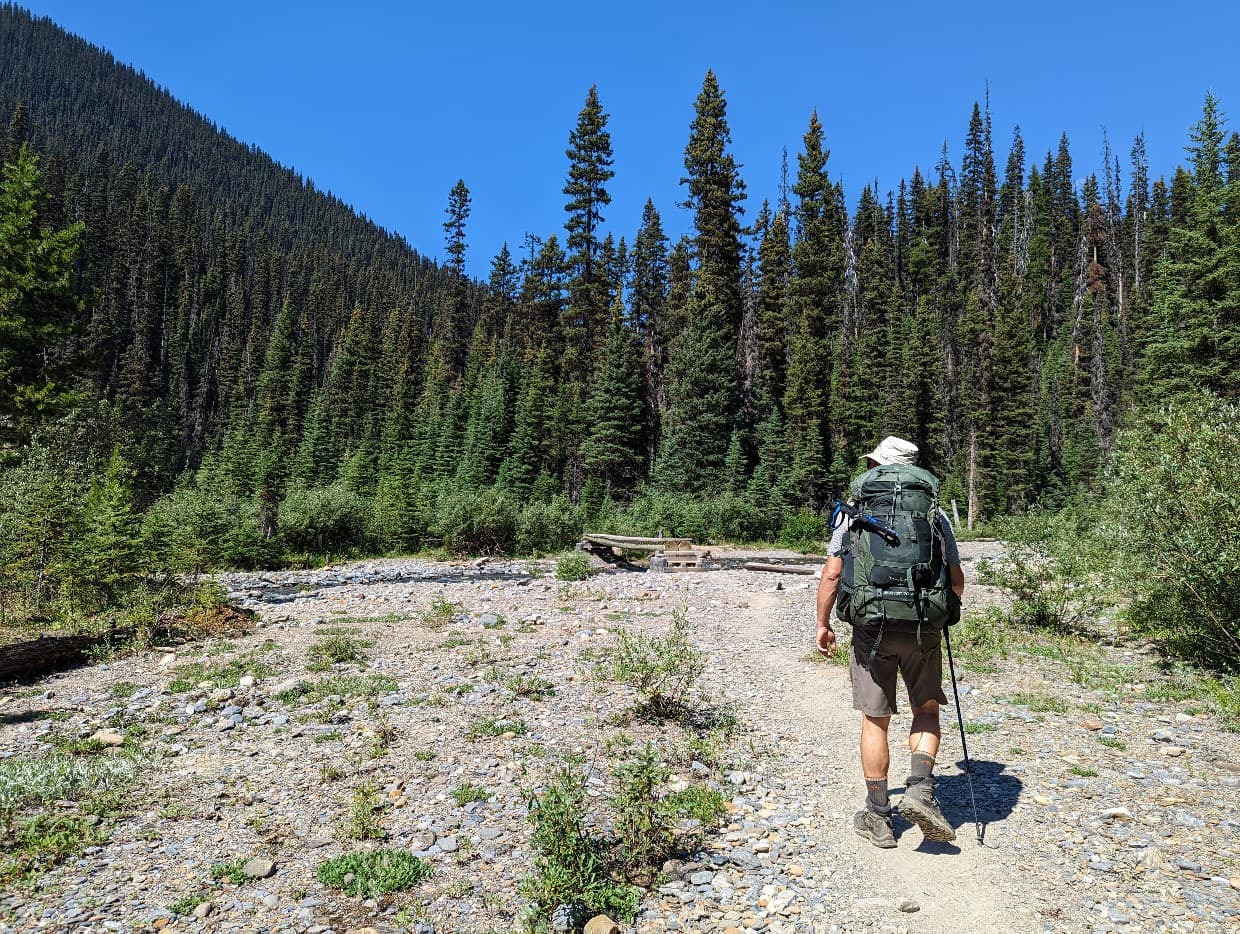
The first section of trail is front country standard, with a flat, wide path leading to a bridge over the Vermillion River.
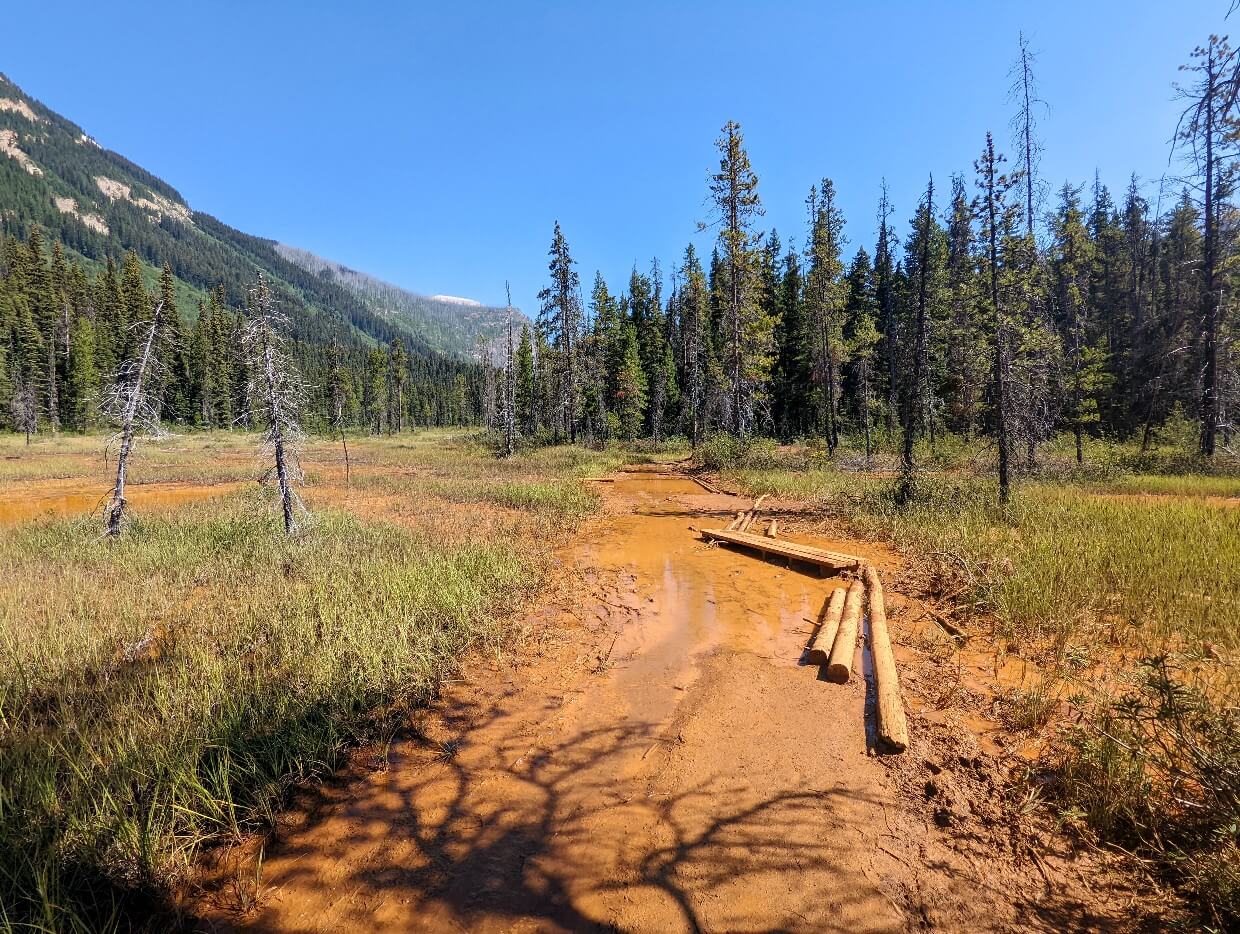
The surface becomes pretty muddy as the route skirts next to a number of orange coloured mineral pools – the eponymous Paint Pots. There used to be boardwalks here but these were missing in 2022.
Beyond the Paint Pots, the trail narrows and heads into the forest. The trees occasionally give way to short meadow sections with wildflowers and a backdrop of forested mountains. Expect some small ups and downs along the way.
There is a junction at 3.7km. Stay on the trail to Helmet Falls (right). At 6.1km, there is a different kind of junction – the meeting of two rivers. This is also the location of the Ochre Helmet Junction campground, a popular lunch or snack stop.

The trail stays close to Ochre Creek (which later becomes Helmet Creek) for the remainder of the journey, providing many opportunities to admire surrounding mountains.
The elevation gain begins not long after Ochre Helmet Junction, with a couple of steep switchbacks bringing the path up high above the river.
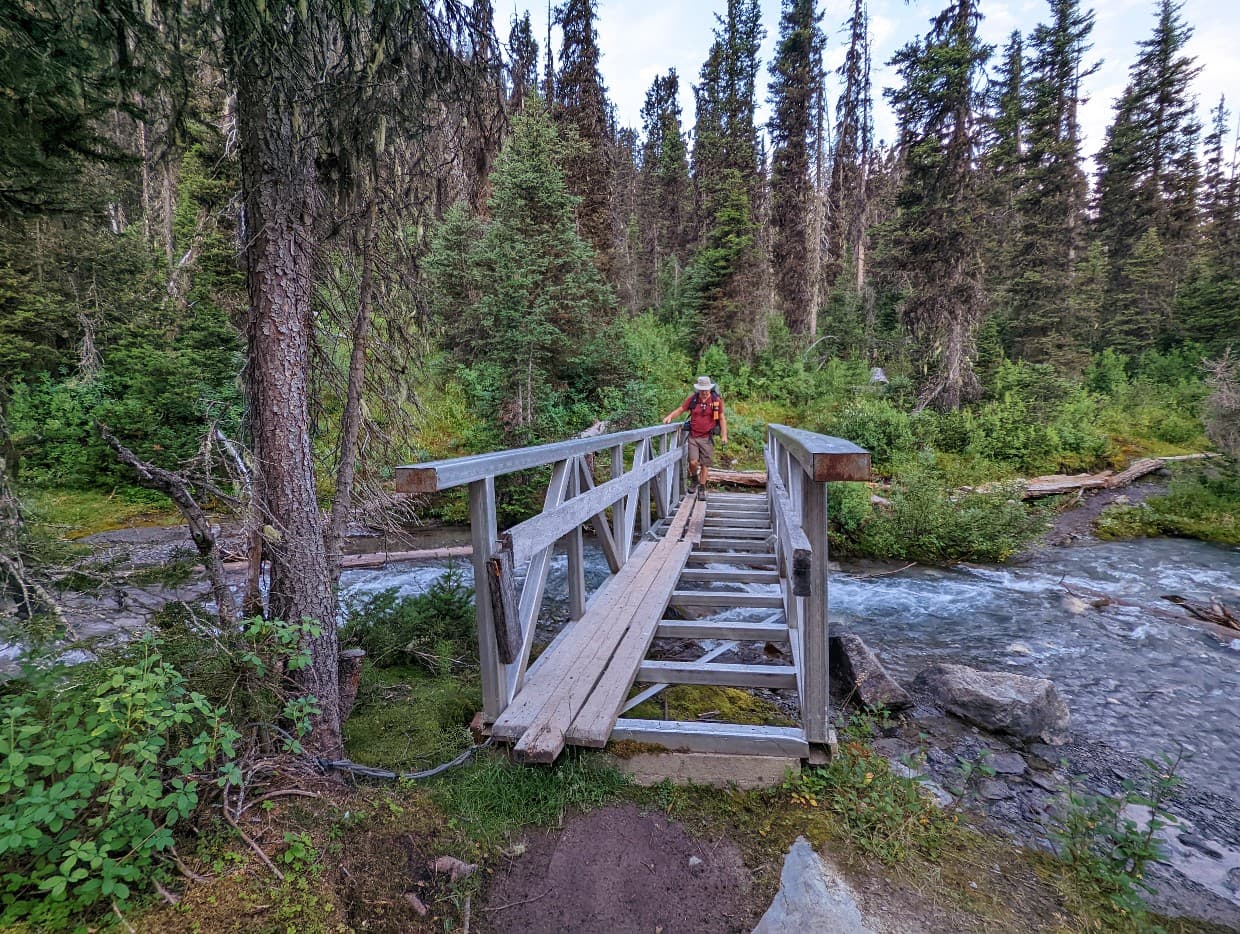
For the most part, however, it remains at river level. A large suspension bridge sits at 12km, providing a bouncy but convenient way to cross Helmet Creek.
The arrival to the Helmet Falls campground is first signified by the Goodsir Pass junction (stay left), a ranger cabin and, finally, a bridge.

Helmet Falls to Tumbling Creek
Distance: 12km
Hiking time: 5 to 6 hours
Elevation gain: 620m
Elevation loss: 490m
The day starts by heading towards Helmet Falls itself. There is a junction after 300m – turn left to continue the Rockwall or go straight to make the short detour to the base of the waterfall.
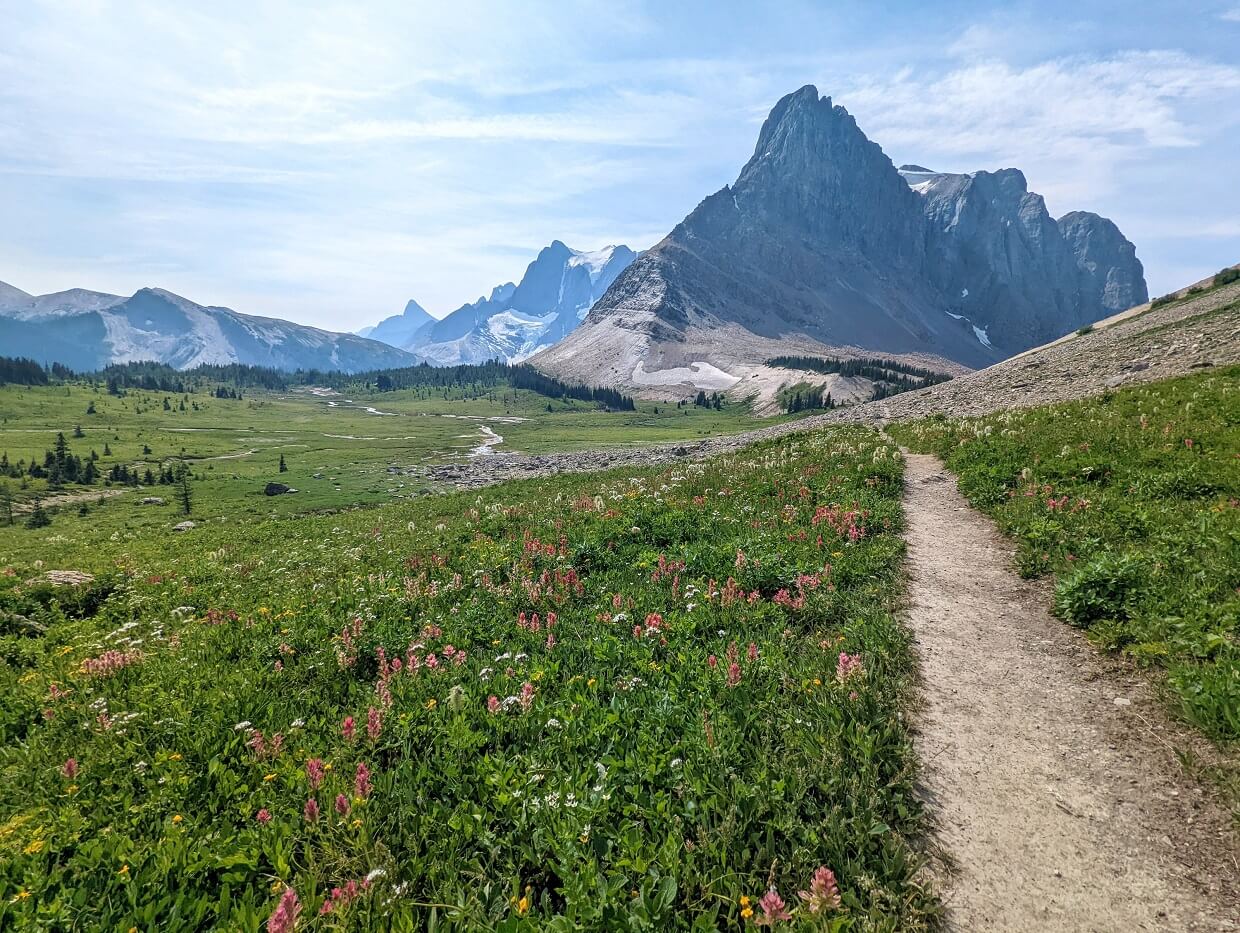
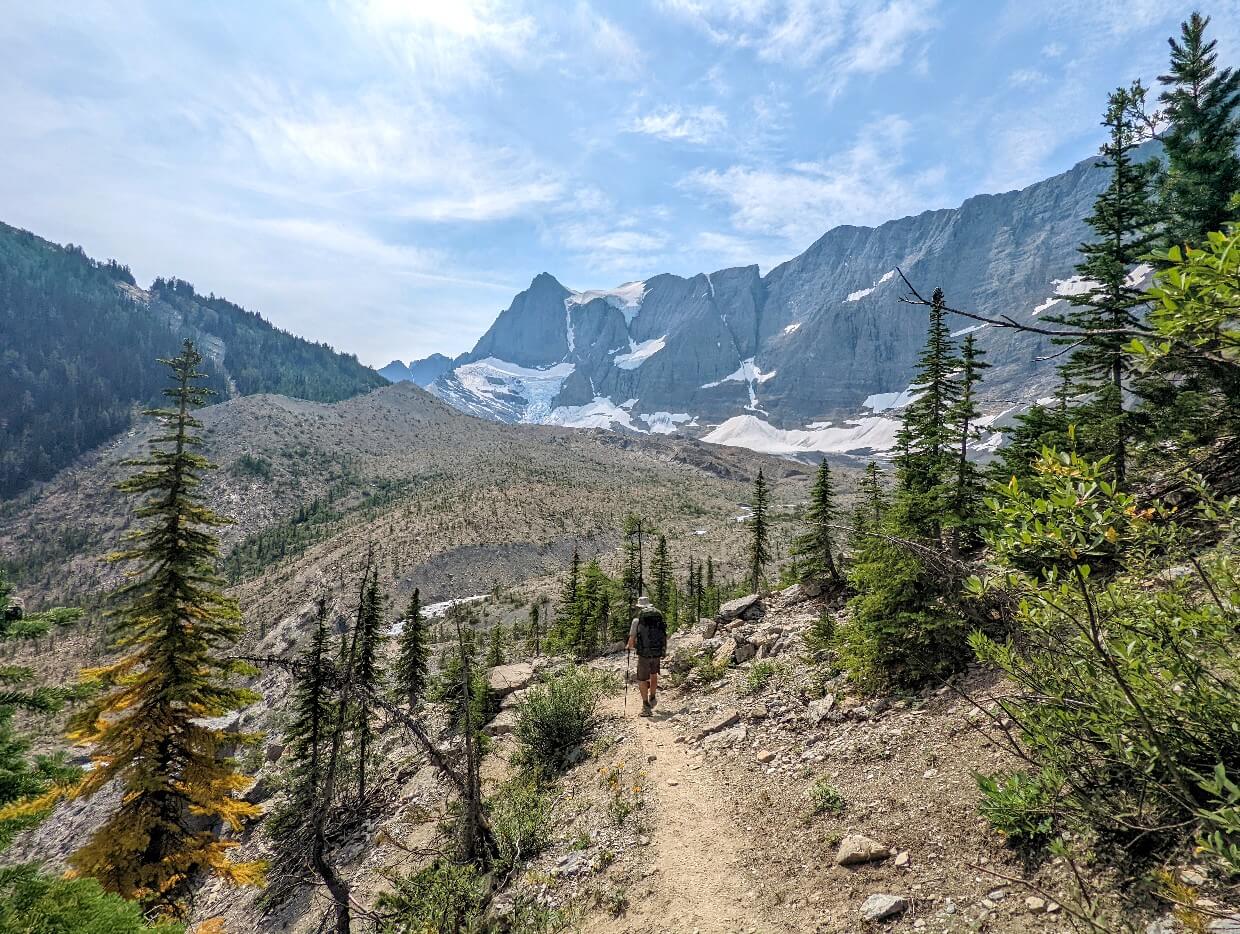
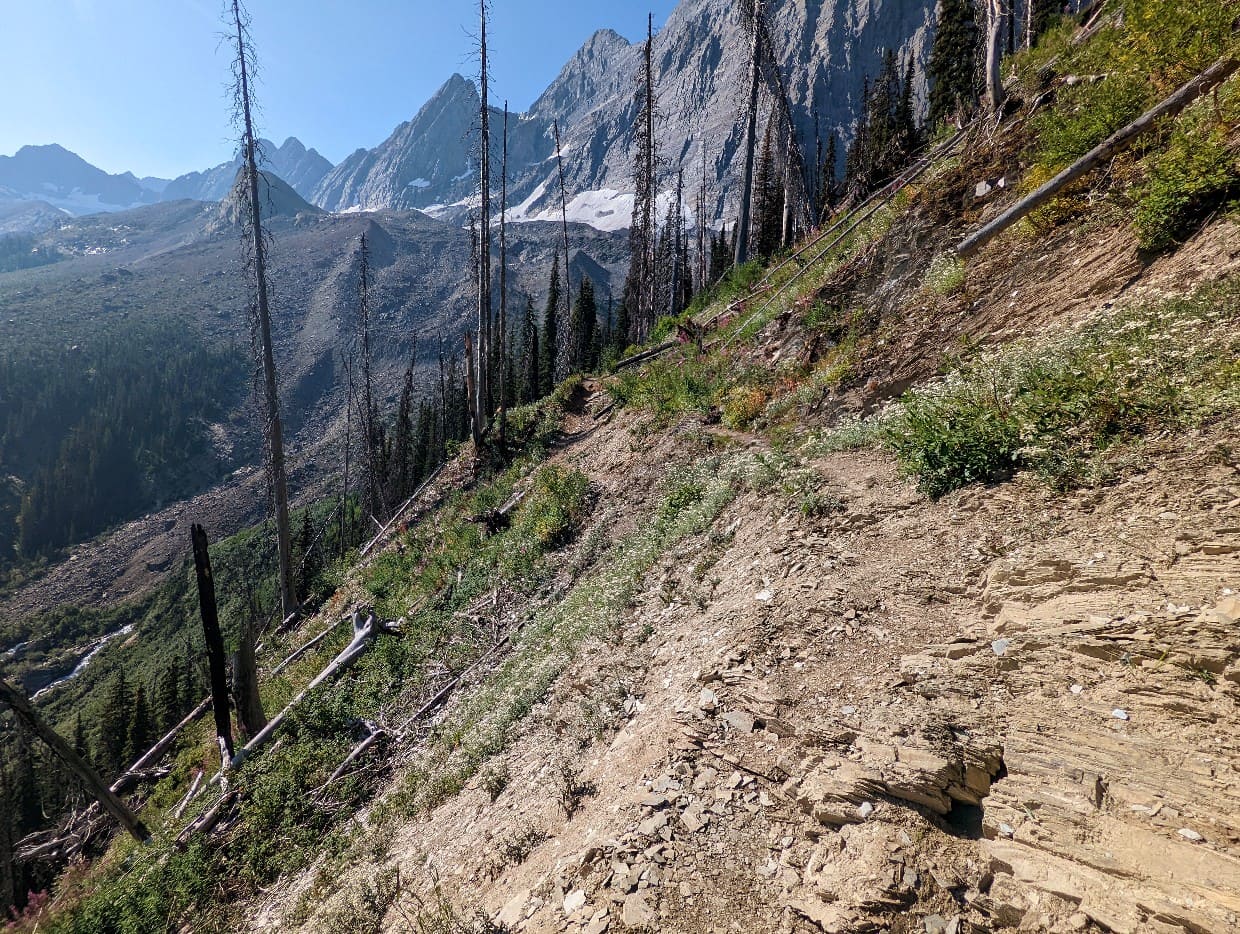
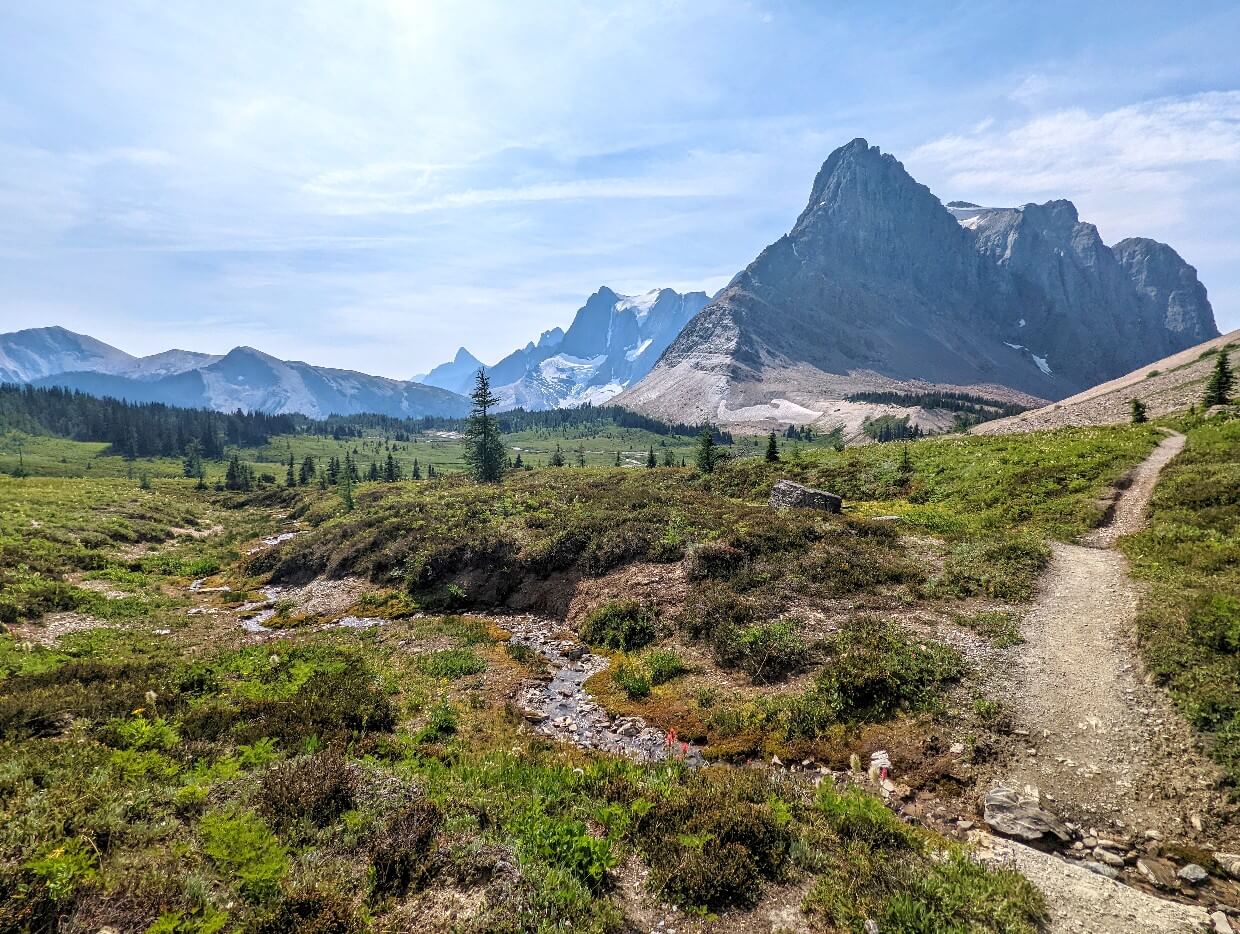
The path to Rockwall Pass starts to climb immediately with the help of a series of switchbacks. The total elevation gain is 440m over 3.2km. But it’s more than worth it.

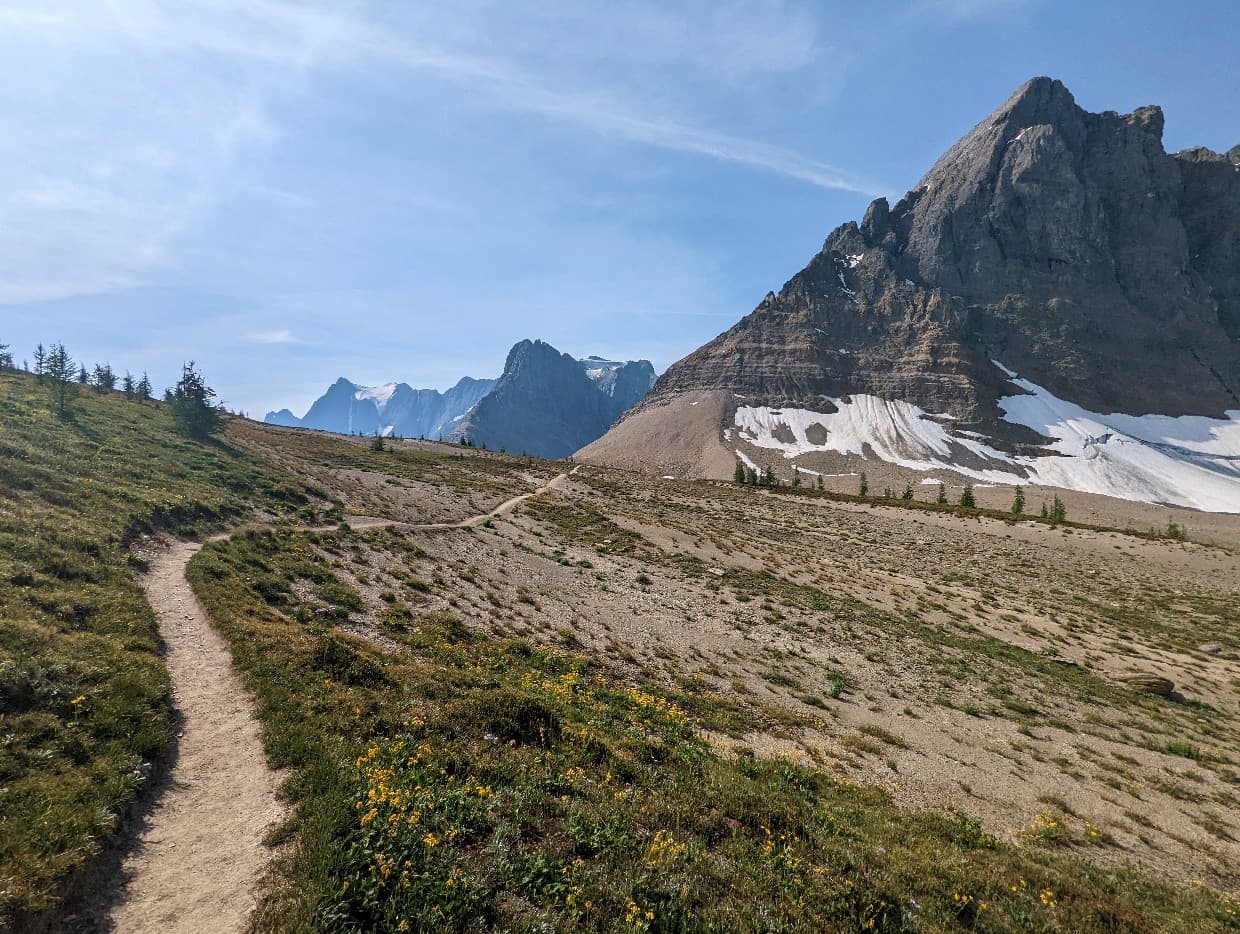
At the end, you’ll turn a corner and see the magnificent Rockwall rising above a beautiful alpine meadow. This was one of my favourite moments on the entire trail. And this is only the start! The next 6.5km is simply dazzling.
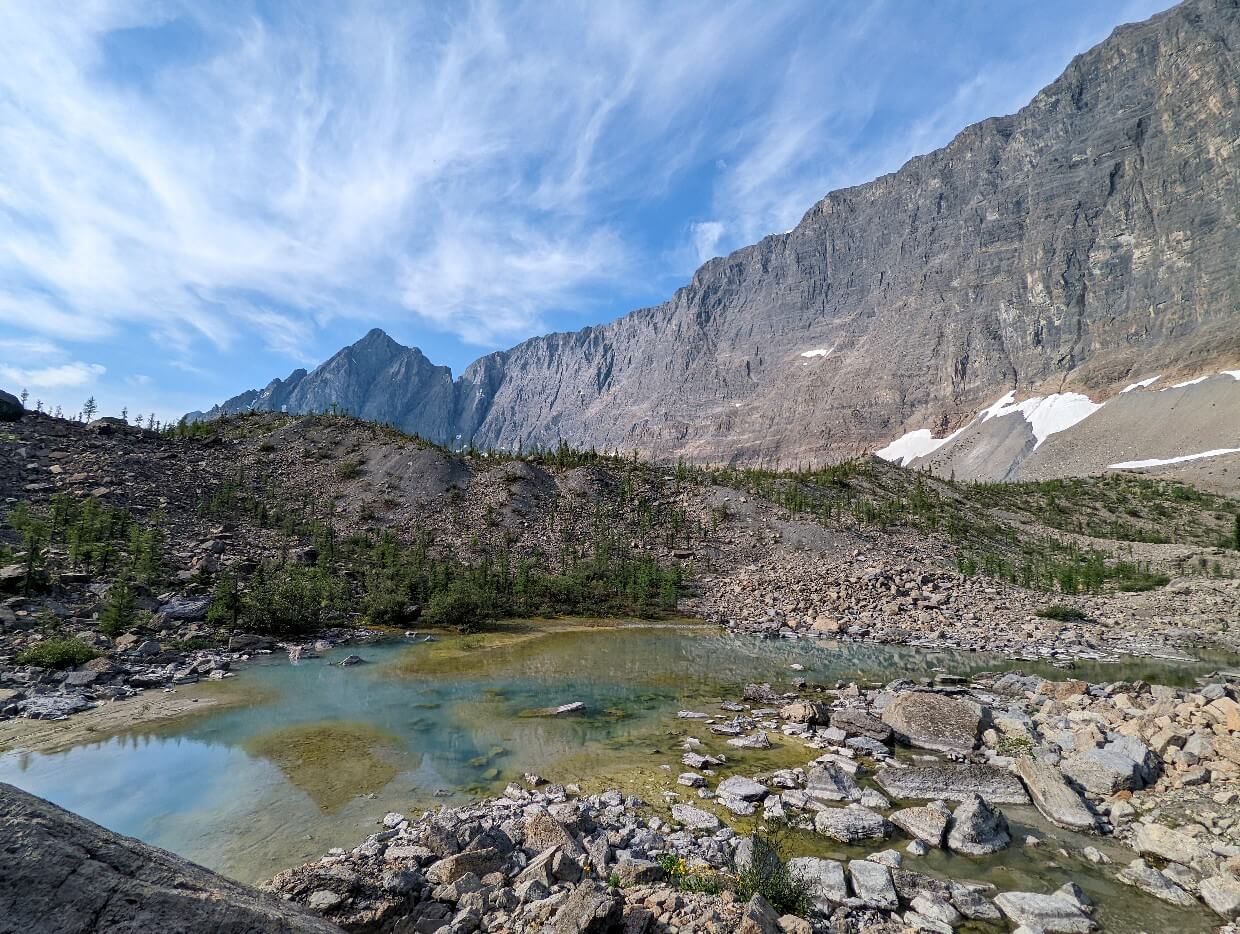
The wide meadow continues for another 1.5km before giving way to a rocky area that is interspersed with small lakes. The trail ascends a couple of rock piles. There are a couple of river crossings here, with wooden bridges for most.
An uphill larch forest section hides the Rockwall temporarily before revealing another wide meadow filled with vibrant wildflowers.
The path stays close to the base of the Rockwall as it ventures towards the only gap in the cliff face (Wolverine Pass).
Stay left at the signed junction. Note that there is an unsigned junction in this area as well – it leads to a ranger cabin.
The final few kilometers of this section involve a steep switchback descent to Tumbling Creek campground (280m loss). The loose surface is slippery in places, so watch your footing.
Tumbling Creek to Numa Creek
Distance: 8km
Hiking time: 3 to 4 hours
Elevation gain: 330m
Elevation loss: 670m
Remember that steep descent yesterday? This part of the Rockwall Trail starts with the same thing in reverse, but on the other side of Tumbling Creek.

As with the climb out of Helmet Falls, this one also comes with a reward – a spectacular view of Tumbling Glacier.
Be sure to take some time to admire this impressive mass of snow, ice and rock. This is a good place for a snack stop or even lunch.
The trail parallels Tumbling Glacier for some time, descending along the way. Big mountain views can be seen in the distance. A small stream follows the path as it descends.
A short flat section leads into a larch forest and then out to a viewpoint. It’s here that the path really begins to head down into the valley.
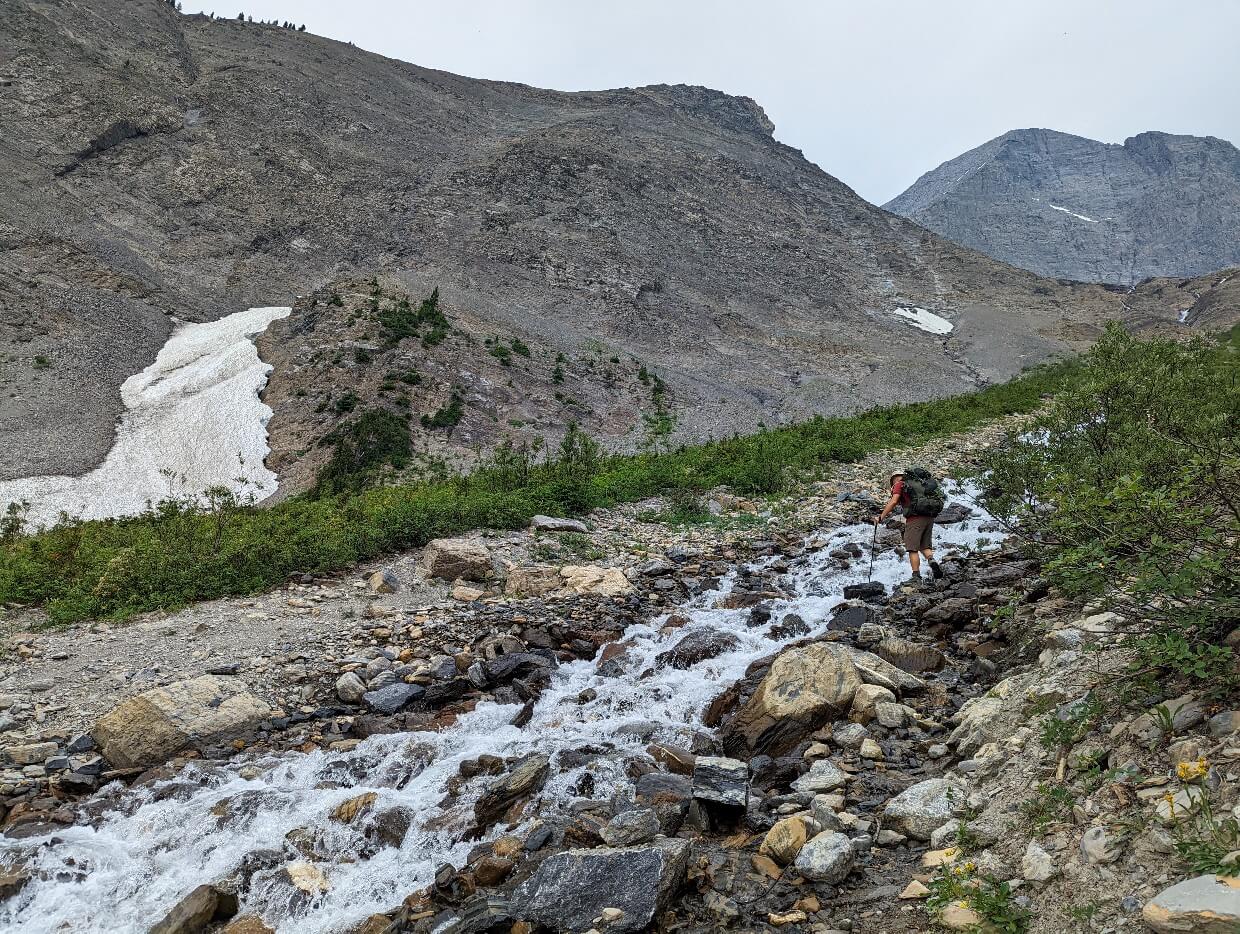
The switchbacks are numerous. There are a couple of small cascading rivers to cross (no bridges).
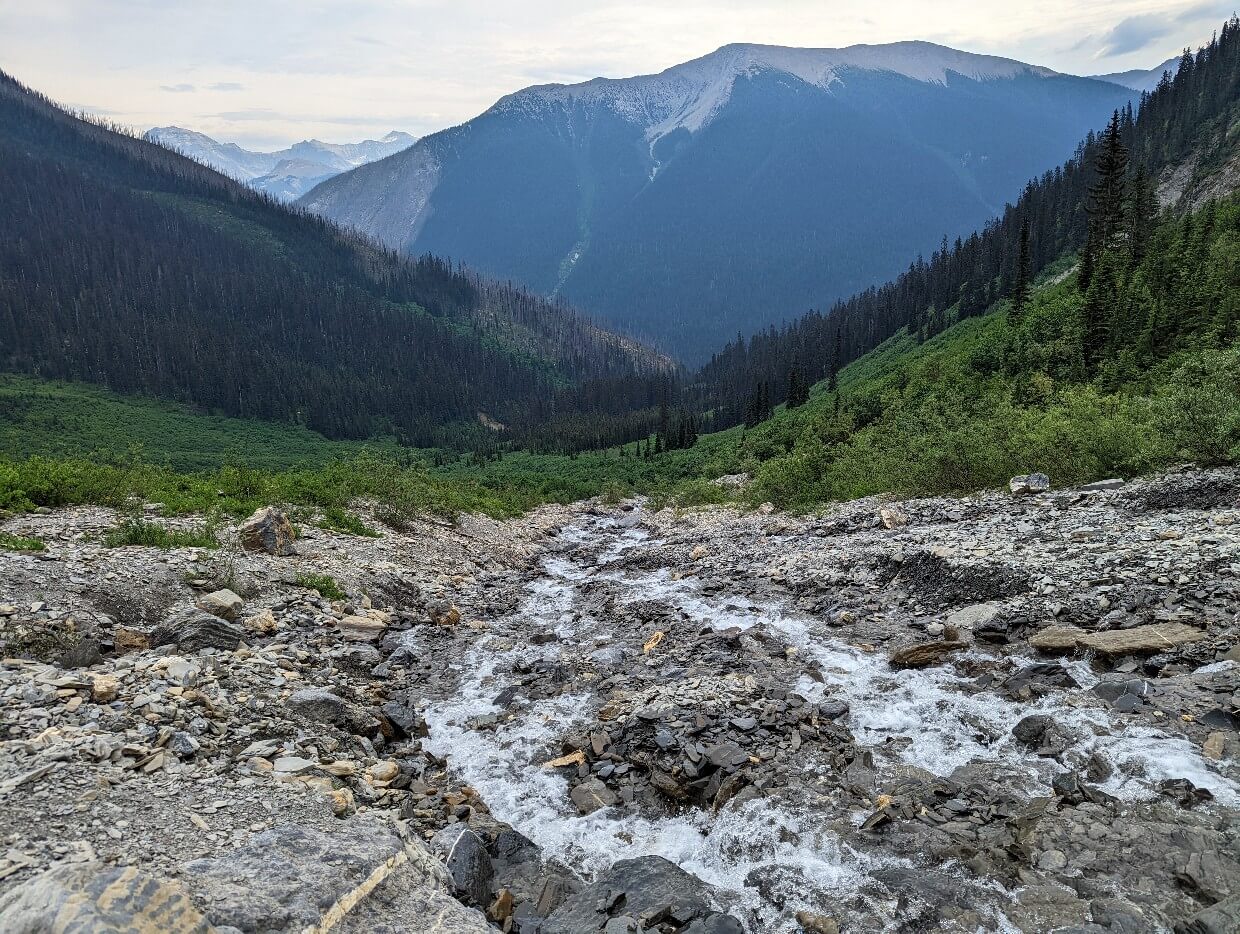
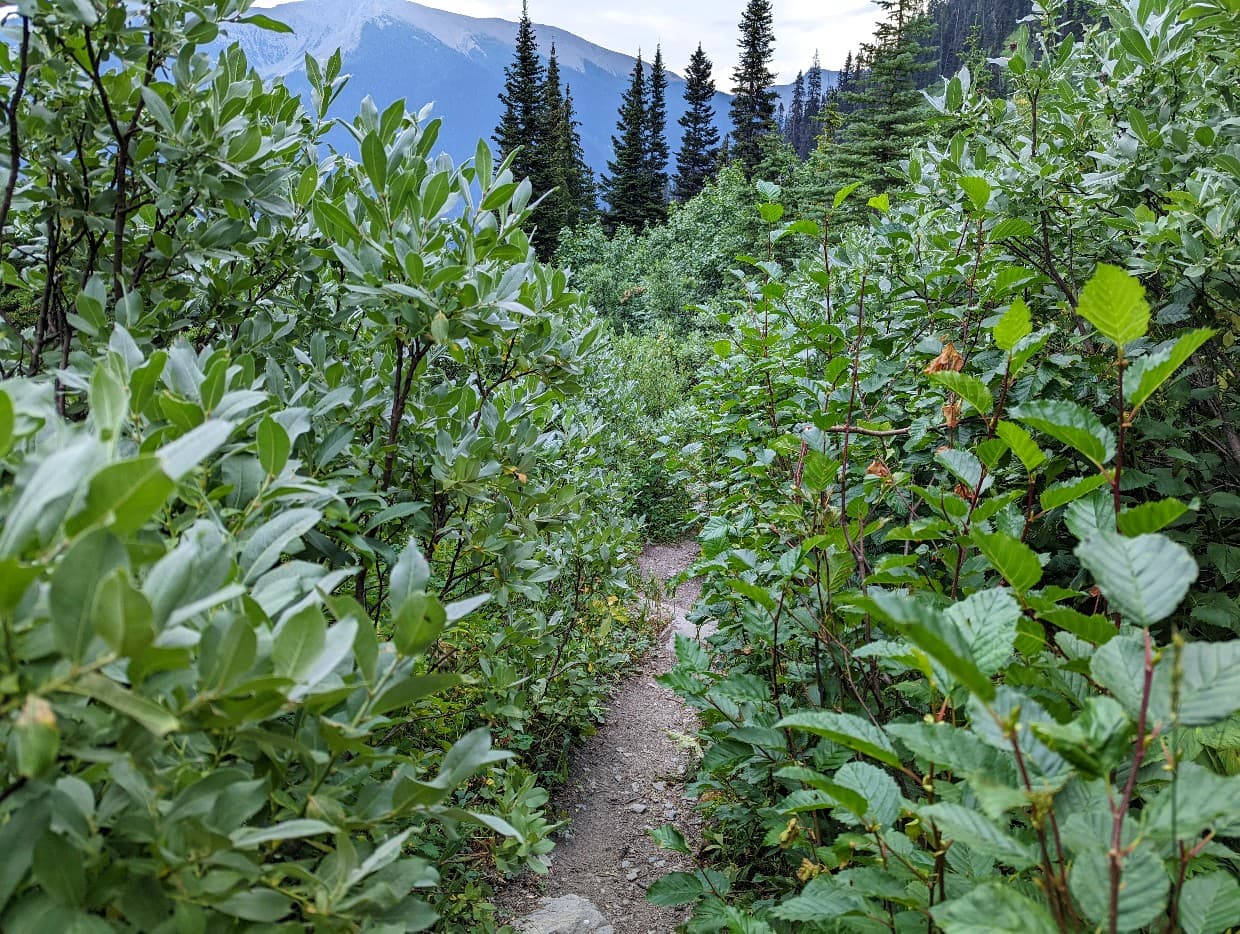
Just over 5km from Tumbling Creek campground, the path enters dense brush. Towering over the average human, this brush blocks almost all views but also provides very little shade.
Needless to say, this downhill section is pretty monotonous. The brush clears up about 400m from Numa Creek campground, which awaits just a little further through the forest.
Numa Creek to Floe Lake
Distance: 10km
Hiking time: 4 to 5 hours
Elevation gain: 790m
Elevation loss: 300m
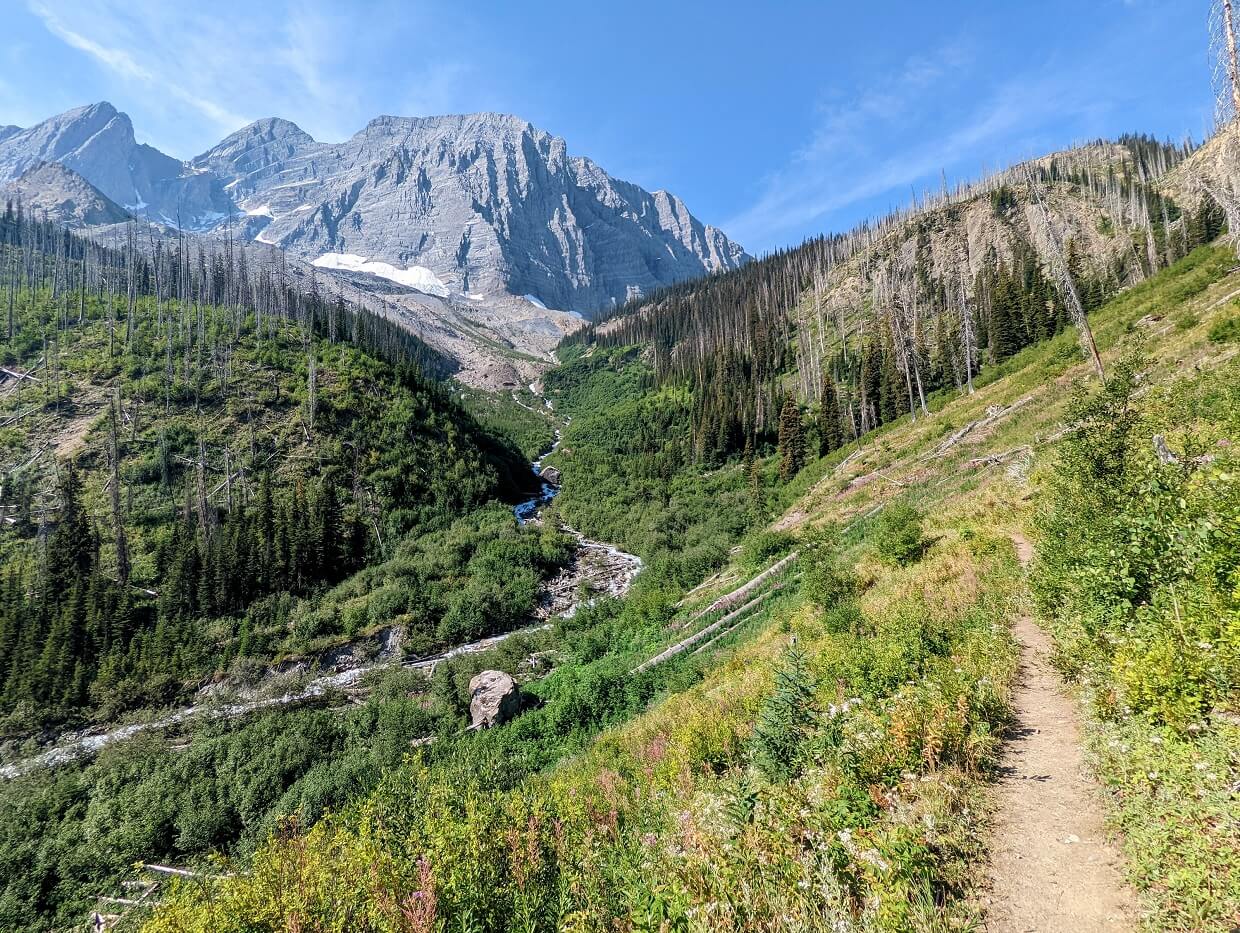
Another morning climb awaits when leaving Numa Creek campground (see the pattern here?) And this one is the biggest so far.
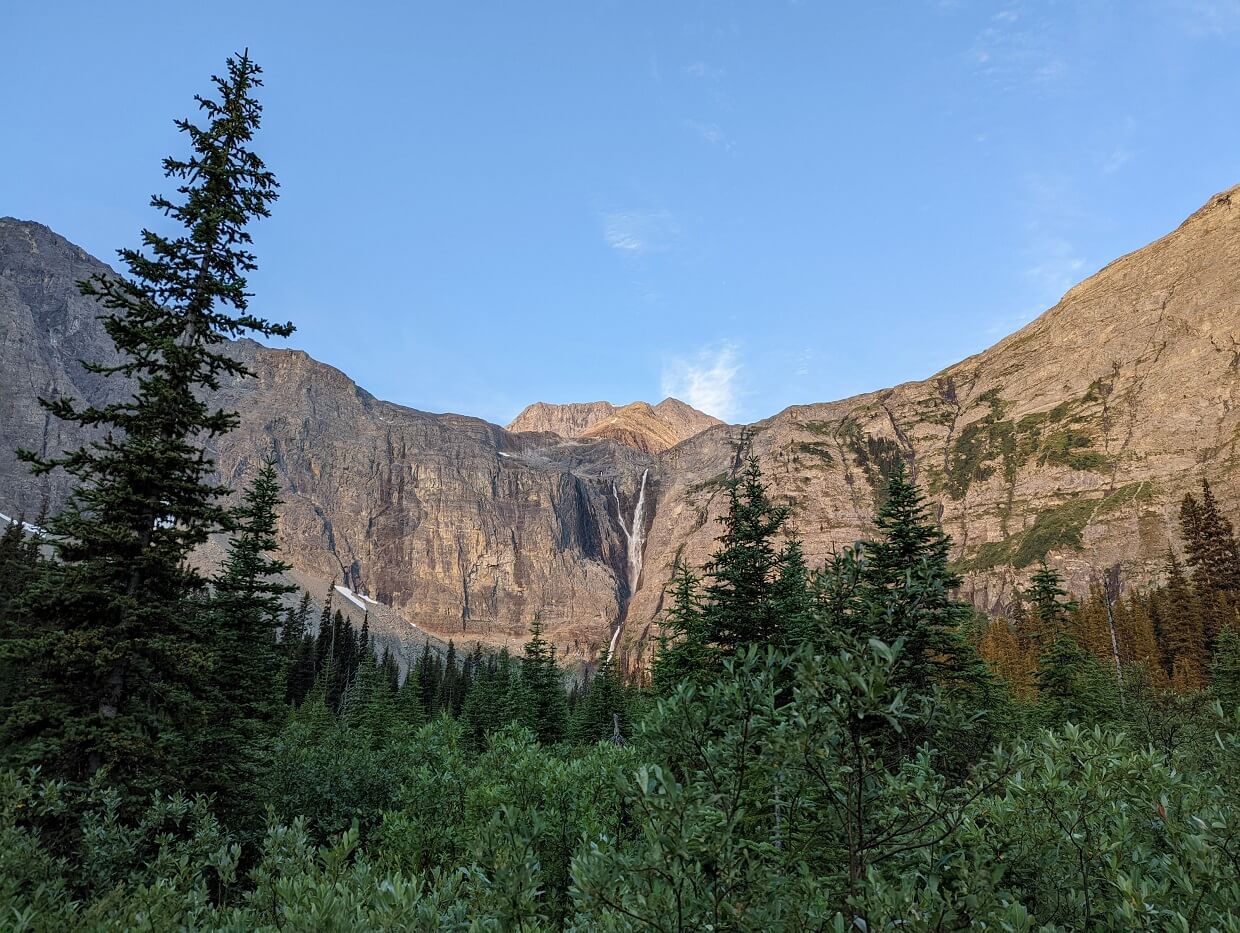
Before then, however, is a meander through a forest and wildflower meadows, with views of a huge waterfall.
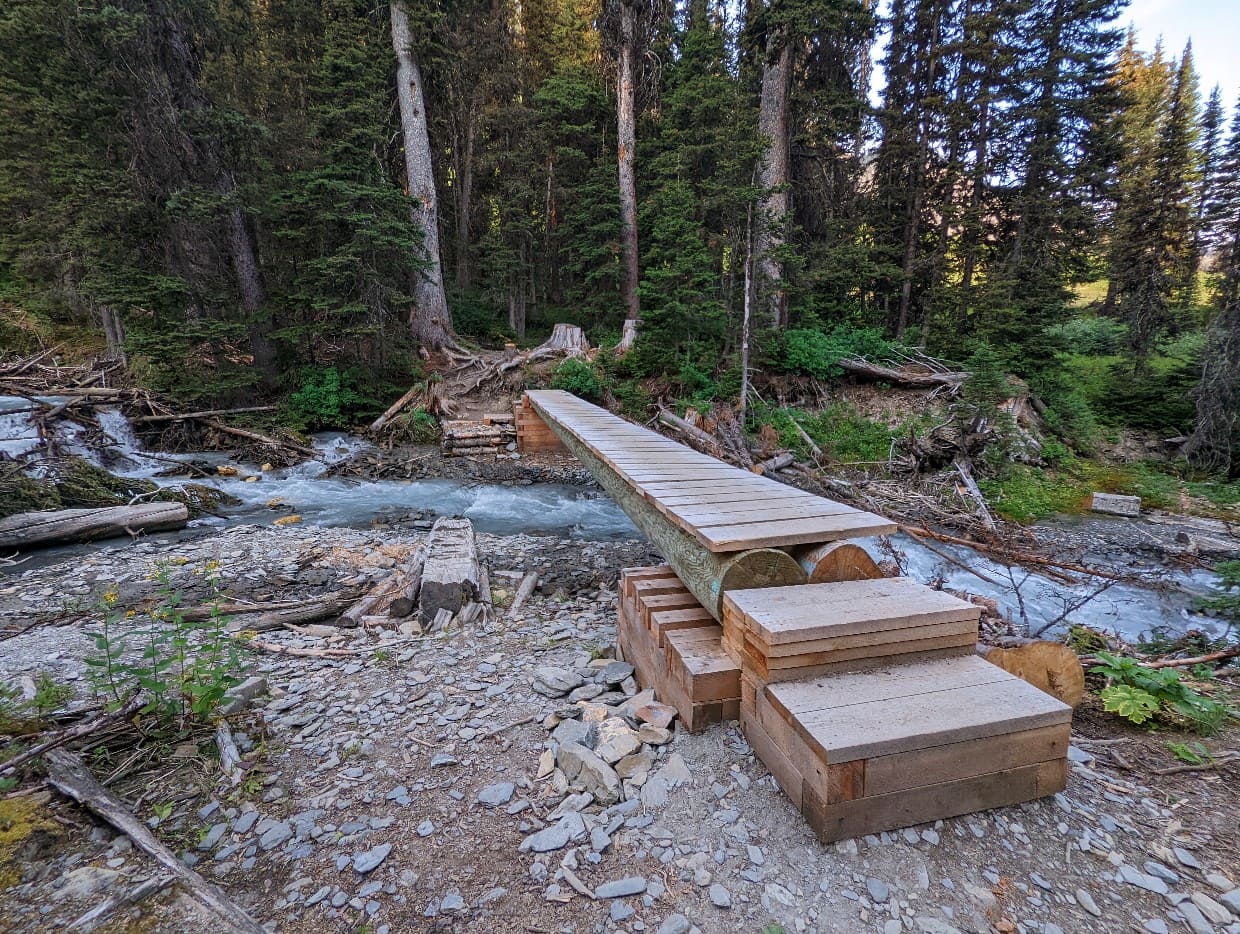
There are two major river crossings here, both with bridges. The first was was partially broken on our hike, with missing slats.
The second bridge was brand new for the 2022 season, the replacement for a tree log.

The ascent begins after the second bridge, with a steep section to start (450m in 2.5km). Some shade is offered by the surrounding trees and peek through mountain views can be seen.
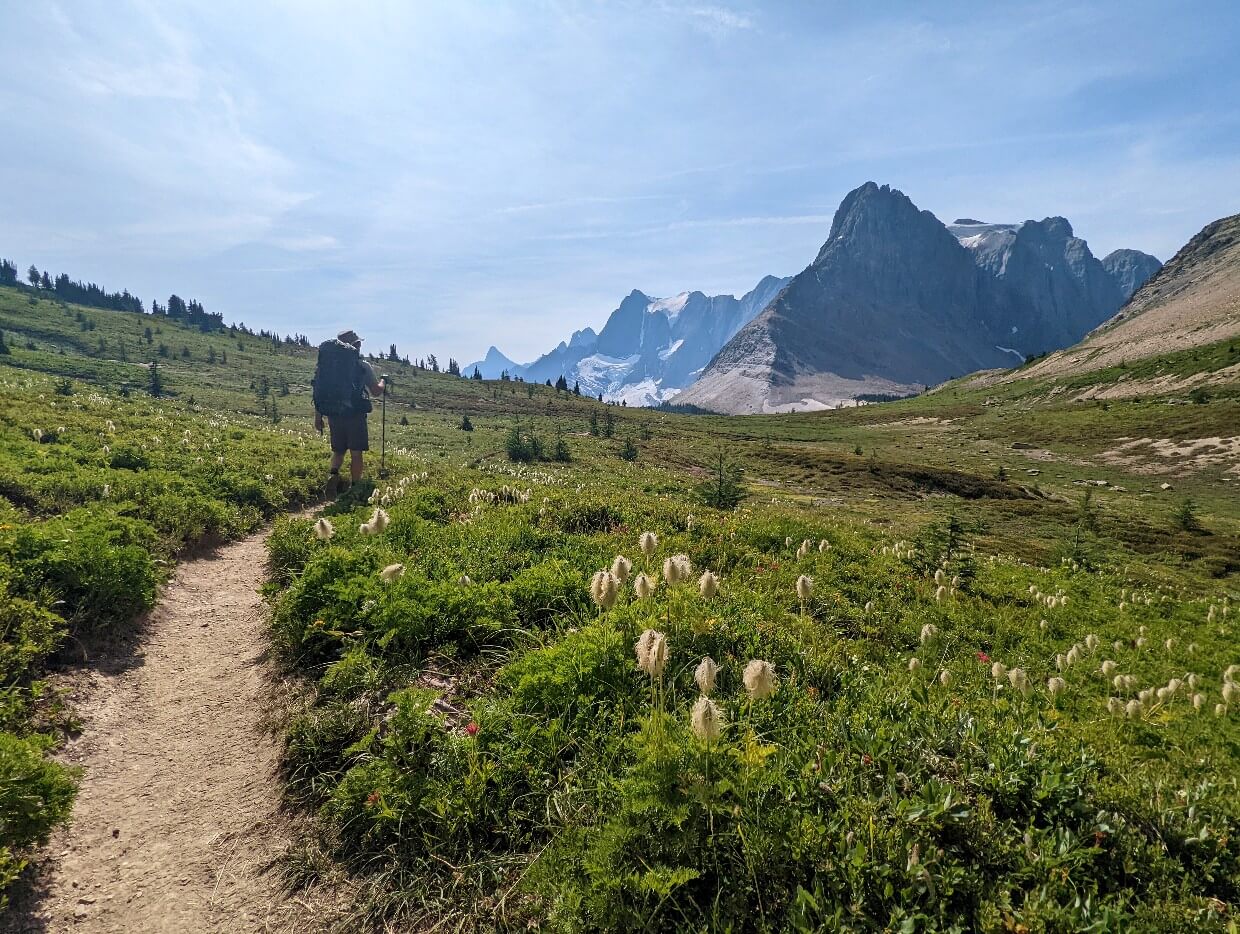
The gradient mellows out after the switchbacks, also the point when the forest thins out and scattered larch trees appear. The final approach to the saddle of Numa Pass traverses a short scree field.
At the pass, there are spectacular mountain views in every direction. While Floe Lake itself is not quite visible, the towering mountains above it are very noticeable. This is an ideal spot for lunch for those camping at Floe Lake.

The final approach to Floe Lake is downhill, with the trail winding through gorgeous wildflower meadows.
The best views of Floe Lake are seen around the 7.4km mark. Try not to rush this section – the vistas from here are somehow even more impressive than from the shoreline.

Floe Lake to Floe Lake Parking Lot
Distance: 10km
Hiking time: 3 to 4 hours
Elevation gain: 40m
Elevation loss: 730m
Leaving the beauty of Floe Lake is hard, but at least the hike ahead is not that challenging.
After the first short flat section, the trail starts descending quickly, losing 350m of elevation in only 1.5km with the help of some switchbacks. It’s steep and narrow at times, with a few rocky sections.
Once this part is out of the way, the rest of the route is a fairly steady downhill trek all the way to the parking lot. There are a couple of very small uphill sections as well as some (usually dry) stream crossings.
Some long switchbacks herald a change of direction about 7.5km after leaving Floe Lake.
About 700m later, you’ll arrive at a bridge over Floe Creek. This is a popular place to cool down on hot days. The next bridge, over Vermillion River, signifies the final 400m of the hike.
A wildfire passed through this area in 2003, which means that this section of the Rockwall has almost zero shade.
It can be a very hot and sweaty hike in either direction, but particularly northbound. If you can, avoid hiking during the hottest part of the day (around 3pm).
Read More: Detailed Floe Lake Trail description

On the positive side, the lack of trees mean that the views of the surrounding mountains are pretty spectacular! The fireweed flowers provide a gorgeous pop of colour as well.
Something else to keep in mind is the lack of water along the route. While Floe Creek parallels most of the trail, it is difficult to access.
Rockwall Trail difficulty
The Rockwall Trail is a moderately difficult backpacking trail, involving some significant elevation gain and loss.
This is a true hiking path with no major technical features. Most of the trail is dirt, with some rocky sections.
There are a few creeks to cross (rock-hopping is usually possible), but all major rivers have bridges. Early in the season, water flow will be higher and there may also be avalanche debris or snow patches.
The biggest challenge for most Rockwall hikers will be the prolonged ascents and descents, both of which can be tiring.

The longer you spend on hiking the trail, the easier it will be. A 5 day itinerary is inherently easier than a 4 day itinerary. On the same theme, the lighter your backpack, the easier the hiking experience.
Inclement weather (snow, heat waves, cold temperatures) can have a significant impact on the difficulty of this trail. There are long, exposed stretches.
Thinking about hiking the Rockwall Trail for your first backpacking trip?
While I do think it’s one of the better choices in BC, I would still always recommend going on an overnight hike first so you can test your gear and stamina in a more controlled environment.
Unlike some backpacking trails, the Rockwall does have some ‘escape routes’ for hikers who may need to leave the trail sooner than planned.
The Tumbling Creek Trail and Numa Creek Trail can be used to return to Highway 93.
When to hike the Rockwall Trail
The Rockwall Trail is best hiked from late July to early September. During this time, the path is usually snow-free.
Temperatures are warm during the day (low 20s Celsius, sometimes hotter) and cool at night (2-10°C or less). It is possible for warm weather to continue into September.
This time period is also ideal for viewing wildflowers. The peak is usually early August, but can start earlier and finish later depending on the year.
We saw so many beautiful wildflowers on our Rockwall Trail hike during the third week of August (2022).
Please note that due to the Rockwall Trail being located in a mountainous area, weather conditions can fluctuate quickly and often. Snow is possible even the middle of summer.

Early season
Parks Canada does not allow bookings for Floe Lake until 10th July due to the possibility of campground and trail being snowbound.
Depending on the year, the snow may melt earlier in the season and the trail will become snow-free sooner.
Sections of the path travel through avalanche areas, another reason why hiking earlier in the season is not recommended.
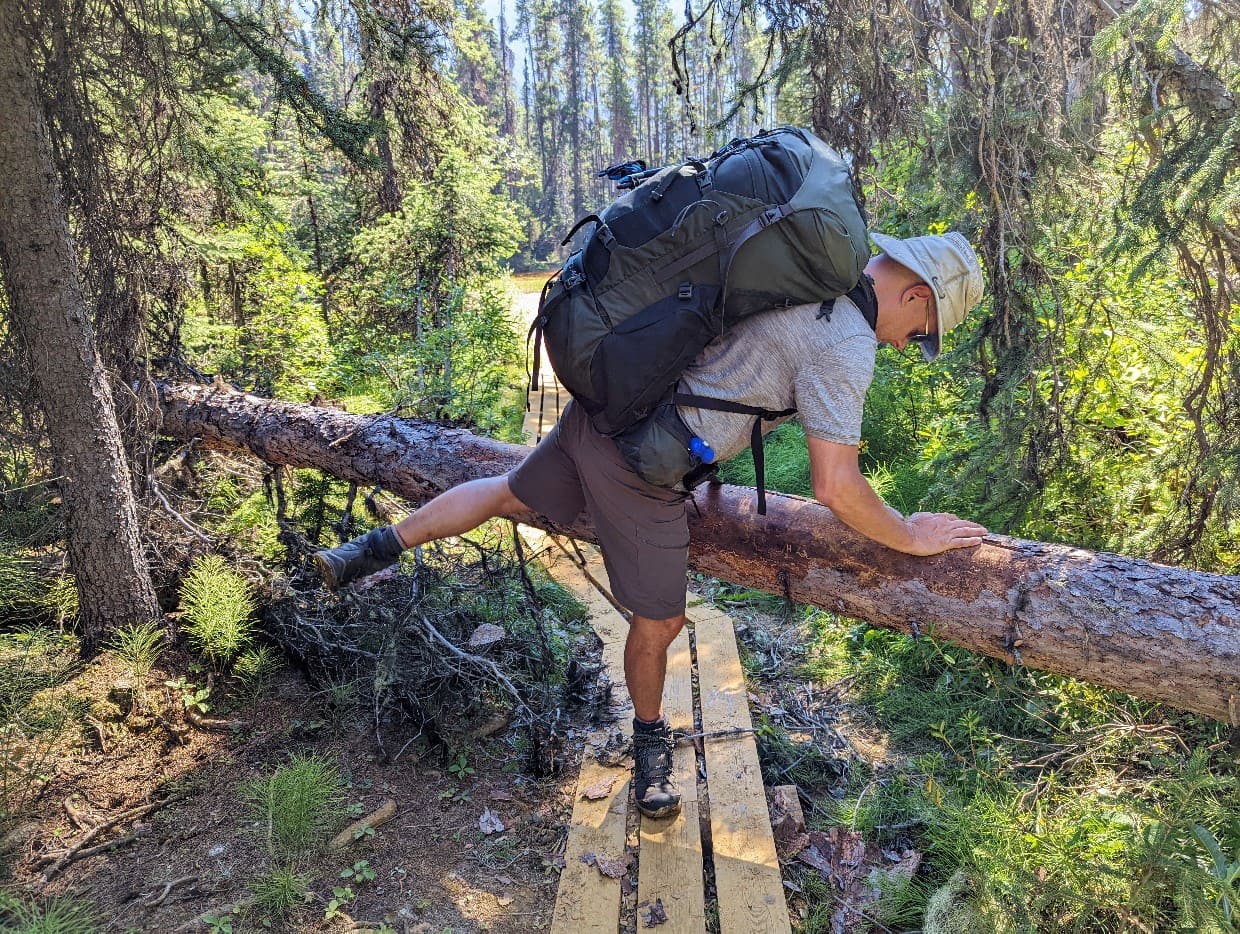
It is possible to find debris and fallen trees on the trail at any time, but this is particularly likely in the early hiking season when annual maintenance hasn’t been completed yet.
The latest trail updates are posted on this Parks Canada page.
Larch season
The Rockwall Trail is one of the best places in British Columbia to see golden larch trees in late summer/early fall. Many sections of trail are lined with larch trees.
For this reason, mid to late September is a popular time to hike the trail. Keep in mind, however, it can be very cold at this time and snow is likely. The exact timing of golden larch season changes each year as it is completely dependent on weather.

Rockwall trailheads and parking
All three Rockwall trailheads are situated on Highway 93 in Kootenay National Park, British Columbia.
From Highway 1, take exit 50. Paint Pots is 20km south, with Numa Creek at 24.8km and Floe Lake at 32.3km.
If you only have one vehicle, I would strongly suggest parking at your finishing trailhead. That is, the place where you will be ending your Rockwall hike.
It’s so nice to be able to access your vehicle immediately after a long hike and then be able to leave when you want to.

Paint Pots (north)
Paint Pots is the most northern of the three Rockwall trailheads. The trailhead’s name refers to the brightly coloured mineral pools situated along the 500m of the trail. The Paint Pots are a popular day hiking destination for families.
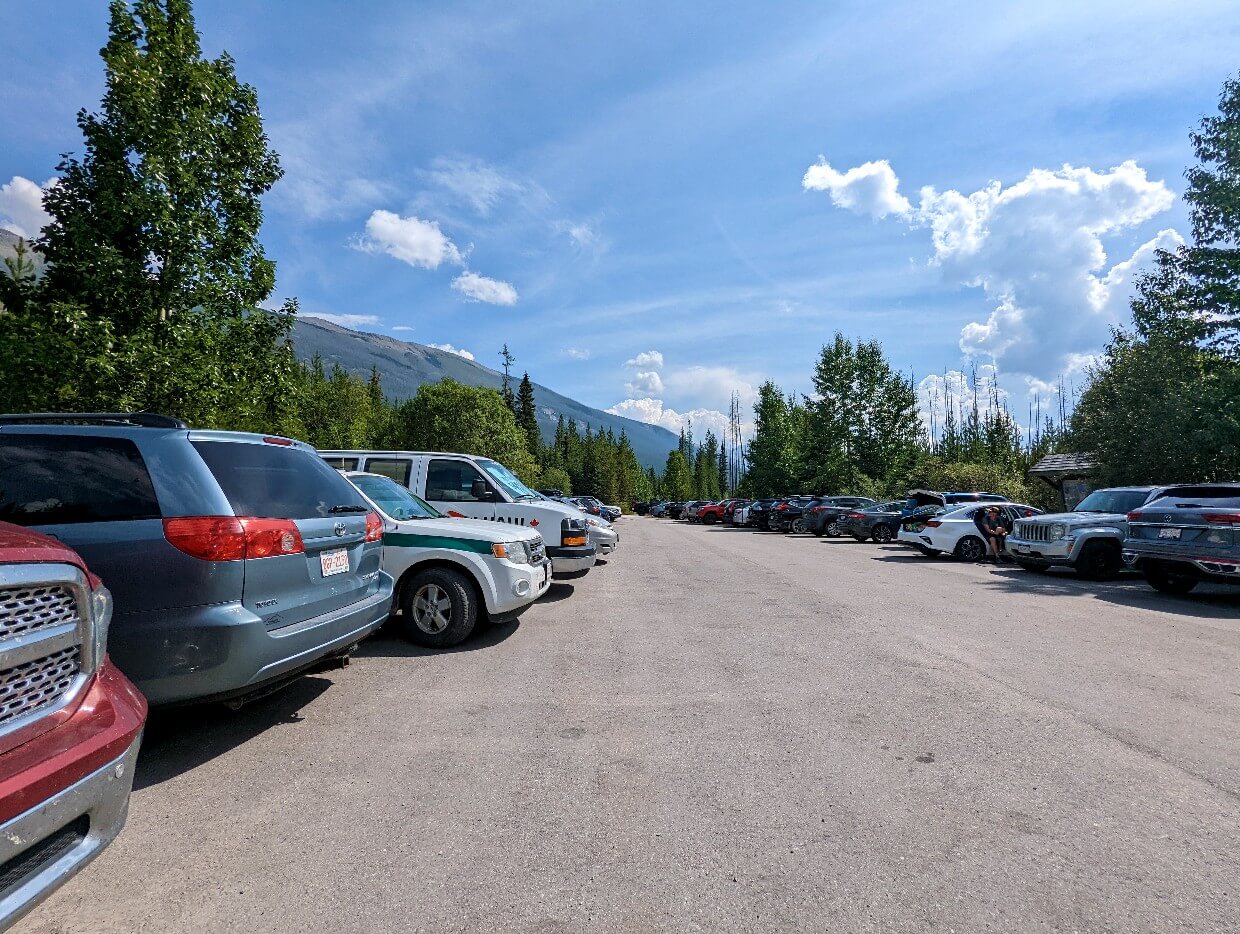
The Paint Pots parking lot is a pretty big, with space for smaller RVs and turnaround. Surrounded by forest, it is well signed from Highway 93.
There are some outhouses in the parking lot plus trail signage and garbage bins. This parking lot is well used by day hikers so there is a lot of movement of vehicles throughout the day.

Floe Lake (south)
Floe Lake is the most southern trailhead on the Rockwall Trail. It used to be the de facto starting point for the majority of Rockwall hikers, but has become more popular as an end destination in recent years.
The day hiking distance to Floe Lake from the parking lot is 20km return with 960m elevation gain.
The Floe Lake parking lot is also used by hikers heading up to Ball Pass via the Hawk Creek Trail (20km return with 850m elevation gain).
Situated just off Highway 93, the Floe Lake parking lot is less than half the size of Paint Pots. It is surrounded by forest.
This parking lot can get very full in the summer, with vehicles parked around the entrance. There is an outhouse, trail signage and a garbage bin. Most people parking here are backpackers.
Secondary trailhead: Numa Falls (mid-point)
For a number of reasons (reservation difficulties, limited time), some hikers choose to start (or end) their Rockwall Trail experience at the Numa Falls Trailhead.
The Numa Falls Trailhead is located between the Floe Lake and Paint Pots trailheads. A 6.3km trail leads from the parking lot to the Numa Creek campground (note, however, that it can temporarily close due to avalanche debris).
The Numa Creek parking lot is bigger than the Floe Lake parking lot but smaller than Paint Pots. The parking lot is right next to Highway 93. It is mostly used by people visiting Numa Falls, which is a short 300m walk away. There are outhouses, picnic benches and garbage bins.
May 2026 update – this access route is currently closed due to a bridge washout and debris on the trail. Check the Trails Conditions page for updates.
Transportation logistics
Since the Rockwall Trail is a linear thru-hike (not an out and back hike or loop trail), the majority of hikers finish at a different trailhead than they started. This means that some consideration for logistics is required.
For larger groups, the solution is simple – simply park one vehicle at your finishing trailhead and then shuttle everyone in another vehicle to the starting trailhead.
There is no organised shuttle service between the Floe Lake and Paint Pots trailheads so groups with only one vehicle will need to plan ahead.
The most common methods used to travel between the trailheads are:
- Stash a bike close to the finishing trailhead. This allows one hiker to cycle back to the starting trailhead and grab the vehicle
- Ask other hikers in the parking lot for a ride. While the simplest solution, this method is highly dependent on the time of day and the individual hikers that happen to be around
- Hitchhike between trailheads, either at the end or start of the hike
Please note that all of these methods are at your own risk.
Hitchhiking between trailheads
If you decide to try and hitchhike, I would highly recommend parking a vehicle at your finishing trailhead and then hitchhiking before your hike.
Not only will this get the hitchhiking out of the way, but it also means that you’ll be much cleaner (and fresh smelling) for the kind driver that picks you up.
Hitchhiking, of course, does come with a level of risk. I felt much more comfortable hitchhiking with my (male) partner than if I’d been alone.
We stood on the road outside the Floe Lake trailhead and held a sign that stated ‘Paint Pots,’ to indicate that we only needed a very short (10 minute) ride.
I do believe the sign helped – we were picked up within 15 minutes. After our own hike, we gave a ride to someone hitchhiking from Floe Lake to Paint Pots. He did not have a sign and said he’d been waiting for longer.

Rockwall Trail reservations
A backcountry permit, called a Wilderness Pass, is required to stay overnight at any of the campgrounds along the Rockwall Trail.
There is a limited number of Wilderness Passes issued daily for each campground. There is no first come, first serve camping available.
The easiest way to secure a backcountry permit for the Rockwall Trail is to make a reservation.
Backcountry campground reservations for Kootenay National Park usually open in January each year. The exact date is usually announced during the preceding December on this Parks Canada webpage.
The 2026 reservation launch date for the Rockwall Trail is 26th January at 8am MT.
If you don’t have a reservation, the only other way to get a Wilderness Pass is to visit the Parks Canada Visitor Centre in Radium on the day of your departure and ask if there is any availability for a same day permit.
Due to the popularity of the Rockwall Trail, I would not rely on this method. Making a reservation is the way to go if you want to hike this trail.
There is no reservation or permit required to hike the Rockwall Trail itself, besides the standard National Park admission fee. Trail runners and day hikers are able to explore the trail without camping.
Reservation launch date
In 2026, reservations for the Rockwall Trail campgrounds will launch on 26th January at 8am MT.
At this exact time, availability for the entire summer season will open.
To make a campsite reservation, you must use the Parks Canada Reservation System. It can be accessed online and also by phone (1-877-737-3783).
Campsite availability is usually snapped up within 15-20 minutes of the reservation system opening, with long weekend dates in July and August being claimed first.

Rockwall reservation process
Although it is possible to call to make a booking, I’d recommend using Parks Canada’s online service. It’s notoriously difficult to get through to the call centre.
On the day of the reservation launch, Parks Canada uses a waiting room system to prevent server overload.
All users loading the website immediately prior to the launch time are held in an online waiting room. At the launch time, users are then randomly assigned a place in line to access the website.
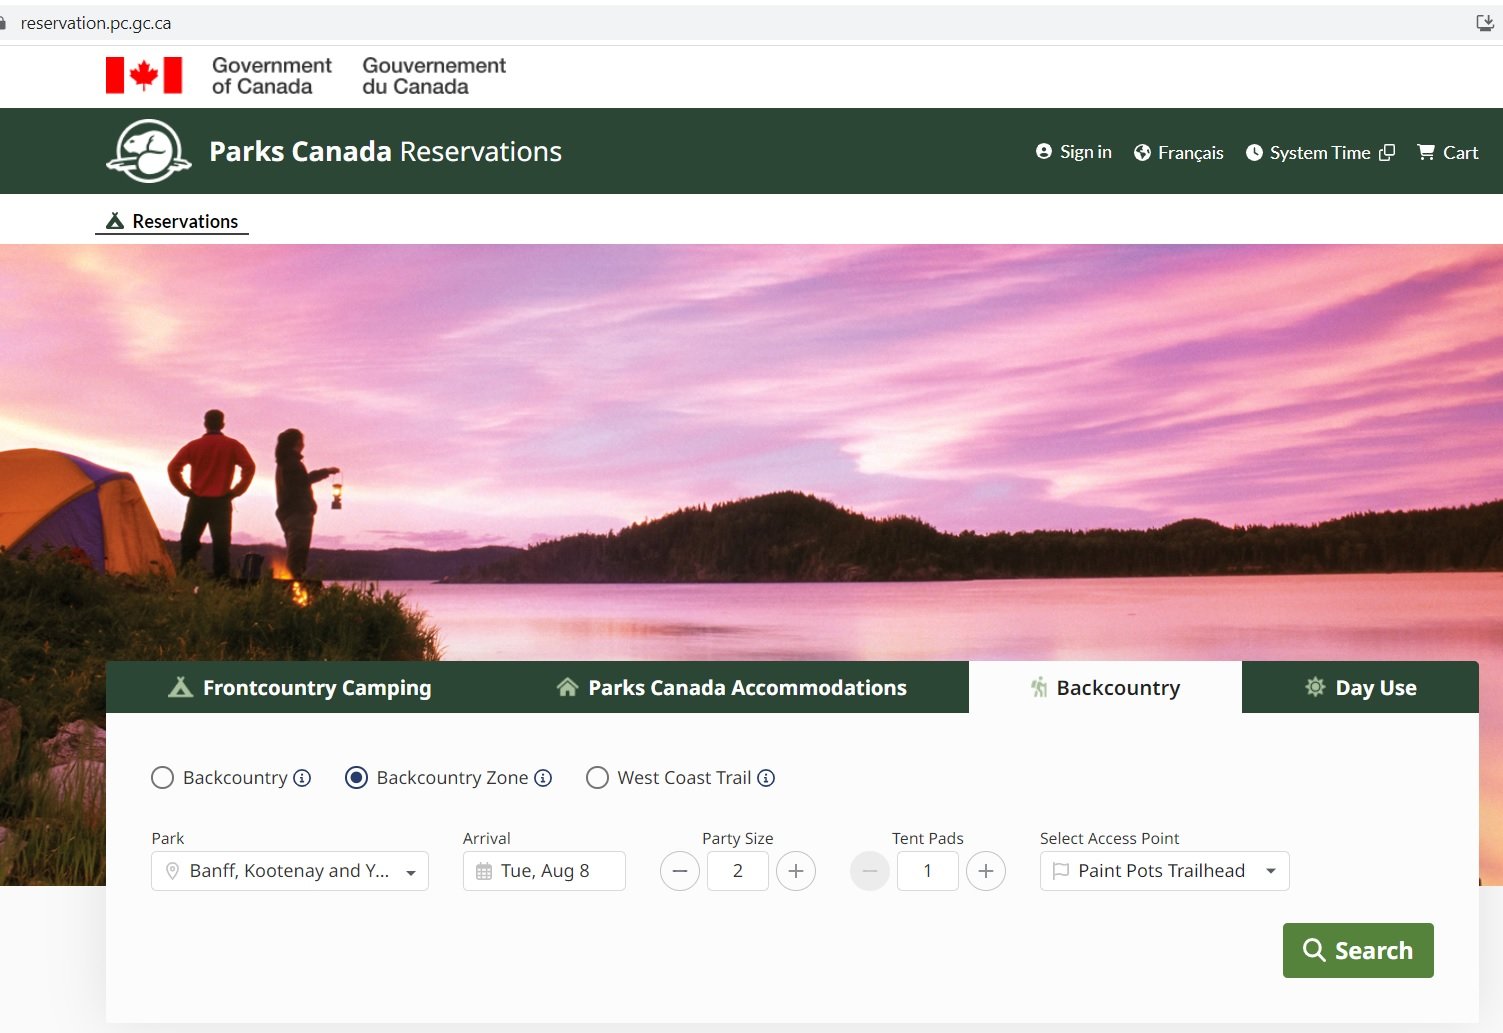
Once it’s your turn:
- Click the ‘Backcountry’ tab then select ‘Backcountry Zone’
- On the drop down list, click ‘Banff, Kootenay and Yoho Backcountry’
- Choose your preferred arrival date, party size, number of tent pads and access point (for most people, this is Paint Pots, Numa Falls or Floe Lake) then click ‘Search’
- A map will load below. Click the green* diamond next to your first campsite. Scroll down and click ‘Add to Stay’ at the bottom of the right hand sidebar
- The screen will refresh and return to the map. Click the green diamond for your next desired campsite and, again, ‘Add to Stay.’ Repeat as needed
- Instead of using the map, you can also utilise the drop down menu below the ‘Your Stay’ section
- When finished, scroll up a little from the map and select the green ‘Reserve’ button on the right hand side
- If the campsites are still available, the next screen will display your reservation details, along with Parks Canada rules. Tick the two boxes and select ‘Confirm reservation details’
- At this point, your reservation is in the shopping cart and held. As long as you complete payment within 20 minutes, your reservation is secure
- Click ‘Proceed to Checkout’ to log into your Parks Canada account and pay for the reservation
*Green signifies available. If the diamond is red, it is unavailable. In that situation, click the ‘Calendar’ icon next to the map and look for green ticks indicating availability
Reservation tips and advice
- Sign up for a Parks Canada account prior to the reservation launch
- I’d also suggest getting very familiar with the reservation system prior to the launch date, as you’ll need to complete your request as quickly as possible to get a space
- Be flexible with your dates and have multiple options/itineraries ready
- Hiking with a group? Enlist other members to help you secure a reservation. The more people trying to reserve, the better chances you have
- Multiple devices can be used to secure multiple spots in line
- Users are able to hold reservations for up to 20 minutes. If they do not complete the booking in that time, the site becomes available again
- Note that the reservation launch date for the Rockwall Trail is the same date for almost all backcountry campsites in Banff, Yoho and Kootenay National Parks – not all users will be trying to book the Rockwall
- And finally….reservations get cancelled all the time. It’s worth regularly checking the Parks Canada reservation system for cancellations
- Alternatively, you can use a service like CampNab to monitor cancellations for you
Rockwall Trail cost
There is no specific fee to hike the Rockwall Trail itself, but there are camping fees as well as reservation fees and the requirement to have a valid Park Pass for Kootenay National Park for the entirety of the hike.
Rockwall Trail fees):
- $15.00/night/per person backcountry camping fee (Wilderness Permit)
- $11.50 online reservation fee
- $13.50 phone reservation fee
- Park pass fees (see below)
For example, a reservation for a four-night Rockwall Trail adventure for two people costs $131.50 ($120 camping fees plus $11.50 online reservation fee).
All Rockwall hikers must hold a valid Park Pass. The fees are $12.25/day per adult or $10.75/day for seniors.
Park Passes for the Canadian Rockies parks are interchangeable – so if you have a Park Pass for Banff National Park, it is also valid in Kootenay National Park.
It is therefore possible to buy a Park Pass at any of the national park entry gates (Radium, Banff) or a Visitor Centre (Field, Banff, Lake Louise, Radium).
If you are planning to spend additional time exploring the Rockies before or after hiking the Rockwall, it is probably worthwhile to get a Discovery Pass.
Discovery Passes are valid for 12 months and include free admission to all national parks in Canada as well as national historic sites.
In 2026, Discovery Passes are $83.50/adult OR $167.50 for a group (up to 7 adults).
From 19th June to 7th September 2026, there are no admission fees for national parks and national historic sites operated by Parks Canada (Canada Strong program).
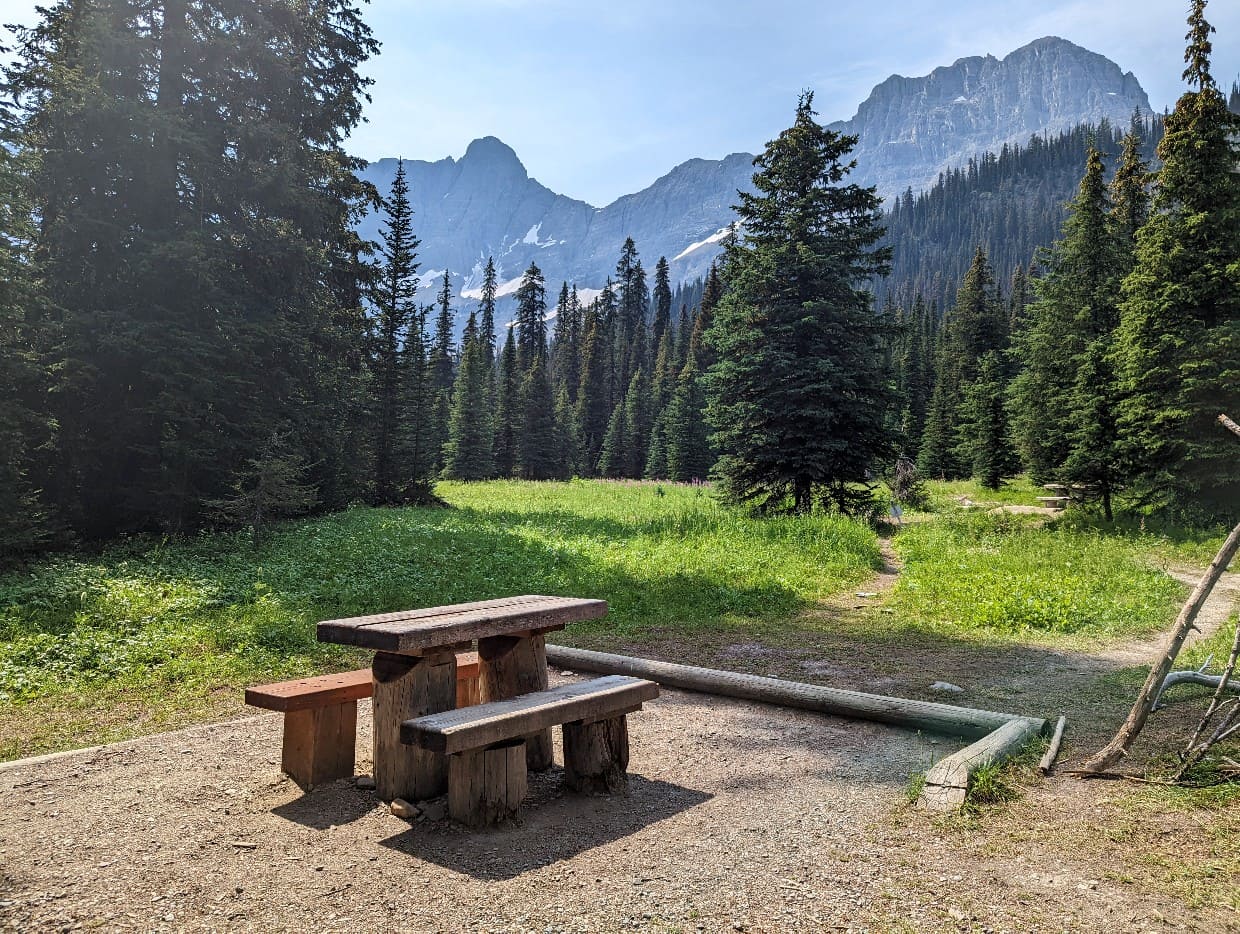
Rockwall Trail campgrounds
There are five backcountry campgrounds located on the Rockwall Trail. The most popular five day hike itinerary includes overnight stays at four of these campgrounds.
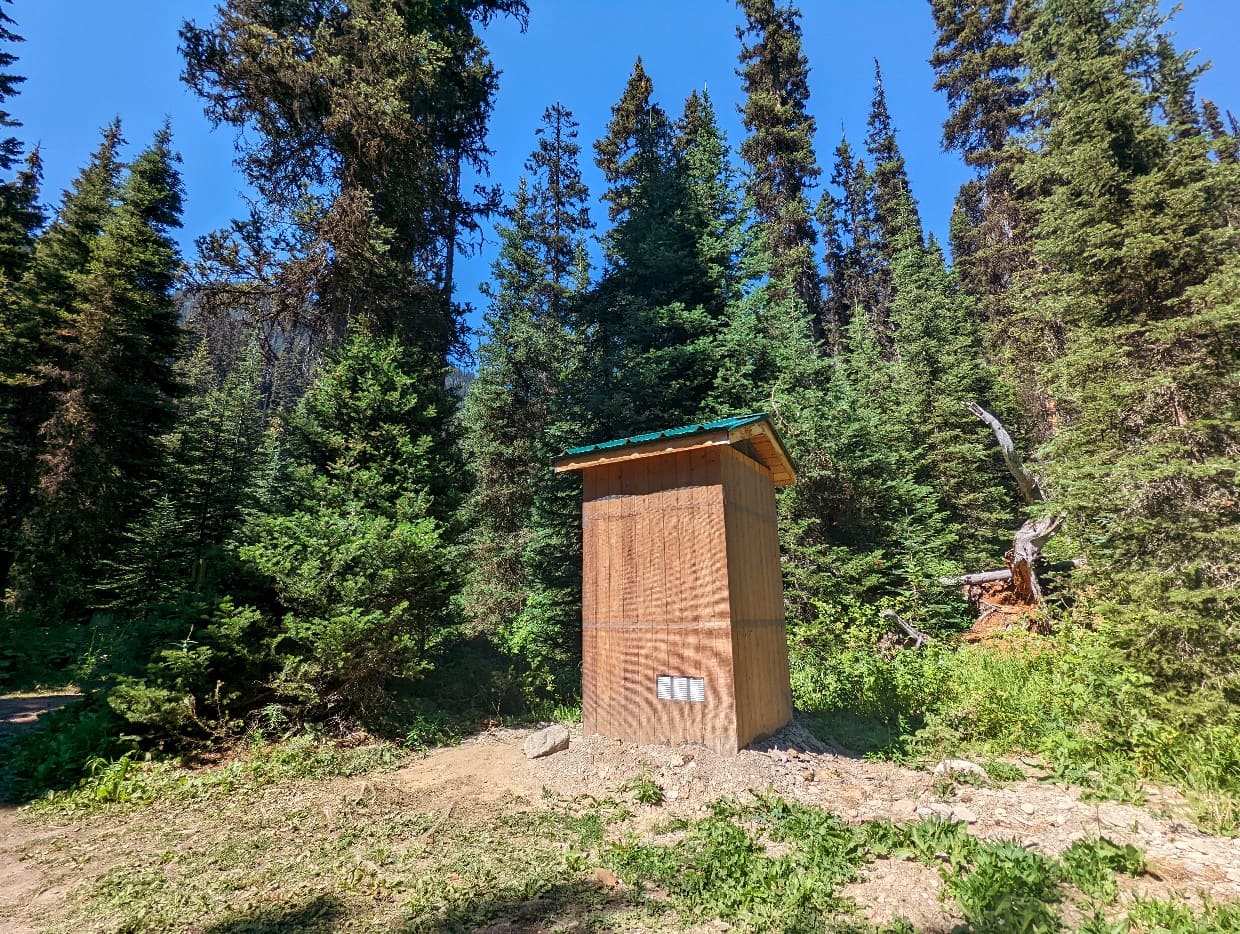
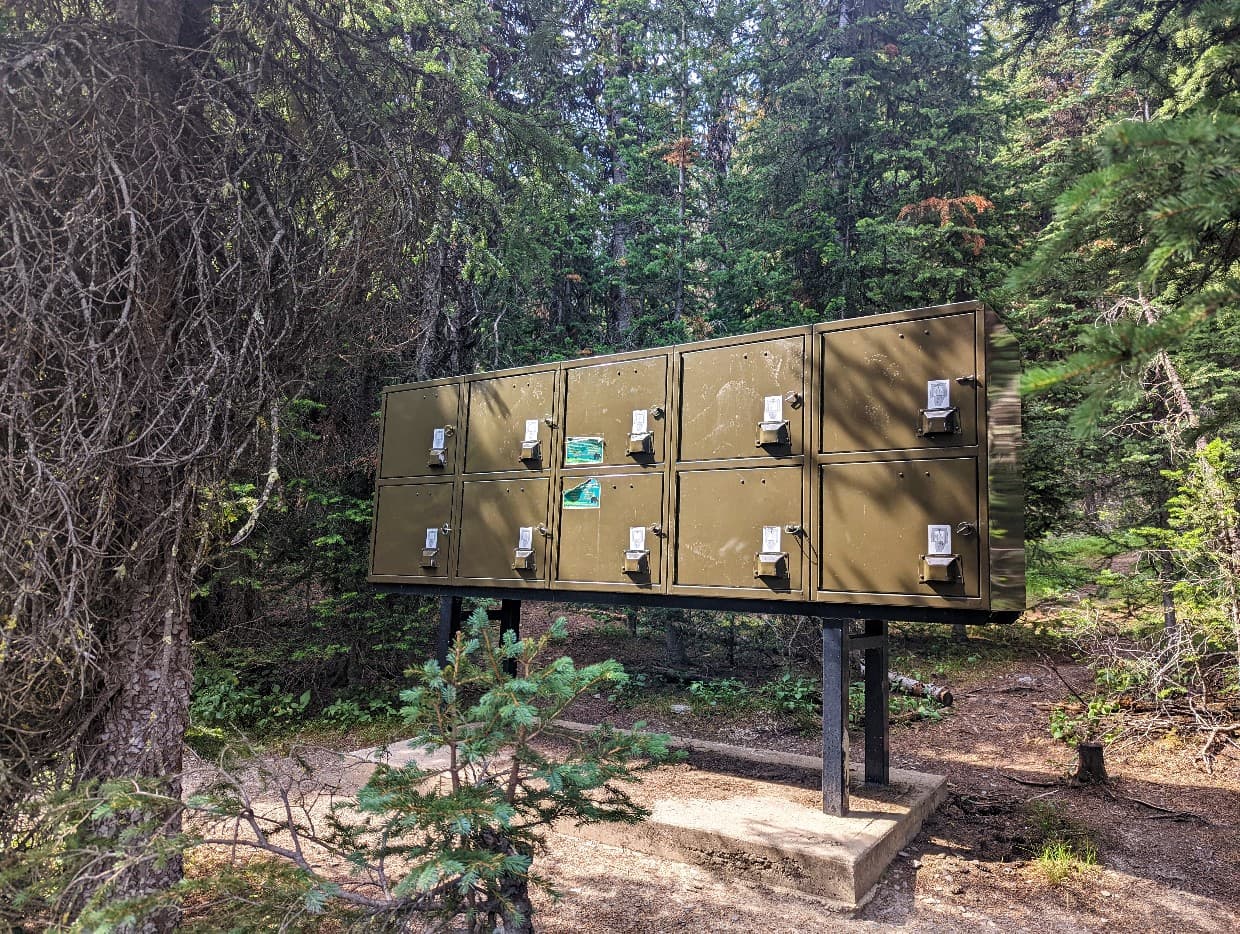
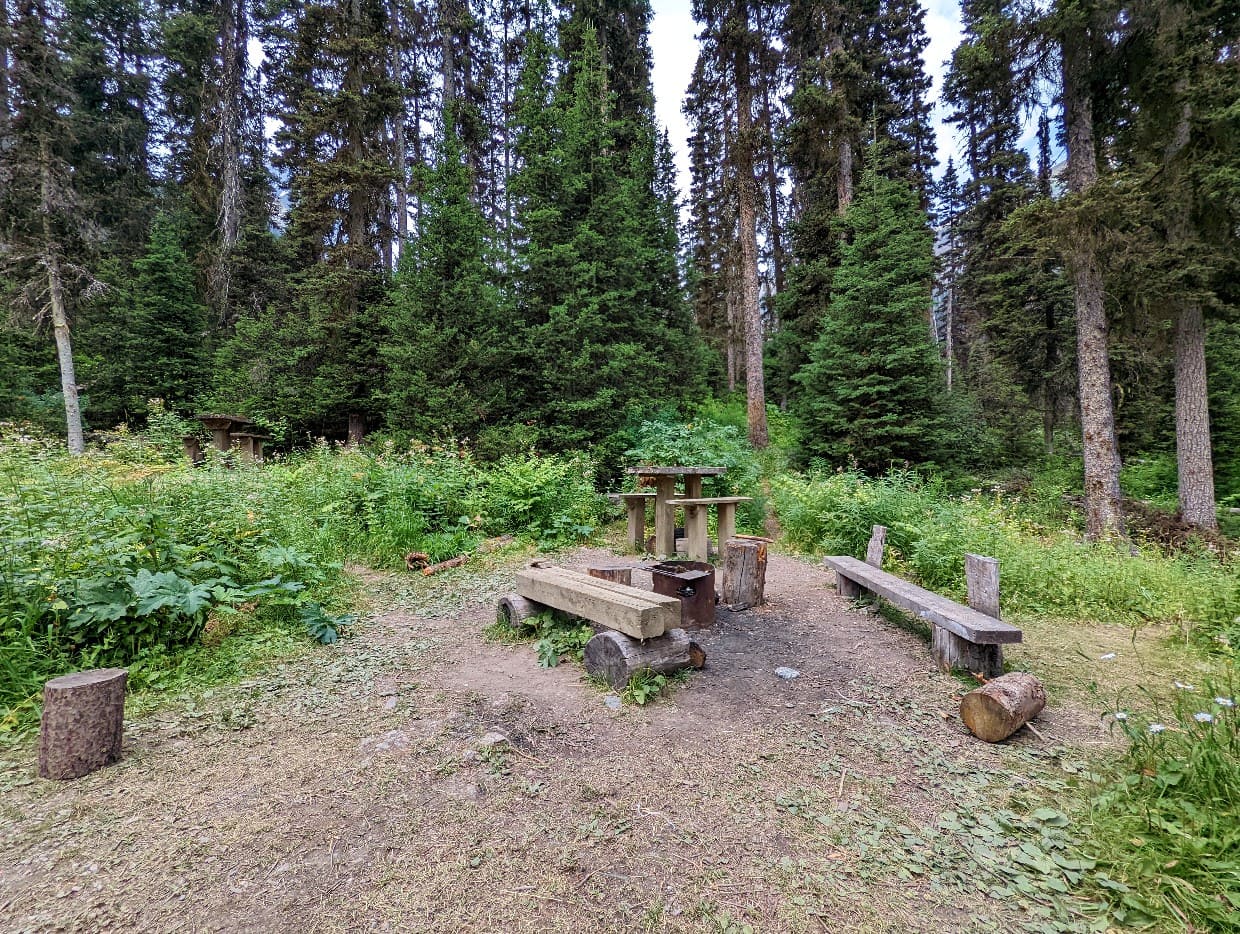
Each campground has framed dirt tent pads, wooden outhouses, bear caches and a dedicated cooking area with benches.
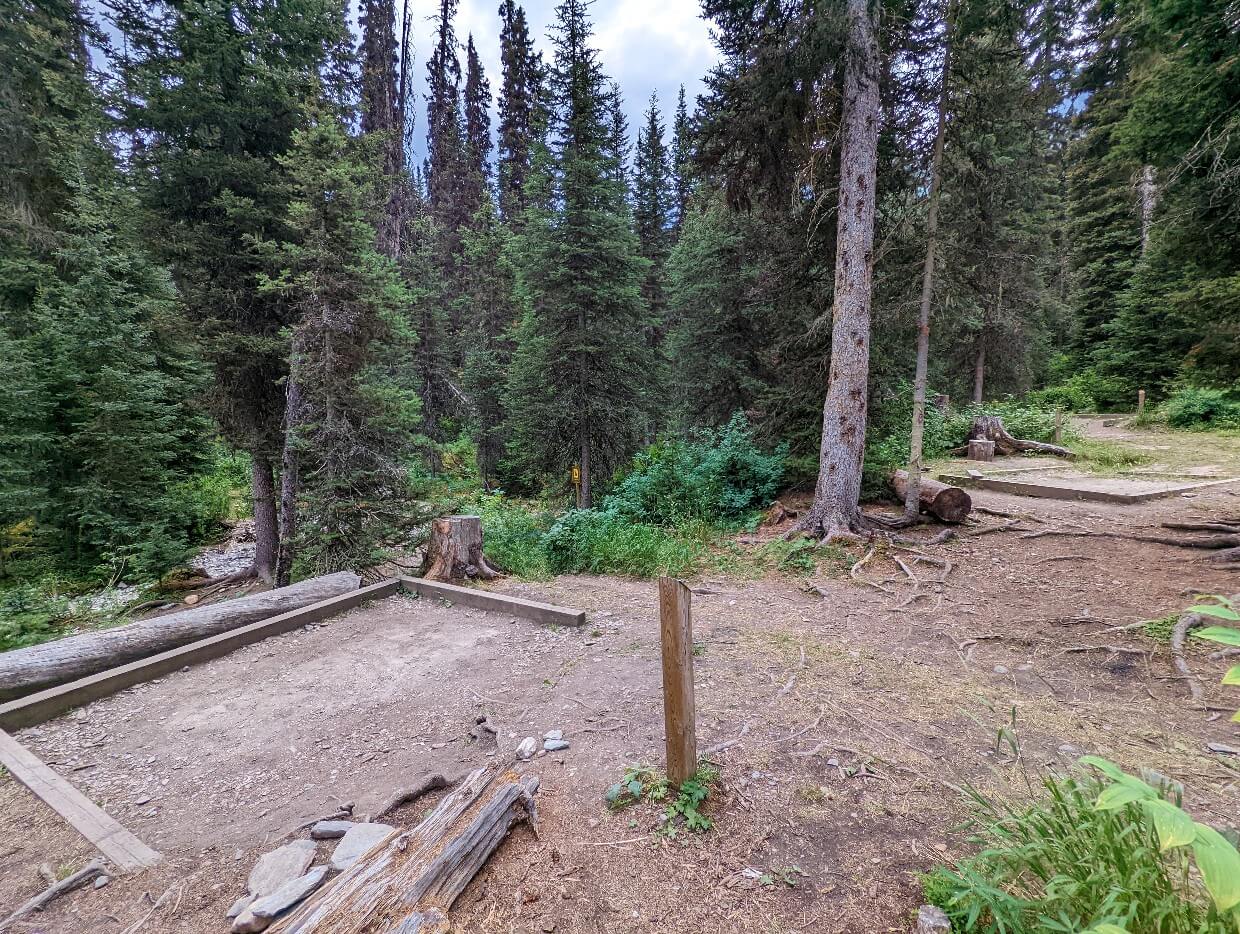
Helmet Ochre Junction campground
Location: 6km from Paint Pots / 48.2km from Floe Lake TH
Facilities: 6 tent pads, bear caches, outhouse, cooking area with benches
Water access: Large river
Campfires allowed: Yes
Popularity: Low
This small campground is situated right next to Ochre Creek, offering great water access. The river also helps to open up the views of the surrounding forested mountains.
Some of the tent pads sit at the edge of the forest while others are fully exposed. Campfires are allowed in this campground when there is no fire ban.
Helmet Ochre Junction is the least popular campground for Rockwall Trail hikers. Being only 6km from Paint Pots, most hikers plan to continue onto the parking lot or stay at Helmet Falls instead.
This campground would, however, be an ideal option for hikers looking for an easy overnight trip (with an optional day hike to Helmet Falls). It may also work well as a first night stop for hikers starting the trail late in the day.

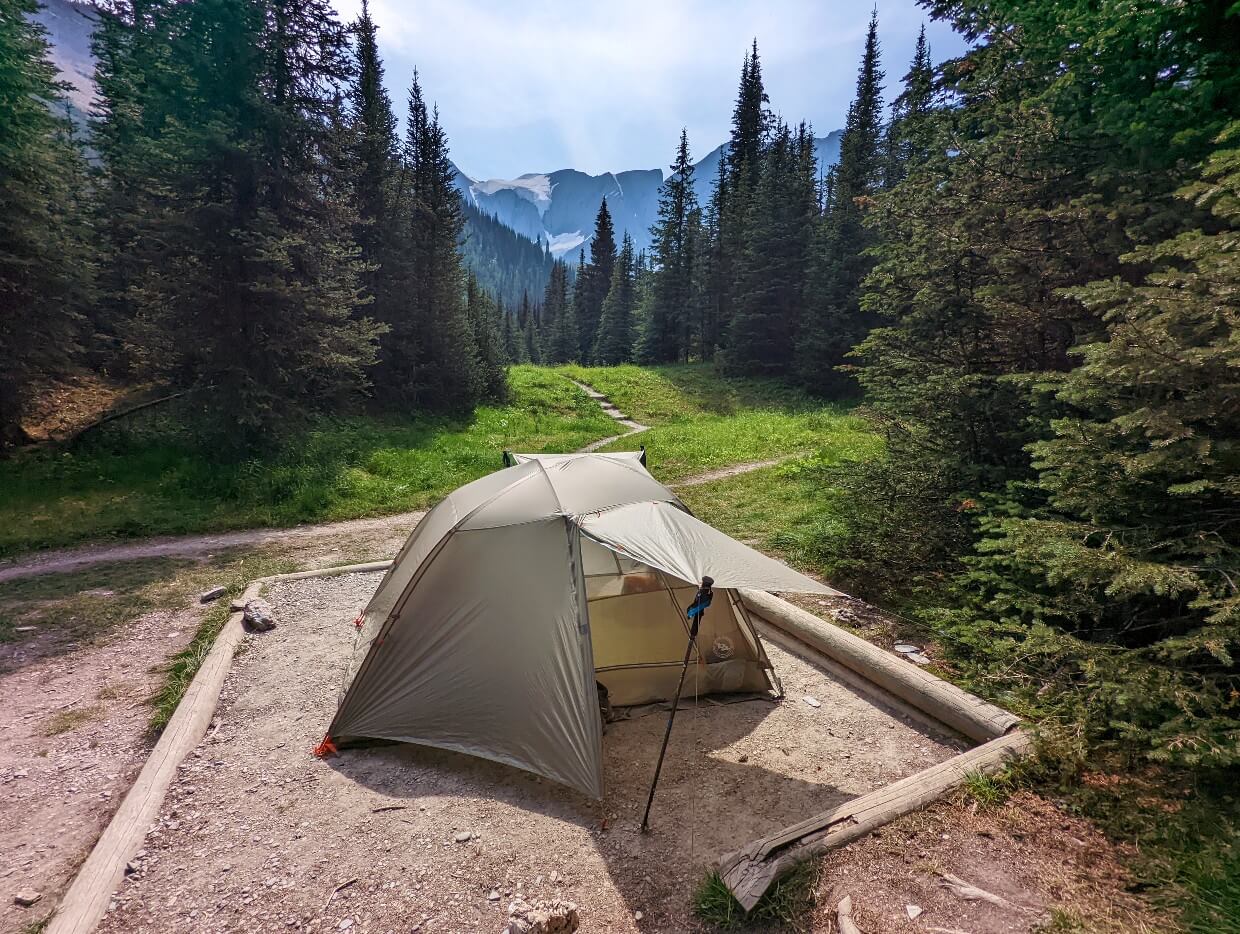
Helmet Falls campground
Location: 14km from Paint Pots TH / 40km from Floe Lake TH
Facilities: 18 tent pads, food caches, cooking area with benches, multiple outhouses
Water access: River
Campfires allowed: No
Popularity: High
Sandwiched between two creeks, Helmet Falls campground is surrounded on three sides by an amphitheater of steep rock walls. The eponymous waterfall is visible to the west, cascading down a massive cliff face.
Most of the campground is forested, providing welcome shade on hot days. A ranger cabin, only occasionally occupied, sits on the eastern side of the creeks. A brushy trail leads from the campground to the base of the Helmet Falls.

The tent pads are grouped together in three different places, with the designated cooking area at the far (western end). The latter offers peek through views of Helmet Falls. Some of the tent pads are backdropped by mountain peaks.
Most Rockwall Trail hikers stay at Helmet Falls on their first or last night. I liked this campground, but it does get dark early here due to the surrounding mountains.

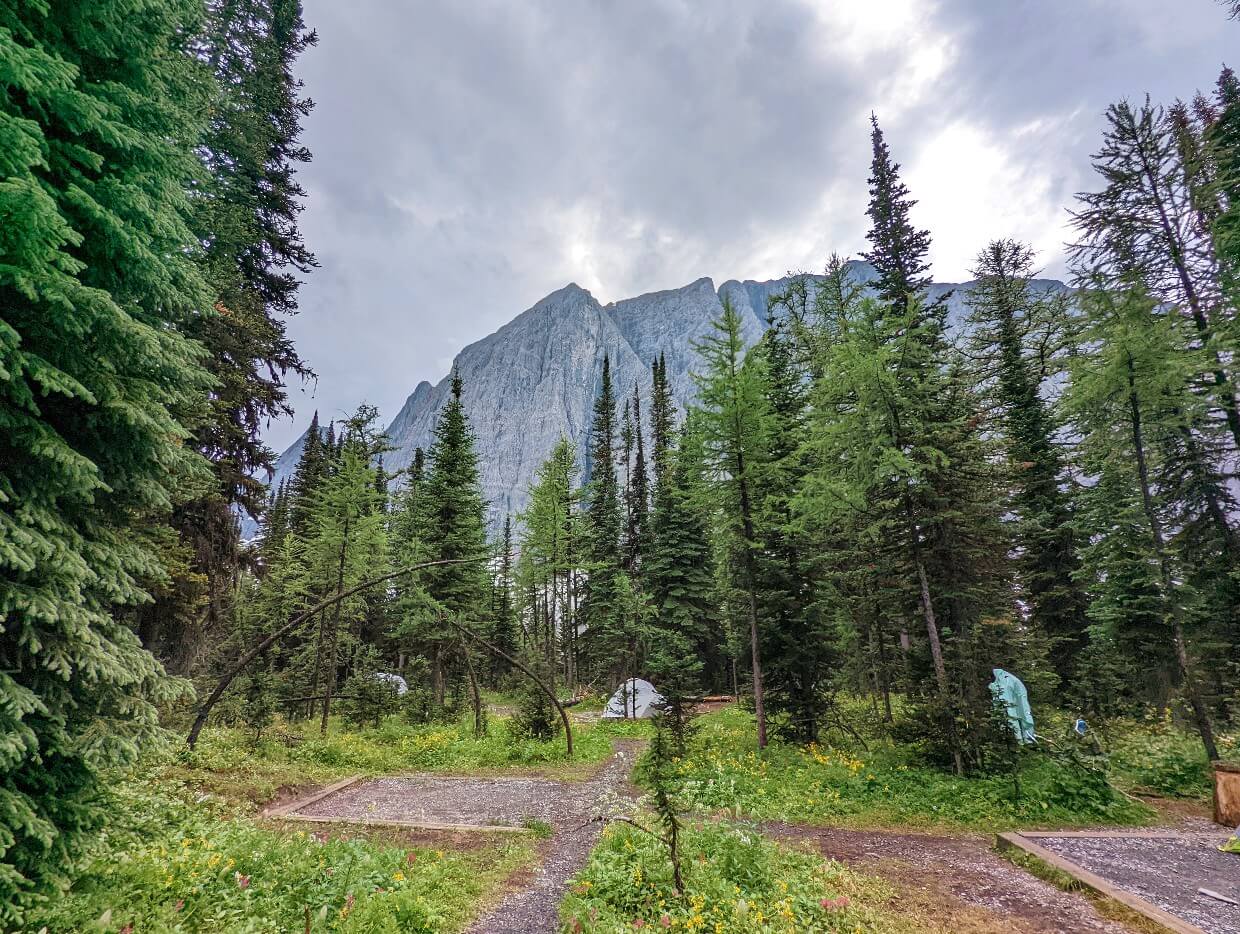
Tumbling Creek campground
Location: 26km from Paint Pots TH / 28km from Floe Lake TH
Facilities: 18 tent pads, two sets of food caches, two cooking areas with benches, multiple outhouses
Water access: Strong river and stream
Campfires allowed: No
Popularity: High
Tumbling Creek is my favourite campground on the Rockwall. For one thing, it’s so spacious!
The tent pads are nicely separated, with a mix of forest and open sites. There is not one, but two cooking/food storage areas.
Due to the size, it can be a little confusing to navigate this campground when you first arrive. If you arrive late and don’t immediately find a tent pad, don’t panic. Some of the tent pads are really tucked away.
Water access is great at Tumbling Creek, with the campground situated just above the river itself. The flow is strong and fast but cold.
A stream flows close to the eastern side of the campground, just behind a couple of tent pads (snag one of these if you can!)
Tumbling Creek campground can be accessed from the main Rockwall Trail or the Tumbling Creek Trail.
Numa Creek campground
Location: 34km from Paint Pots TH / 20km from Floe Lake TH
Facilities: 18 tent pads, food caches, cooking area with benches, multiple outhouses
Water access: Strong river
Campfires allowed: Yes
Popularity: High
Numa Creek is a campground of two halves, literally! The cooking/food storage area is located on one side of the river, with all of the tent pads on the other.
The large rocky area alongside the water is popular for sunbathing, lunch and reading. Some hikers choose to take a dip in the (freezing) river, arranging rocks to create deeper pools.
A small cluster of tent pads are situated close to the trail, with the rest set into a maze of brush and forest. Numa Creek is my least favourite Rockwall Trail campground as it just felt quite congested to me.
This campground is situated at the lowest elevation of the four most used Rockwall campgrounds (1549m) – campfires are allowed when there is no fire ban.
Numa Creek campground can be accessed from the main Rockwall Trail or the Numa Creek Trail (direct from the Numa Falls Trailhead).
Floe Lake campground
Location: 44km from Paint Pots TH / 10km from Floe Lake TH
Facilities: 18 tent pads, two sets of food caches, two cooking areas with benches, multiple outhouses
Water access: Lake
Campfires allowed: No
Popularity: Very high
Floe Lake is one of the most in-demand backcountry campgrounds in the entire Canadian Rockies. And it’s deserving of the attention.
This much loved campground is perched right on the shore of this turquoise coloured lake, providing hikers with spectacular views at any time of day (but particularly at sunrise).
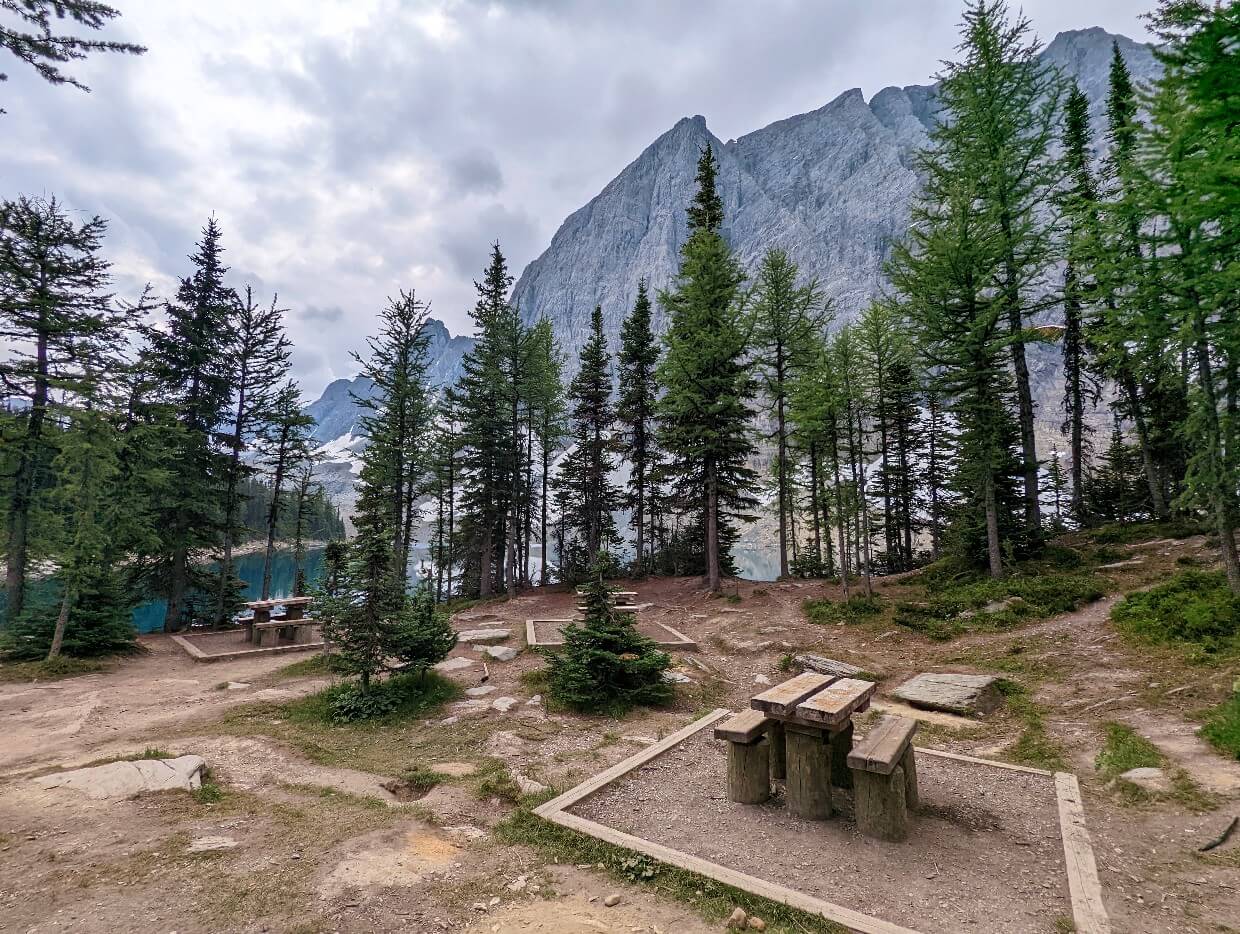
There are two cooking areas, with one offering direct access to the water as well as a rocky beach. A ranger cabin sits close to the other cooking area.
Dream of setting up a tent right next to Floe Lake itself? There is just one camp spot with unobstructed lake views.

We were very lucky to be secure this particular site, but we did arrive at super early (before 2pm). Keep in mind that though this lakeside site is beautiful, it can also be super windy.
Floe Lake is a popular day (and overnight) hiking destination, so expect to see more people here than you may expect.
Please note that it is only possible to camp at Floe Lake from 10th July onwards due to the possibility of the campground being snowbound.
Trail navigation
The Rockwall Trail is a well established (and well used) hiking route. Almost the entire trail is dirt path, with only a few, very short, sections on an alternative type of surface (e.g. rock).
A significant amount of the Rockwall Trail is located in exposed areas so it is usually straightforward to spot the route ahead. Snow or avalanche debris may obscure some sections of the trail during the early hiking season.
Signage is placed on every major junction on the Rockwall Trail.
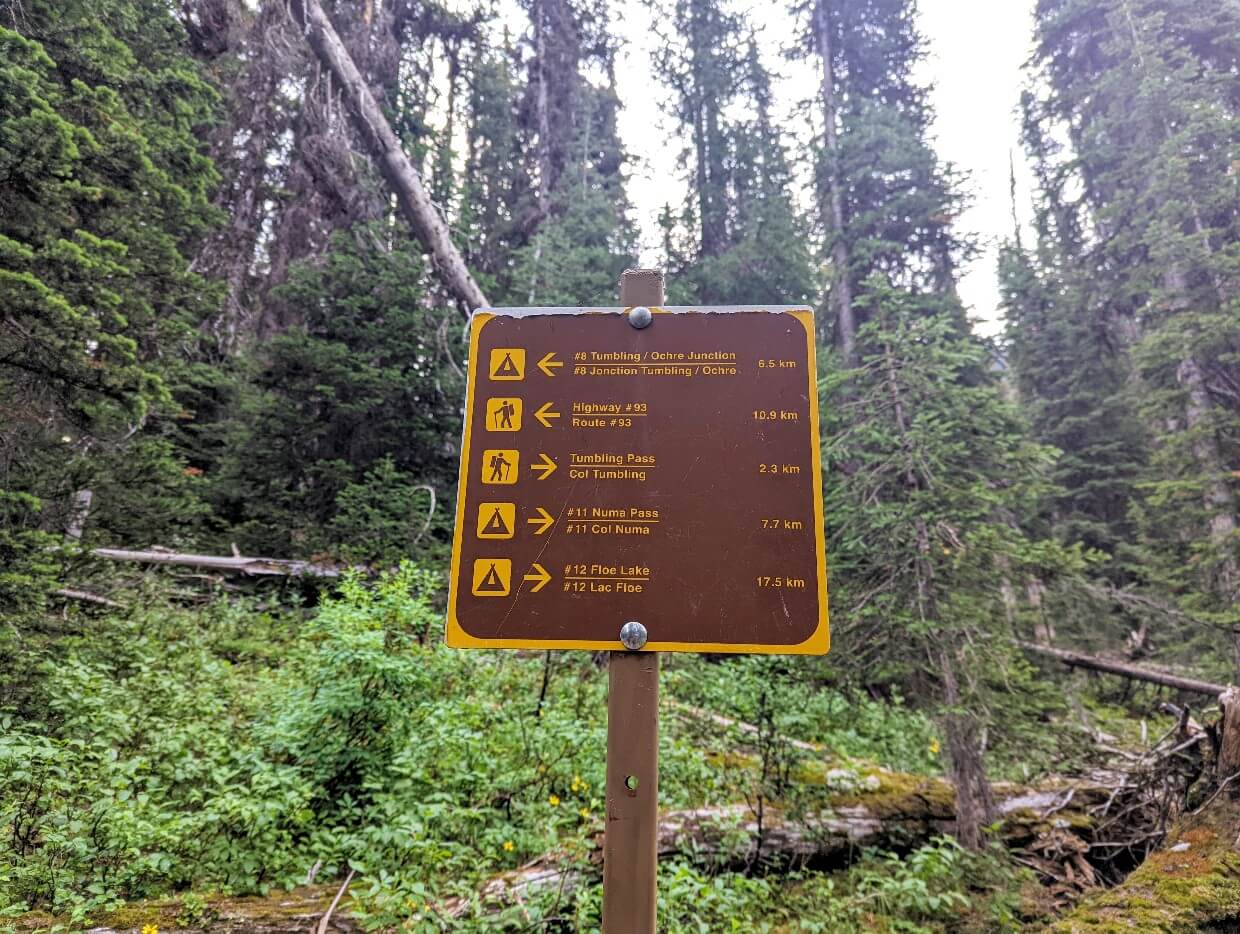
It is important to know, however, that you will never see any ‘Rockwall Trail’ directional signs. This is because the Rockwall Trail is actually a combination of six different hiking trails!
The full list is:
- Ochre Creek Trail – Paint Pots Trailhead to Helmet Ochre Junction campground
- Helmet Creek Trail – Helmet Ochre Junction to Helmet Falls campground
- Rockwall Pass Trail – Helmet Falls to Tumbling Creek campground
- Tumbling Pass Trail – Tumbling Creek to Numa Creek campground
- Numa Pass Trail – Numa Creek to Floe Lake campground
- Floe Lake Trail – Floe Lake to Floe Lake Trailhead
Funnily enough, there is very little signage along the route referring to any of those trails either.
The vast majority of signs refer to distances to campgrounds, trailheads and passes only. Be sure to be familiar with your destination each day to avoid any wrong turns!
Since the Rockwall Trail is so well established, most hikers will only use the Parks Canada’s Kootenay Trail Guide (printed or PDF versions) for navigation.
We also used the Maps.me app, mostly for checking how much more elevation we had to climb or the distance to the next campground.
Organic Maps is an alternative option, maintained by the original creators of Maps.me. It has very similar functionality, accuracy and offline maps feature.

Which way to hike the Rockwall Trail
The Rockwall Trail can be hiked in either direction – from the Paint Pots Trailhead to Floe Lake Trailhead (southbound) or vice versa (northbound).
We hiked the Rockwall Trail southbound, starting at Paint Pots and finishing at the Floe Lake parking lot. I would highly recommend that direction for these reasons:
- The hike to Helmet Falls is an easier first day experience compared to the hike to Floe Lake. While the route to Helmet Falls is longer (14km vs. 10km) the elevation gain is only 350m compared to 730m
- The hike down from Floe Lake to the parking lot makes for a relatively easy last day. Most hikers finish in about 3-4 hours. Helmet Falls to Paint Pots is more like 4-5 hours.
- Most of the southbound climbs have tree coverage (shade!) In the other direction, they are much more exposed. This is particularly true for the northbound ascent up to Floe Lake – prepare for a sweaty, hot hike in the middle of the summer
- The views are better. This is probably hotly debated but I firmly believe that the vistas are more spectacular when hiking southbound. The moment you see the Rockwall for the first time after hiking up the switchbacks from Helmet Falls campground is particularly special
- Floe Lake is a definite highlight of the Rockwall. Staying here on our last night felt like a fitting ending to the hike. We also enjoyed our first view of it being from above (rather than the shoreline)
- Less overall elevation gain. It doesn’t make a huge difference but the Paint Pots Trailhead is slightly higher than the Floe Lake Trailhead (by 97m!)
Suggested Rockwall Trail itineraries
The classic Rockwall Trail hike experience is 5 days long with overnight stops at the four main campgrounds – Helmet Falls, Tumbling Creek, Numa Creek and Floe Lake.
For a lot of people, however, the defining factor for deciding a Rockwall itinerary is the reservation system. There’s no denying it – this hike is incredibly popular and reserving your ideal routing is difficult.
As well as other Rockwall hikers, your competition is overnight backpackers and Great Divide Trail thru-hikers. Floe Lake is the hardest campground to secure as it is a very popular destination for one night trips.
Take a look at the suggested itineraries below and consider which are best suited for your group’s hiking ability and the time you have available to hike the Rockwall.
On reservation launch day, it may be necessary to compromise, so be sure to have several back-up plans.
5 day, 4 night relaxed itinerary
- Day 1: Paint Pots to Helmet Falls, 14km with 350m elevation gain and 50m loss (4 to 5 hours)
- Day 2: Helmet Falls to Tumbling Creek, 12km with 620m/490m (5 to 6 hours)
- Day 3: Tumbling Creek to Numa Creek, 8km with 330m/670m (3 to 4 hours)
- Day 4: Numa Creek to Floe Lake, 10km with 790m/300m (4 to 5 hours)
- Day 5: Floe Lake to Parking Lot, 10km with 40m/730m (3 to 5 hours)
If you have the time (and manage to secure the reservations), this is a very relaxed Rockwall trip.
With reasonably short distances and approachable elevation gain, it’s an ideal itinerary for novice backpackers, families and/or anyone who doesn’t want to rush.
We hike often and spent about 4-6 hours on the trail each day with this itinerary, stopping often to take in the views, take photos and eat snacks. I really enjoyed the relaxed pace of this routing.
Experienced or fast hikers may find this itinerary to be on the slow side. If you prefer longer trail days (or have limited time), check out the shorter itineraries below.
An alternative five day trip would include nights at Ochre Junction, Tumbling Creek, Numa Creek and Floe Lake. This would involve a longer hike on day two (Ochre to Tumbling).

4 day, 3 night itinerary (with Floe Lake)
- Day 1: Paint Pots to Helmet Falls, 14km with 350m elevation gain and 50m loss (4 to 5 hours)
- Day 2: Helmet Falls to Numa Creek, 20km with 950m/1160m (8 to 10 hours)
- Day 3: Numa Creek to Floe Lake, 10km with 790m/300m (4 to 5 hours)
- Day 4: Floe Lake to Parking Lot, 12km with 40m/730m (3 to 5 hours)
In my opinion, this 4 day itinerary is the ‘easiest’ Rockwall Trail routing of this length with an overnight stay at Floe Lake.
When I say easiest, however, this itinerary still has its challenges. Day two is the longest and most tiring (20km), with two big climbs and a lengthy downhill section to Numa Creek.
If you’re a hiker who finds distance harder than elevation gain, I would suggest looking at the next itinerary instead.
4 day, 3 night itinerary (with Floe Lake, harder alternative)
- Day 1: Paint Pots to Helmet Falls, 14km with 350m elevation gain and 50m loss (4 to 5 hours)
- Day 2: Helmet Falls to Tumbling Creek, 12km with 620m/490m (5 to 6 hours)
- Day 3: Tumbling Creek to Floe Lake, 18km with 1120m/970m (8 to 10 hours)
- Day 4: Floe Lake to Parking Lot, 10km with 40m/730m (3 to 5 hours)
While this 4 day itinerary is more difficult than the one mentioned above, it would be my personal preference for a trip of this length (including a night at Floe Lake).
I love the section between Helmet Falls and Tumbling Creek and this routing allows one full day to enjoy it. I also find Tumbling Creek to be a nicer campsite than Numa Creek.
There’s no doubt about it, however, that the third day of this itinerary will be the hardest with two significant ascents, one being very long.
Be sure to start early (before 9am) and enjoy an extended lunch at Numa Creek before continuing to Floe Lake.

4 day, 3 night itinerary (without a night at Floe Lake)
- Day 1: Paint Pots to Helmet Falls, 14km with 350m elevation gain and 50m loss (4 to 5 hours)
- Day 2: Helmet Falls to Tumbling Creek, 12km with 620m/490m (5 to 6 hours)
- Day 3: Tumbling Creek to Numa Creek, 8km with 330m/670m (3 to 4 hours)
- Day 4: Numa Creek to Floe Lake Parking Lot, 20km with 790m/1030m (7 to 9 hours)
Without a doubt, Floe Lake is the hardest campground to book. If you don’t manage to secure a spot, don’t panic. It’s still possible to hike the Rockwall.
I believe that this 4 day itinerary to be the best way to hike the Rockwall without a night at Floe Lake.
Day 4 is long, with a big climb up to Numa Pass (3 to 4 hours), a steady descent to Floe Lake (1 hour or so), lunch at Floe Lake then the final downhill section to the parking lot (3 to 4 hours).
Most hikers starting at 8am should be finished by 6pm, with breaks included.
3 day, 2 night itinerary – Rockwall loop
- Day 1: Paint Pots to Helmet Falls, 14km with 350m elevation gain and 50m loss (4 to 5 hours)
- Day 2: Helmet Falls to Tumbling Creek, 12km with 620m/490m (5 to 6 hours)
- Day 3: Tumbling Creek to Paint Pots, 10.2km with 120m/350m (3 to 4 hours)
If you don’t have the time or the stamina for a longer trip on the Rockwall, consider this short loop. It starts and finishes from the same trailhead, a factor that makes transportation easy.
This condensed route includes what I personally believe to be one of the most beautiful sections of the trail (Rockwall Pass).
This loop could be hiked in either direction, but I think it is more visually spectacular counter-clockwise, as listed above.
If you’re a fast or strong hiker, consider a detour up to Tumbling Pass to see the Tumbling Glacier before heading back to Paint Pots.
Another idea would be to spend another night at Tumbling Creek to have time for this side trip.
Wildlife on the Rockwall Trail
Kootenay National Park is home to a variety of mammals and more than 180 species of birds.
Both grizzly and black bears roam this area, with grizzlies more commonly seen. We spotted a grizzly while hiking Rockwall Pass.
Negative wildlife encounters are rare on the Rockwall Trail. Parks Canada promotes coexistence and there are a few things hikers can do to help:
- Make noise while hiking. This alerts wildlife to your presence and gives them a chance to avoid you. As a general rule, animals don’t want to be close to humans
- Leave No Trace. After eating, make sure you haven’t left any food or wrappers at your location
- Store food properly. Not only is feeding animals is illegal but it can be deadly for them too. This includes accidently feeding wildlife as well. Use the provided food caches and bear hangs at the campgrounds to store food, cooking equipment and smelly items when not in use
- Give wildlife space. If you do see any animals, keep your distance – ideally 100m or more. This offers them an escape route
- Know what to do if a bear approaches you. Always remain calm. Depending on the behaviour of the bear, different techniques are required (read our bear safety post for more info)
- Carry bear spray. An aerosol deterrent made with chili pepper oil, bear spray is a ‘last resort’ tool intended to be used only when other methods have failed
As a side note, expect to see mosquitoes in the campgrounds in July and August. They become more prevalent around sunset. We didn’t see any on the actual trail and very few in the campgrounds in mid/late August. More annoying were the horse and deer flies (yuck!)
Safety information
While the Rockwall Trail may be a well travelled route, it is located in remote mountainous terrain:
- Weather conditions can vary and change quickly. Snow is possible at any time of year
- There may be snow on the trail until mid July, sometimes even later
- Some sections of the hike are very exposed, with no trees for shade or cover. Hikers should know what to do in the event of a lightning storm
- The trail travels through avalanche paths and early season hikers should be prepared to see and climb over blown down trees and other debris
- Some areas of the path may become slippery in wet weather. Watch your step and don’t rush
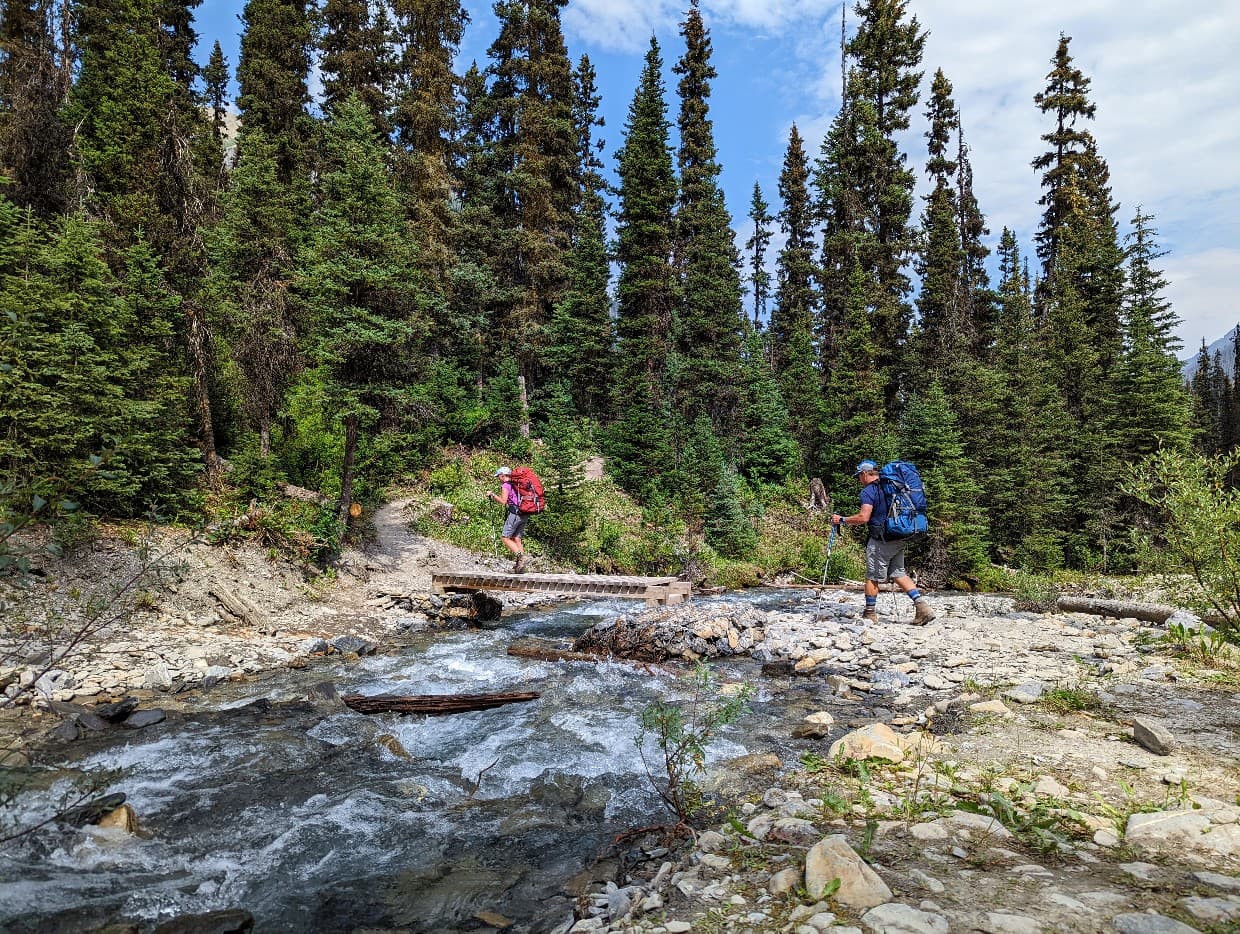
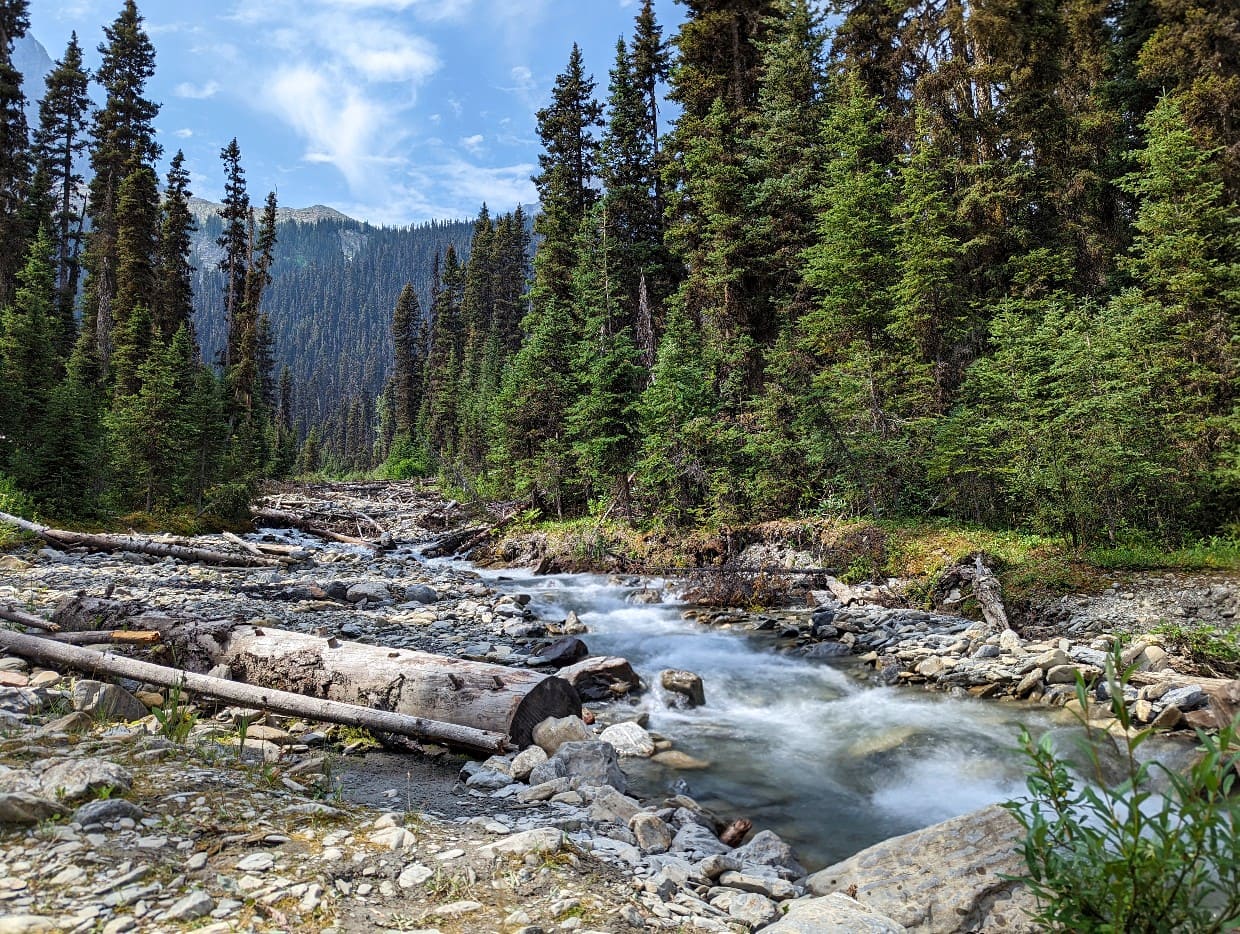
- There are a number of river crossings along the route. The smaller creeks will require rock-hopping.
- Larger rivers have bridges. These can become damaged over the winter and temporary structures (such as tree logs) may be used instead
- Besides these hazards, it’s also important to be aware of wildlife, particularly bears (see previous section)
- Look (and listen) for wasp nests, particularly on the Paint Pots to Helmet Falls section. In 2022, there were a number of wasp nests on bridges and also next to the trail. Keep antihistamines handy
- There is no phone signal anywhere on the Rockwall Trail. Tell someone where you’re going and when you plan to be back (check out our outdoor safety guide for more tips). We carried an InReach device in case of emergencies
- Always purify water before drinking. On this trip, we utilised a gravity hydration bladder system with the MSR Thru-Link In-Line Microfilter

Water access
All five of the campgrounds on the Rockwall Trail have reliable sources of water, with a large river or strong creek running close to the tent pads.
Access to water is more variable on the Rockwall Trail itself:
- Paint Pots to Helmet Falls: Multiple river and creek crossings throughout. Two of the most convenient access points are 6km (Helmet Ochre Junction campground) and 12km from Paint Pots (Helmet Creek)
- Helmet Falls to Tumbling Creek: Water access is pretty limited, with the exception of one section featuring tarns, rivers and creeks located 5km-5.8km from Helmet Falls. There is a seasonal stream near Wolverine Pass as well (it had a very light flow during our hike)
- Tumbling Creek to Numa Creek: A small creek runs alongside the trail around the 3km mark. Multiple creek crossings on descent, 5km after leaving Tumbling Creek
- Numa Creek to Floe Lake: The trail crosses Numa Creek twice before heading up to Numa Pass. Beyond that, there are no reliable water sources until Floe Lake
- Floe Lake to parking lot: No reliable access to water until Floe Creek crossing at 8km mark. Seasonal creek/run-off at 2.7km but may not be running throughout the summer. Very exposed trail – bring plenty of water

Rockwall Trail packing list
As well as all of your regular backpacking gear and the 10 Essentials, I would recommend bringing the following items when hiking the Rockwall:
- Bear spray. With black bears and grizzly bears all roaming the area around the Rockwall Trail, it’s a good idea to carry bear spray ‘just in case.’ Keep it in a convenient place, close enough to access quickly. I’d recommend using a holster like this
- Hiking poles. We shared one pair of hiking poles, mostly utilising them for descents and ascents. Our Black Diamond’s Carbon Z poles weigh less than 300g
- Antihistamines. As mentioned in the hazards section, wasp nests are commonly seen between Paint Pots and Helmet Falls. Bring plenty of antihistamines in case someone in your group is stung (I heard about a hiker getting stung a dozen times by one nest)
- Head net. If you’re hiking the Rockwall before the end of August and are easily irritated by deer/horse flies, you may want to bring a head net. On hot days, these annoying creatures are prevalent in the campgrounds
- Insect repellent. We didn’t have too many issues with mosquitoes in mid/late August, but they can be prevalent in the campgrounds earlier in the summer (especially around sunset)
- Printed permit. Make sure to bring a printed copy of your Wilderness Pass (camping permit), just in case you run into a Parks Canada Ranger or staff member
- Sun hat. Significant sections of the Rockwall Trail are pretty exposed. Wear a sun hat for extra protection, along with sunscreen (we like JustSun mineral sunscreen – natural, not greasy and made in Canada)
- Tried and tested shoes. While this isn’t the hardest hike in the Rockies, you’ll want to wear some tried and tested footwear
Our complete packing list
Backpacking is all about balance – keeping your pack weight low while still ensuring you have everything you need to be self sufficient and comfortable.
Keep in mind though, that the lighter you pack, the easier (and likely more enjoyable) the actual hiking will be.
Our packs weighed 27lb (Gemma) and 30lb (JR) when starting the Rockwall.
Here are all the items we carried:
- Backpack – (Osprey Aura AG 65 for Gemma, Osprey Aether 65 for JR)
- Waterproof pack covers
- Tent (Big Agnes Copper Spur 3)
- Tent footprint
- Sleeping bag
- Sleeping pad
- Hiking boots (we both use Salomon Quest 4D)
- Stove (Jetboil MiniMo)
- Fuel (110g isobutane propane)
- Cup (GSI Infinity Backpacker Mug)
- Bowl/plate (we use a folding bowl)
- Utensils (2 x long spoons like this)
- Cleaning supplies (CampSuds and tiny scrubber)
- Food storage container (we used a dry bag)
- 12lb of food (see below for more details)
- Clothing (see below for more)
- Water filtration (MSR Thru-Link with Aquatabs as backup)
- Water storage (2 x 2l Osprey bladders)
- Communication device (InReach SE+)
- Headlamp (Petzl Actik headlamp with rechargeable battery)
- First Aid kit with Leukotape for blister prevention
- Sunglasses and sunscreen
- Insect repellent
- Knife (this one)
- Emergency matches
- Tenacious tape (for repairs)
- Toilet paper and hand sanitizer in Ziploc bag
- Camera (Pixel 6 Pro)
- Portable battery charger and phone cable
- Bear spray
- Bear horn
- Camp shoes (I love my Teva sandals)
- 5 Dice Game (Yahtzee)
- Printed permit and map
- Vehicle keys and ID
For food, we dehydrated all of our own dinner meals. On this particular trip, we ate a different pasta meal every night. Breakfast was granola with powdered milk. We usually eat wraps for lunch, with fruit, nuts and various snacks (wasabi peas, energy bars, sesame snaps etc.)
My Rockwall wardrobe included:
- 2 x merino t-shirts
- 2 x merino long sleeve shirts (I used one to sleep in)
- 1 x pair of quick drying pants
- 1 x pair of merino wool base layer pants (long johns)
- 2 x pairs of shorts
- 5 x pairs of underwear
- 2 x quick drying sport bras
- 3 x merino wool socks
- Arc’teryx Atom LT Jacket (mostly used as an outer layer)
- Arc’teryx Beta Jacket (waterproof)
- Wool toque
- Light gloves
- Buff neck gaiter
Where to stay before/after hiking the Rockwall Trail
Most hikers spend at least one night close to the Rockwall Trail before starting and/or another night after finishing.
Here are my recommendations for accommodation and camping in and around Kootenay National Park.
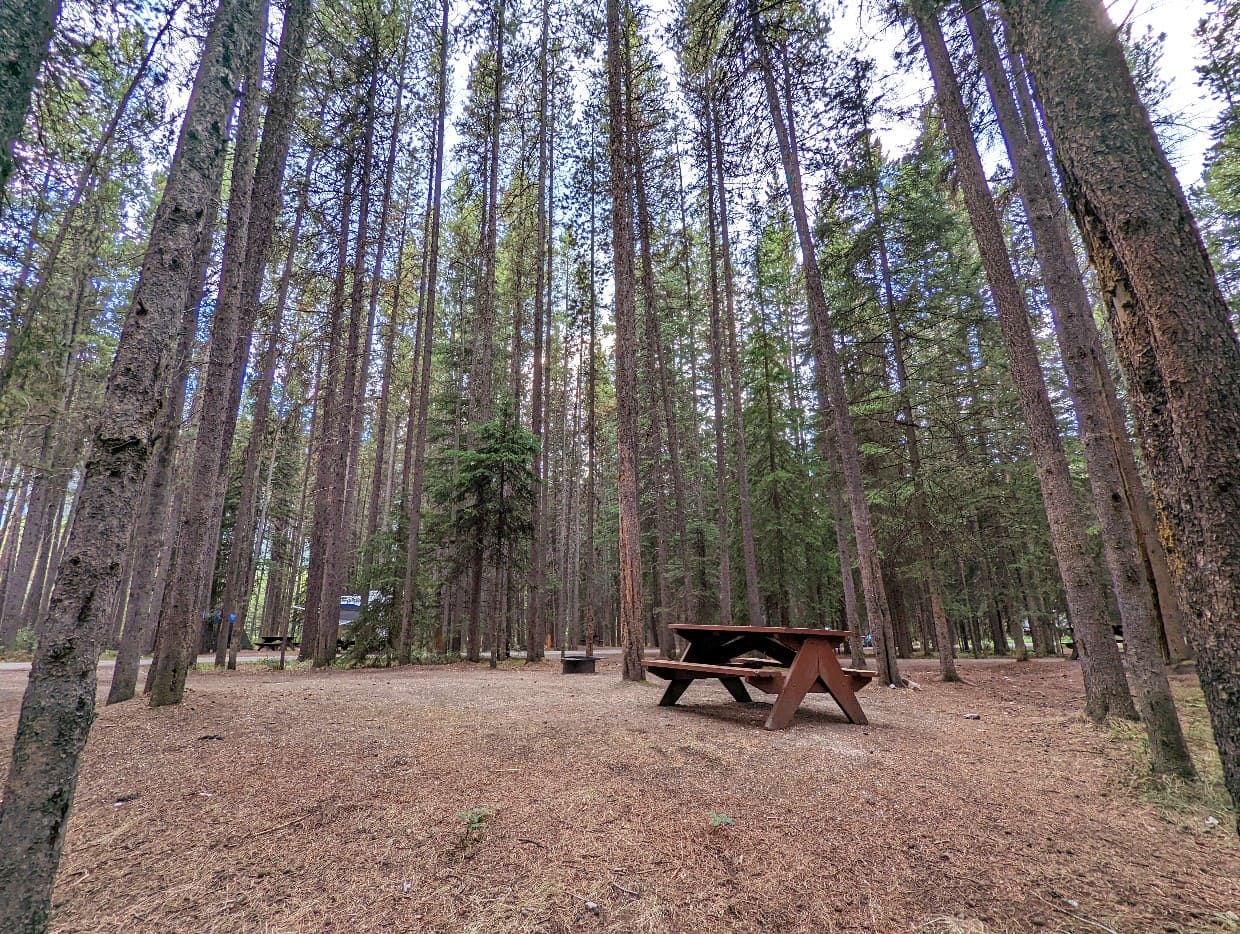
Marble Canyon Campground, Kootenay National Park
Marble Canyon is the closest frontcountry campground to the Rockwall Trail. It is located less than fifteen minutes drive to both primary trailheads.
The sites are generally small, though some offer views of the surrounding mountains. There are flush toilets but no showers. We stayed here before our hike. Reservations recommended.
An alternative to Marble Canyon is McLeod Meadows. Situated further south, it is a 25 minute drive from the Floe Lake Trailhead. Like Marble Canyon, the sites are pretty small and there are no showers.

Johnston Canyon Campground, Banff National Park
Looking for a shower before/after your hike? The closest frontcountry campground with showers is at Johnston Canyon in Banff National Park.
Johnston Canyon is an easy 25 minutes drive (27km) from the Paint Pots trailhead. The campsites are large with plenty of space for more than one tent.
We stayed at Johnston Canyon after finishing the Rockwall. There’s a (pricey) restaurant ten minutes walk from the campground.
Redstreak Campground, Kootenay National Park
If you’re travelling to/from the Rockwall from the south, consider a stay at Redstreak Campground in Kootenay National Park.
This large frontcountry campground has showers and is also is very close to the hot springs in Radium (extra charge). There is a grocery store in town, plus a brewery and half a dozen restaurants.

Storm Mountain Lodge & Cabins
Treat yourself after your Rockwall hike with a stay at Storm Mountain Lodge and Cabins. This 100 year old property is set on five acres of land in Banff National Park, just 10 minutes drive from Paint Pots.
The historic log cabins are spaced for privacy and feature wood burning fireplaces, antique soaker tubs as well as other luxurious touches. Spectacular views of the surrounding mountain ranges can be seen from some of the cabins.
Gourmet dinners are served in the main lodge, with the menu showcasing local produce and organic ingredients.
HI Castle Mountain Wilderness Hostel
If camping for another night doesn’t appeal but your budget is limited, consider a stay at the HI Castle Mountain Wilderness Hostel.
Only 15 minutes drive from Paint Pots, this hostel is very conveniently located for the Rockwall Trail. Prices are around $45 for one bed in a 14 person male or female dorm (linen included).
Travelling Canada and concerned about leaving valuables in your vehicle while hiking the Rockwall? This hostel offers luggage storage so you can hike with peace of mind.
Radium Chalet, Radium Hot Springs
While Banff is the closest town to both of the main Rockwall trailheads, Radium Hot Springs provides a better choice of affordable accommodation options.
For a stay with a view, check out Radium Chalet. This property is perched on top of a hill behind Radium, providing guests with amazing panoramas of the Purcell Mountains. The family suites, featuring two floors and three sleeping spaces, provide great value for groups.
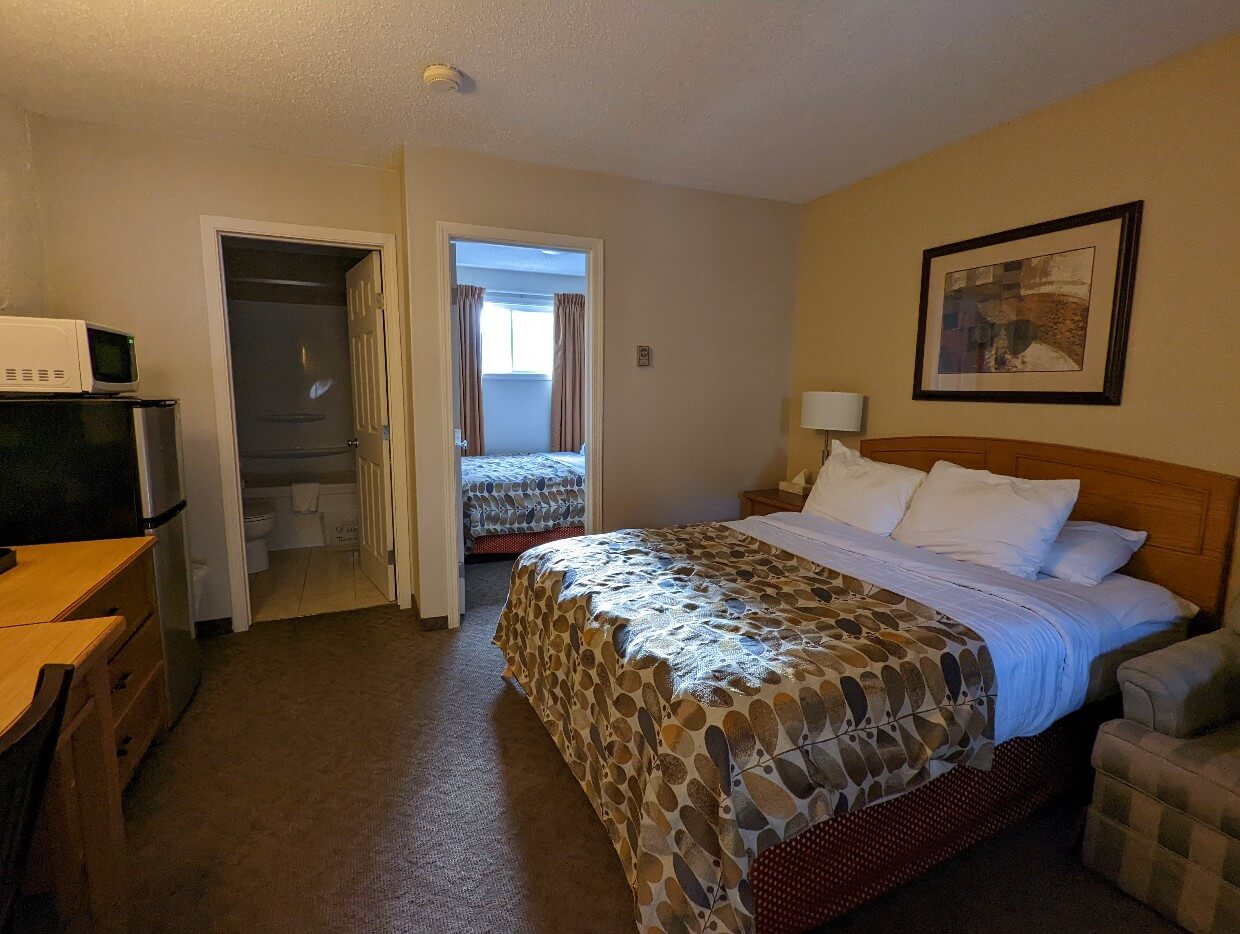
We have also stayed at Crystal Springs Motel while visiting Radium Hot Springs. This motel is on the basic side but the pricing is fair. Located on a side street, it’s also quieter than other nearby alternatives.

Check out these other BC Rockies backpacking guides next:
Floe Lake Trail, Kootenay National Park
Mount Assiniboine Provincial Park
Lake O’Hara, Yoho National Park
The Great Divide Trail
The Iceline Trail, Yoho National Park
Eva Lake, Mount Revelstoke National Park


One half of the Canadian/British couple behind Off Track Travel, Gemma is happiest when hiking on the trail or planning the next big travel adventure. JR and Gemma are currently based in the beautiful Okanagan Valley, British Columbia, Canada. Consider buying us a coffee if you have find any of our guides helpful!
Now that I have read this article, I will definitely be adding The Rockwall Trail to my list of must-do hikes! I love that the author provided information on when the best time to hike here along with details regarding how to reserve the trail and what fees are associated with backcountry camping. Overall, this guide is incredibly detailed and informative, making it easy to plan a hike at the Rockwall Trail.
Thanks Dhiren!
Thank you for this in depth article on the Rockwall trail. I have just made reservations for a 4 day (3 night) backpacking trip and cannot wait to hike this trail. You answered all my questions so far! Great blog, appreciate all the detail.
Hi there,
Congrats on securing reservations for this awesome trail! I hope you have a wonderful adventure and I’m glad this guide could help!