Vanlife has been our travel style for almost a decade. We like to travel slow, taking our time to discover places beyond the beaten path and experience the beauty of nature.
The easiest (and cheapest) way we’ve found to do this is to travel in a van. This was especially true when we decided to travel full time from 2017-2020 as digital nomads.
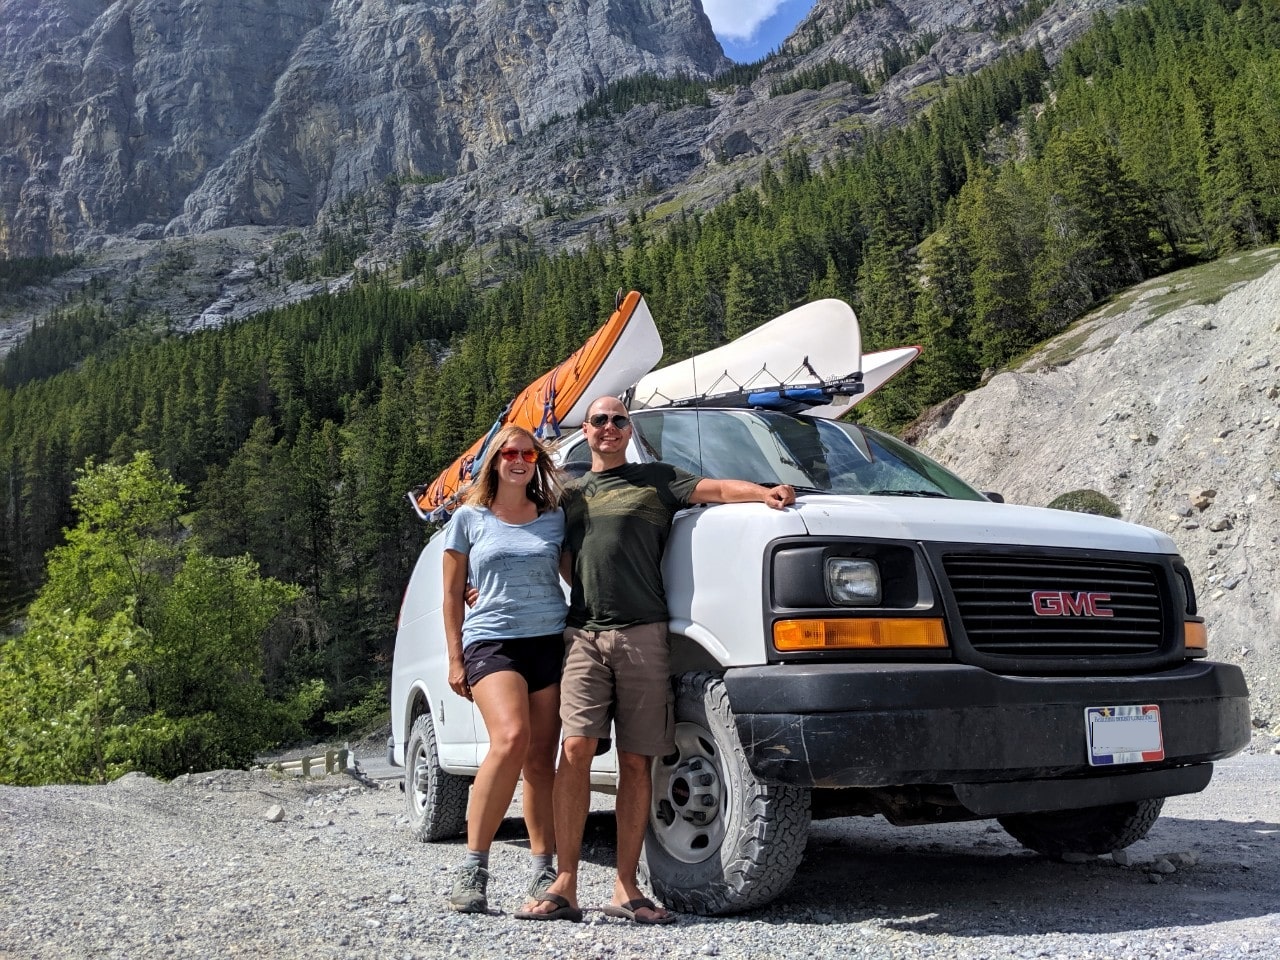
‘Hanna’ the Savana is our current DIY adventure van. A 2005 GMC Savana (2500 size) van, it took us over a year to find her, finally making the purchase in 2017. After quite a big transformation, we have the van home we’ve always dreamed of.
Hanna the Savana is actually our third DIY van conversion. The first was a Toyota Lucida which we took for an epic three month trip from the UK to Turkey and back, via 18 different countries.
The second was our beloved Chevrolet Astro van, which we used for years and many trips in Western Canada. It even took us beyond the Arctic Circle and back.
Find out all the details of our GMC Savana van conversion below, including an inside tour and cost breakdown.
Construction diaries for this van conversion can be found here:
Building a temporary bed: Update 2
Crossing Canada in Winter: Update 4
Starting the real conversion: Update 5
An almost finished van: Update 6

This post includes affiliate links. If you make a qualifying purchase through one of these links, I receive a percentage at no extra cost to you. I only recommend products I use and love.
Designing our Van Conversion
The design of our van conversion was not something we decided quickly. It was a work in progress for months before the build even started.
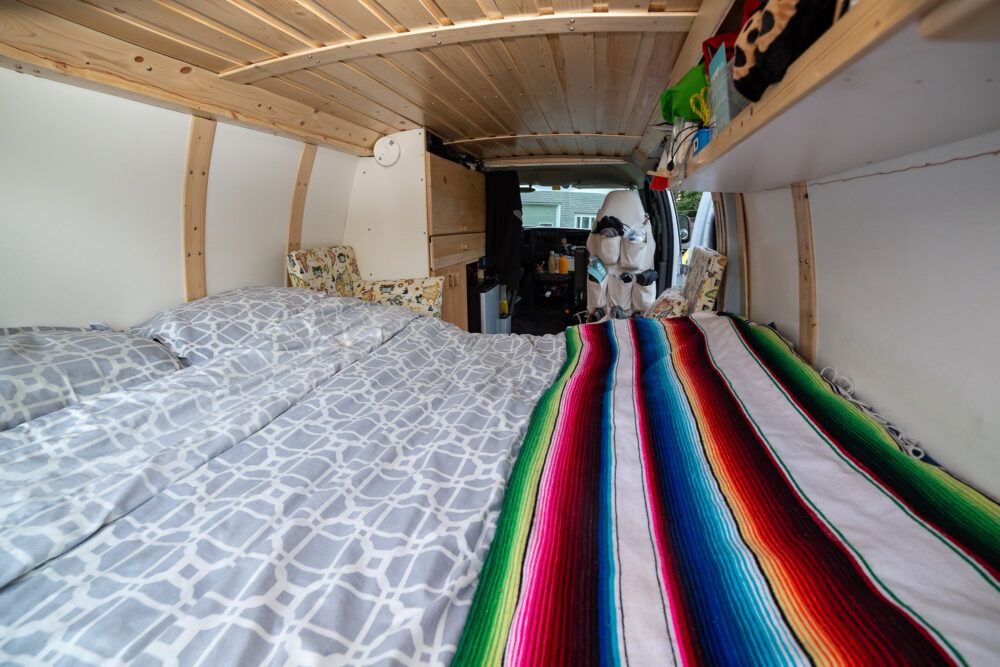
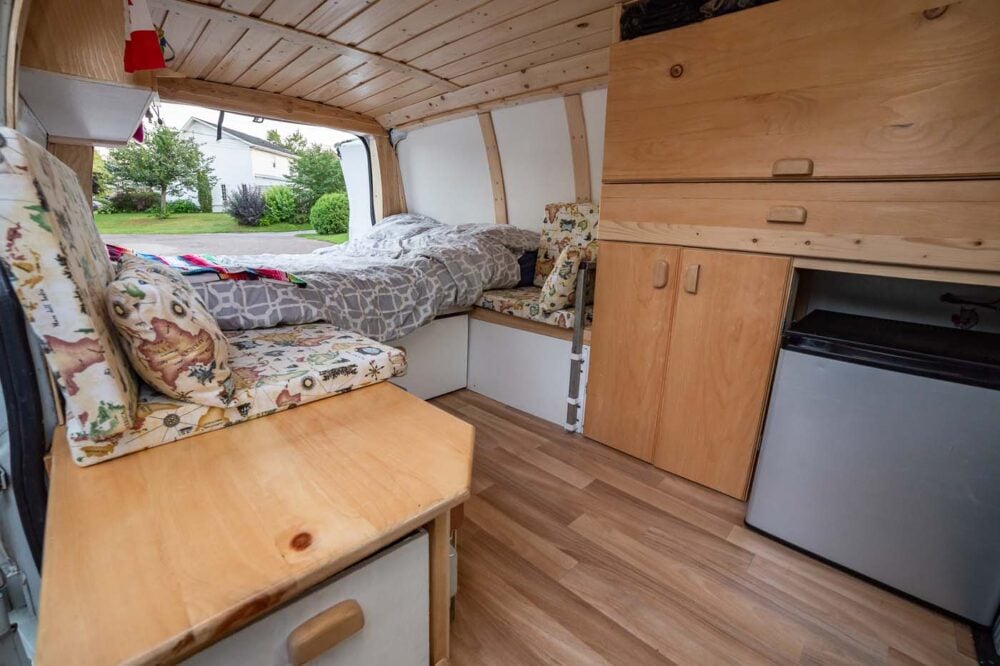
We always knew that the bed would be horizontally placed at the back of the vehicle (as in our last conversion), but it was the positioning of the storage cabinets, seating area and cooking space that was the most debated.
- Our biggest priorities for this conversion were storage and usability. We have a lot of outdoor hobbies (paddling, hiking, climbing, snowboarding etc) and it was imperative that we had enough space to store this equipment plus our own personal items.
- To this end, most of our outdoor gear is stored in a large drawer at the back of the vehicle. This way, space inside the van is prioritised for personal items used more often.
- Second, we needed a space that would work in both dry and rainy weather – it had to be possible to work, cook and live inside comfortably when necessary. The key to this has been our kitchen counter
- Placed by the door, the kitchen counter enables us to cook both inside and out and also use it as a seating area when needed. Kitchen equipment is stored in the cabinet underneath.
- For working inside, we have a table attachment in front of one seat. The table’s flat surface is stored underneath the bed.

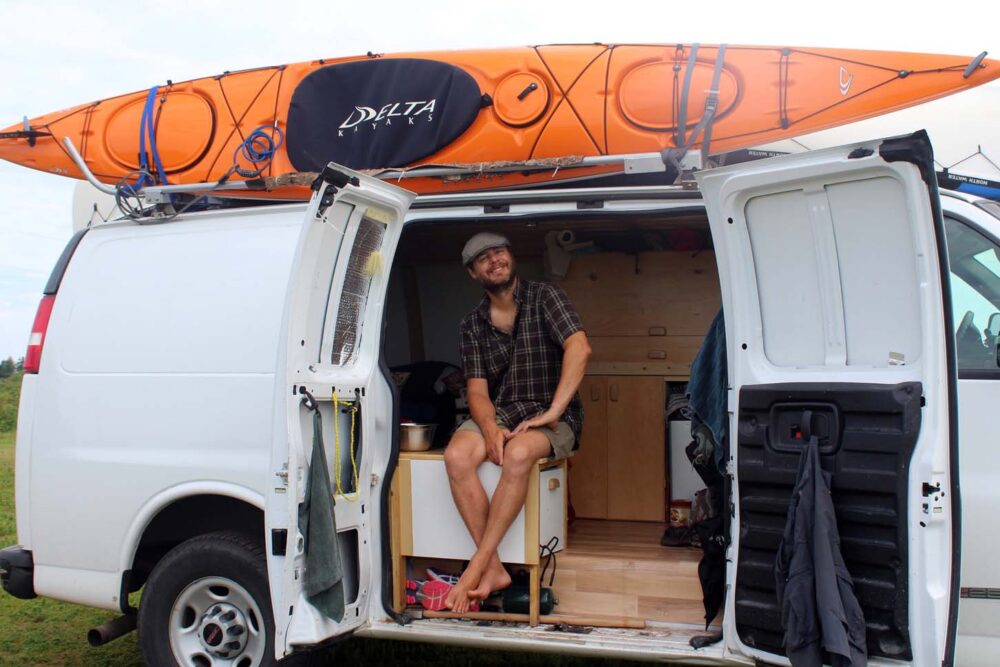
A tour of our DIY GMC Savana van conversion
Check out the photos below for an inside look of our Savana van conversion. Of course, we make little changes all the time as we continue to travel but this offers a good overall look.
Post-conversion photos taken in August 2018, courtesy of Guillaume Hébert

Special features of our van conversion
Just as with any other type of living space, our van reflects who we are as people. This is definitely not a cardboard cut out van conversion. For this reason, there are a few features that are unique to our van.
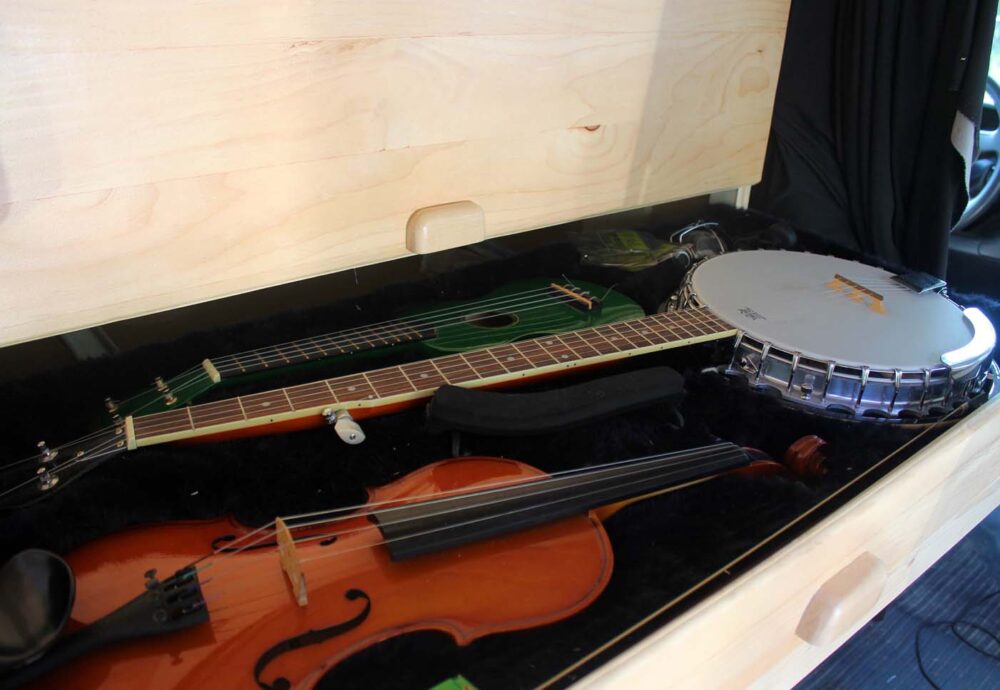
The first of these is a music drawer, above our pantry and below my wardrobe. Molded cut outs for our banjo, violin and ukulele are lined with fake fur to prevent damage and movement.
The banjo and ukulele get far more use than my old violin, which JR begs me to teach him how to play (so far, he has learned ‘Happy Birthday’).
The second special feature is the van’s wooden ceiling. Taking around two weeks to make from start to finish, it is made from spruce trees from JR’s dad’s land in northeastern New Brunswick.
The panels of wood have been planed, shaped, sanded, varnished and then fastened to the ceiling in layers. Not only is it pretty beautiful to look at, but the smaller, unattached pieces allow for movement and swelling of the wood.


The total cost of our DIY GMC Savana van conversion
Our van conversion was built on a low budget, though we did splurge on a few aspects that were most important to us.
And, of course, the budget overran a little. Here are the approximate costs for our DIY Savana van build, in Canadian dollars.
2005 GMC Savana 2500 Van – Purchased for $9000 in British Columbia, plus $1000 taxes
Plywood for walls and floor – $200
Laminate flooring – $90
Insulation – $200
Paint and varnish – $160
Miscellaneous screws and fixings – $75
Drawer slides – $60
Hinges for storage cabinets – $30
Rubber and metal fitting for entrance step – $30
Koolatron AC/DC fridge – $350 (*we removed this in 2020)
Deep cycle marine battery – $350
2 x 75W solar panels – $200
Solar system control panel – $25
Miscellaneous fuses and hardware for solar system – $20
Welded aluminium frame for solar panels – $150
Material for passenger seat shoe storage – $20
Total spent on van conversion was $1,960 + initial van purchase of $10,000 = $11,960


Gifted items
We were lucky enough to receive some items as gifts. This included the foam for the cushions as well as the covering material. The shoe holder on the back of the passenger seat was made for us by a friend, as were the cushion covers.
Some of the fittings and fixtures came to us for free or were re-purposed from items we already had, such as the ceiling wood and the bed mattress (an old futon).
If you were looking to recreate this van design yourself, the estimated cost would be approximately $3000.
Manual labour
JR spent three periods of around two weeks working to convert the van, equaling a total build time of around six weeks.
He received some assistance from family (thank you!) and also had the use of his father’s tools and shop equipment. For reference, JR has no professional or formal woodworking or building experience.
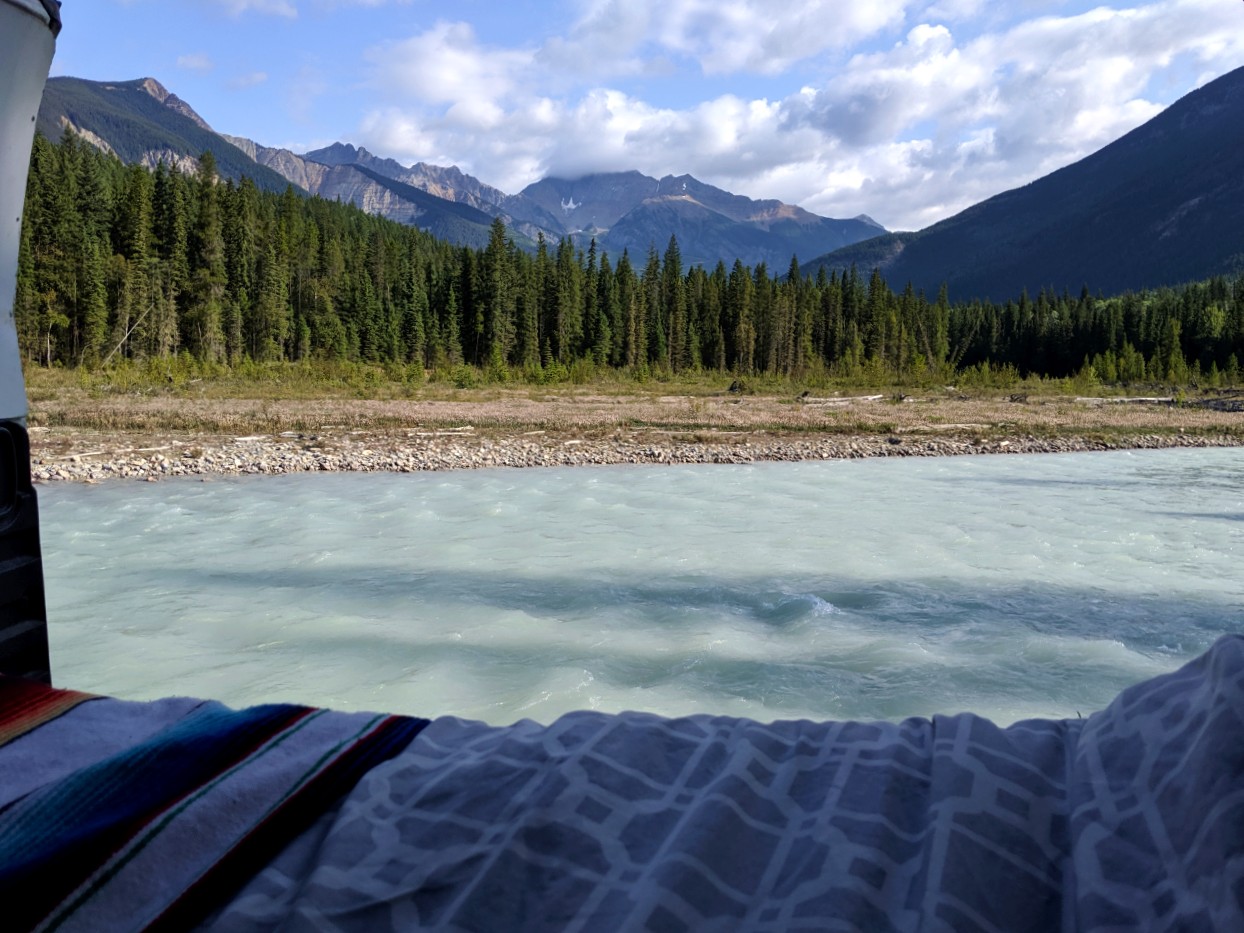
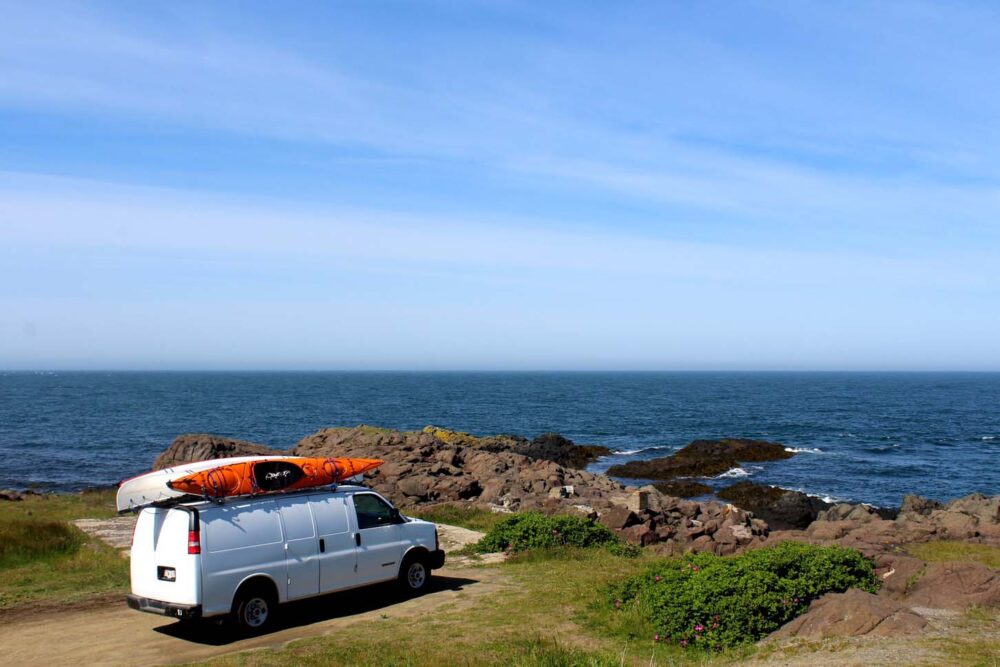
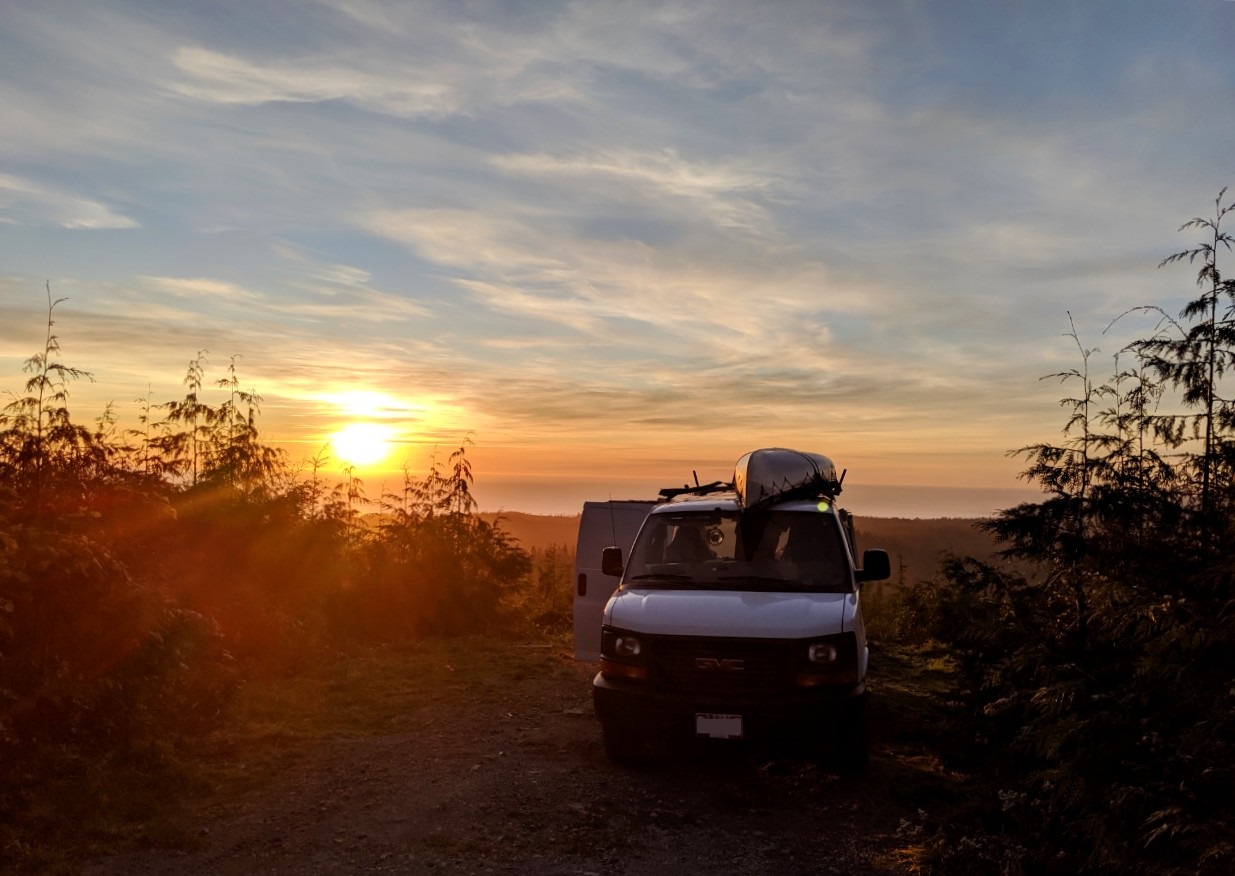
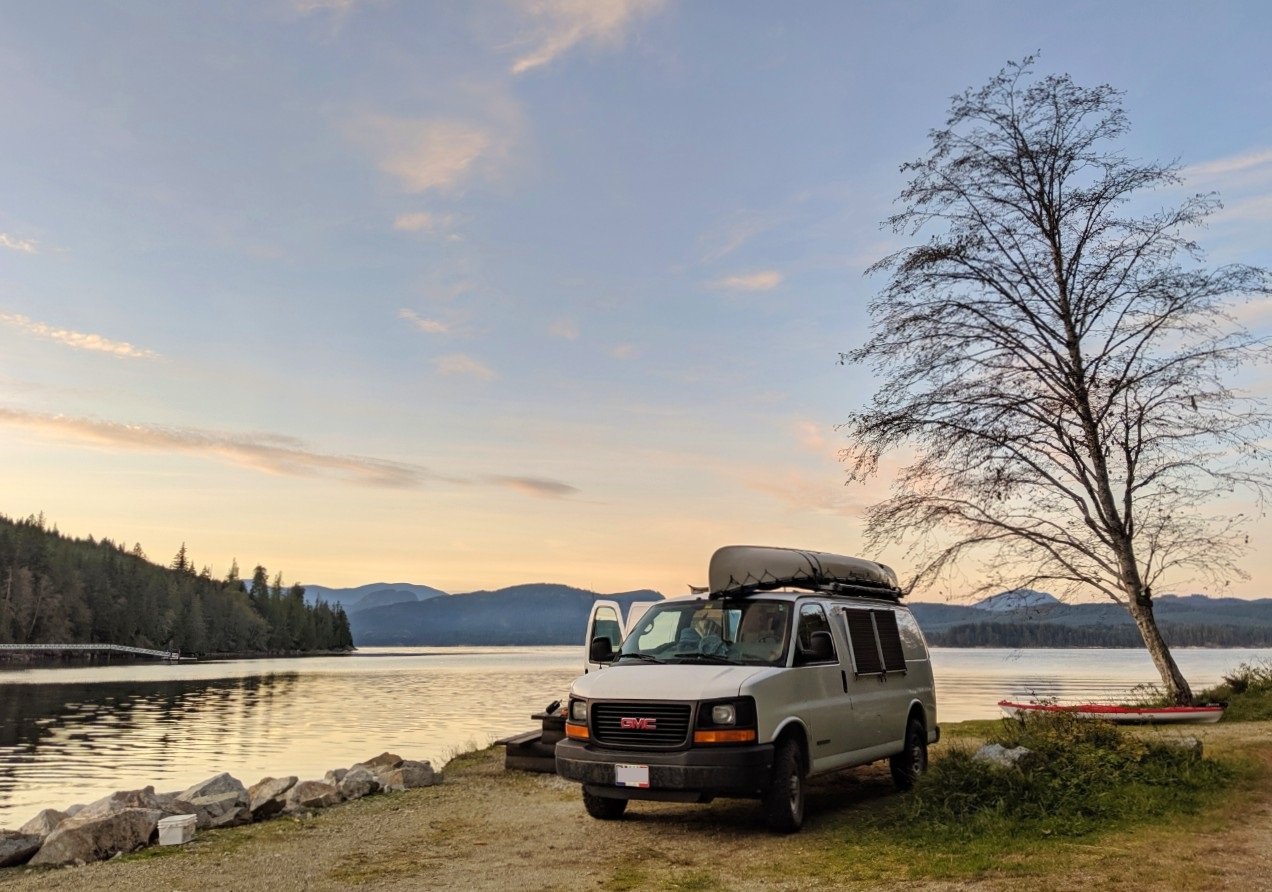
Testing the van: Our first big road trip
Our inaugural van trip featured five months of travelling around New Brunswick, PEI, Nova Scotia, Quebec and Ontario in Canada.
As the colder weather started to creep in, we headed to British Columbia with a two week road trip through the USA. All in all, we covered around 20,000km in the van. Check out some of our favourite camp spots below.
The van performed fantastically throughout the trip, though we did make some improvements around the half way mark. This included adding a shelf above the bed for day to day item storage plus a custom built shoe holder on the back of the passenger seat.
We also decided to attach the solar panels to the driver’s side of the van with the help of a welded aluminium frame. Our solar system works a lot better now, especially when driving west.
The last major improvement was the purchase of BFGoodrich KO2 All Season Tires (an extra $1200) before leaving New Brunswick.
We had the previous version of these tires on our last van and were always impressed by their capability and seemingly everlasting tread.

GMC Savana van conversion: disadvantages
There are two downsides to this GMC Savana van conversion. First, our Savana is rear wheel drive, meaning that it is not ideal to drive in snowy or icy conditions
Second, it can be hot to sleep in. There is no air conditioning and we ran out of time to add ventilation. That is our next project!


Check out these other van posts:
The Complete Guide to Finding Free Camping in Canada
25+ of the Best Campgrounds on Vancouver Island
How to Camp For Free in British Columbia
Three of the Best Places to Camp on the Gaspe Peninsula, Quebec
11 of the Best Campgrounds in Nova Scotia


One half of the Canadian/British couple behind Off Track Travel, Gemma is happiest when hiking on the trail or planning the next big travel adventure. JR and Gemma are currently based in the beautiful Okanagan Valley, British Columbia, Canada. Consider buying us a coffee if you have find any of our guides helpful!
We have the same van we’re building out! Love yours!
What size mattress do you have ? Thanks!
Hi Sarah,
Thanks so much! The bed frame is 6 by 4 feet. The mattress is a standard futon mattress (roughly 75″ x 54″ x 6″). It’s a little larger than the actual bed frame but it squishes enough to make it work. It was a cheap option for us at the time since we were moving out of our house but it turned to be pretty comfortable!
Good luck with your van build
Fantastic to see, I did a similar trip but in my Venza SUV, I wish I would have known about free camping areas.
Looks like a great ride.
Was wondering why you ended up removing the fridge?
Good question! The details are in this van conversion evaluation post here