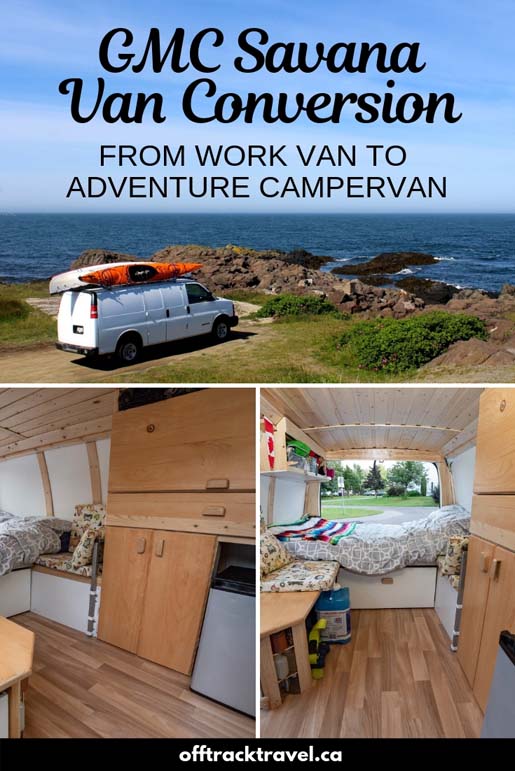
The biggest update to our GMC Savana DIY van conversion journey yet!
In just over two weeks, our van really became liveable with a proper ceiling, cupboards, under bed storage, seating, solar panel system and more. JR managed to get an incredible amount done in such a short period of time.
But in classic van building style, the conversion wasn’t quite done. A few finishing pieces here and there were missing, although nothing truly essential. We have also learned from experience that it is best to have something of a trial to test what works and what doesn’t.
So after this stage, we travelled in the ‘almost finished’ van for two months, exploring Canada’s Nova Scotia and Prince Edward Island provinces. I’ll talk more about the results of this trial next time! For now, here’s a look at the big changes.
There are affiliate links in this post. If you make a qualifying purchase through one of these links, I may receive a small commission at no extra cost to you.

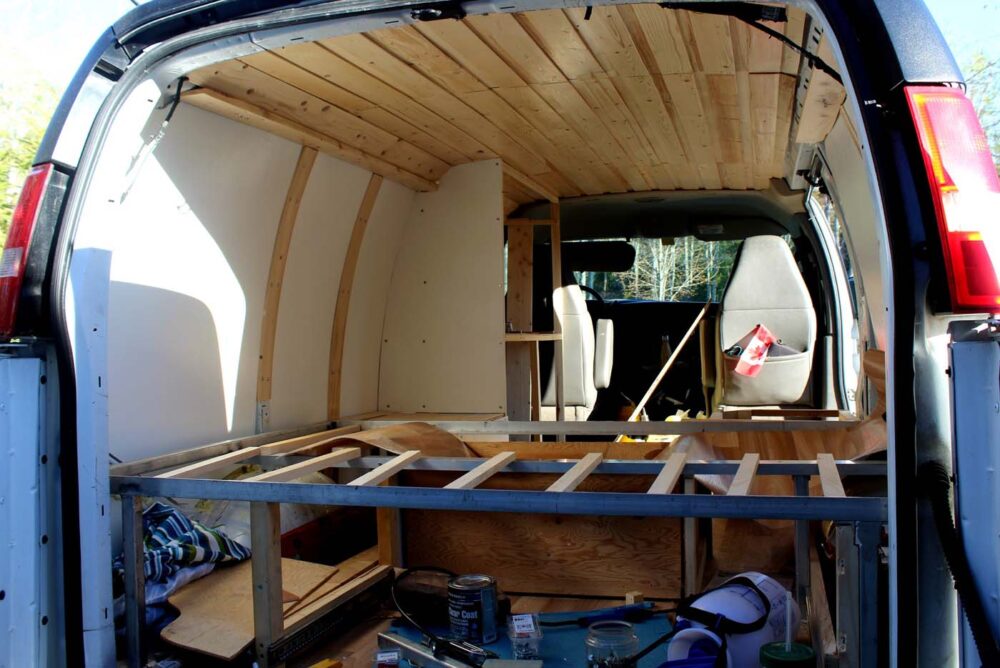
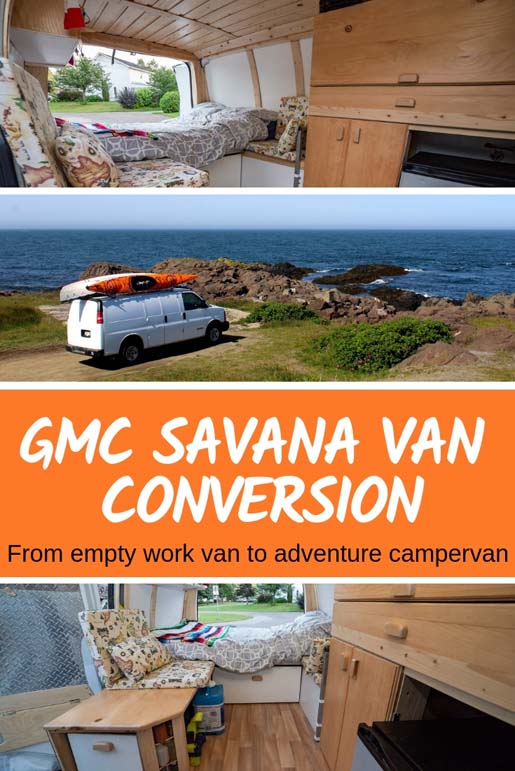
Our DIY GMC Savana conversion van ceiling
The van’s ceiling is something we are especially proud of. Not only does it look great and have a personal connection to us (the spruce wood was grown on JR’s dad’s land) but it has practical functionality too.
It may be hard to tell on first glance, but the ceiling has two levels of wooden slats, with the narrower (and thinner) part simply resting on top of the wider slats.
This means that even if the wider slats expand or contract with cold/hot temperatures, we won’t end up with a ceiling full of gaps. Constructing this ceiling was difficult. It took hours and hours of sanding and varnishing plus half a day to put together (with a two-man team, thanks JR’s dad).
Underneath the slats is a layer of insulation foam panels, affixed with insulation foam, as seen in the last update.


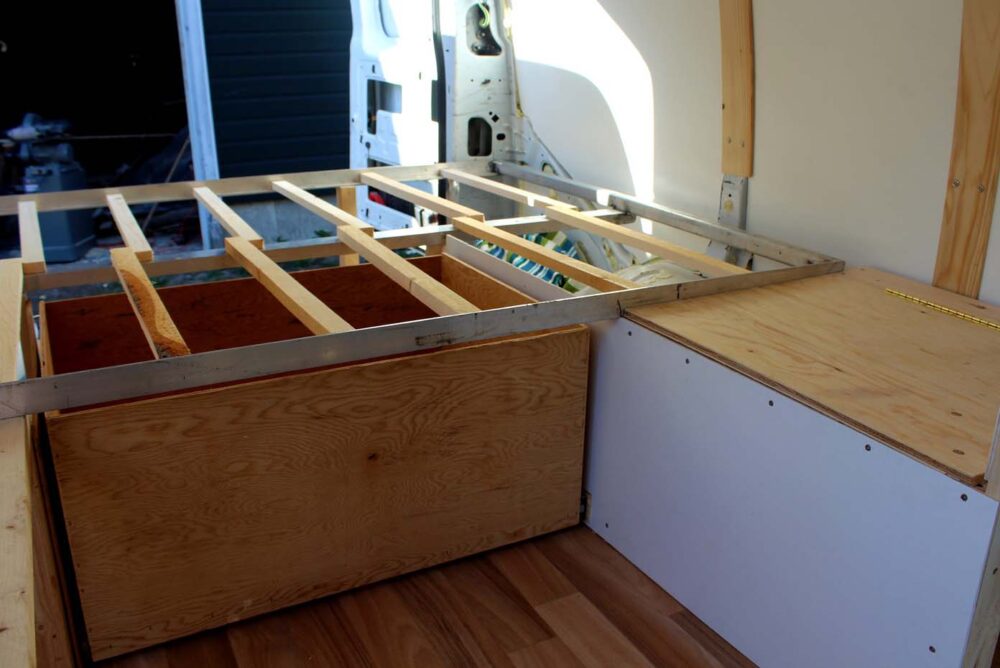
GMC Savana under bed storage
One of the most important considerations when designing this van was the under bed storage. We have a lot of hobbies and having enough space for all of the required equipment for these hobbies is important. This was one of the major reasons we upgraded to a Savana from our old Astro van conversion.
We came to the conclusion that everything we use regularly (clothing, personal items) should be accessible from inside the van, and the remainder (mostly outdoor gear) from the back. The logic was right, but it proved a little tricky to implement.
The biggest issue was our two snowboards and bulky winter gear. The original plan was to build two drawers at the back for all of our outdoor equipment but there was no way that would work with the snowboards.
Instead, JR built one large drawer on a slider (rated to 100lb) and left the space alongside as a long, open storage place for awkwardly sized outdoor equipment.

Inside accessible storage drawers
Over on the other side of the bed is another large drawer (again with a 100lb rated slider) that contains clothing and personal items. The remaining under bed storage is only accessible via lifting the hinged bed panels.

This storage is only used for items we rarely use or need to access. One of these items is the solar system battery (more on this later). The handles on both of these large drawers are handmade by JR and match the cupboards.
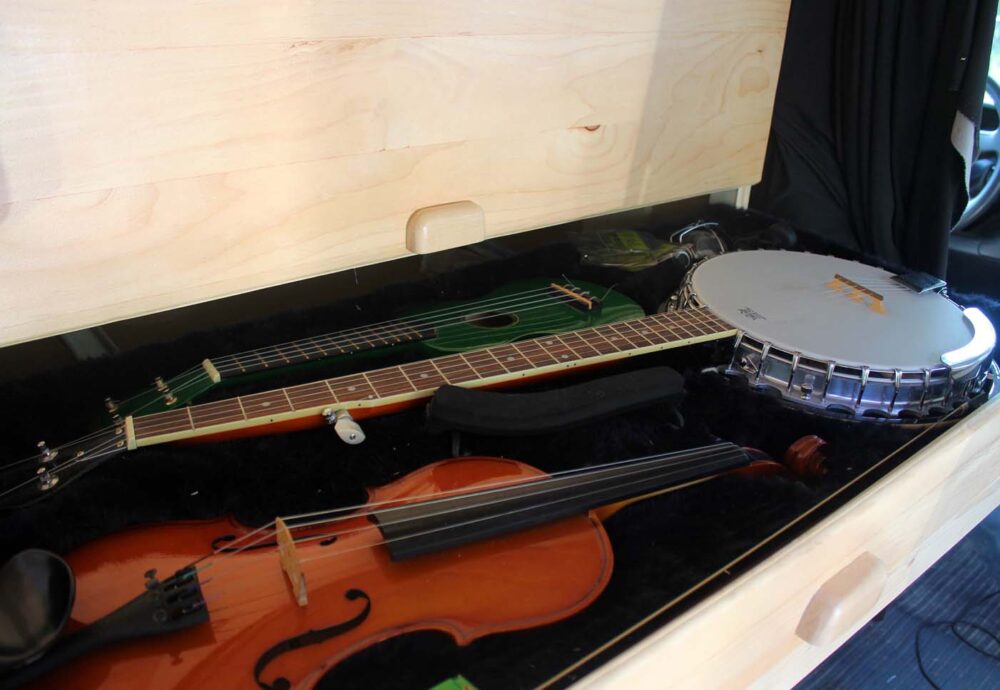
Cupboard space
Next up, the cupboards. The idea here was to have a full height cupboard with a cut out for a small ACDC fridge. One of JR’s priorities was a drawer to safely fit his banjo and ukelele. The result (a deep, drawer lined with fake fur) is probably one of the most unique van features I have personally seen!
The largest storage space is for clothes and personal items. At the time we left, there were no dividers within this space. Lower down, the bottom cupboard is dedicated to food, separated with three shelves. The large gap above the fridge is necessary for ventilation.


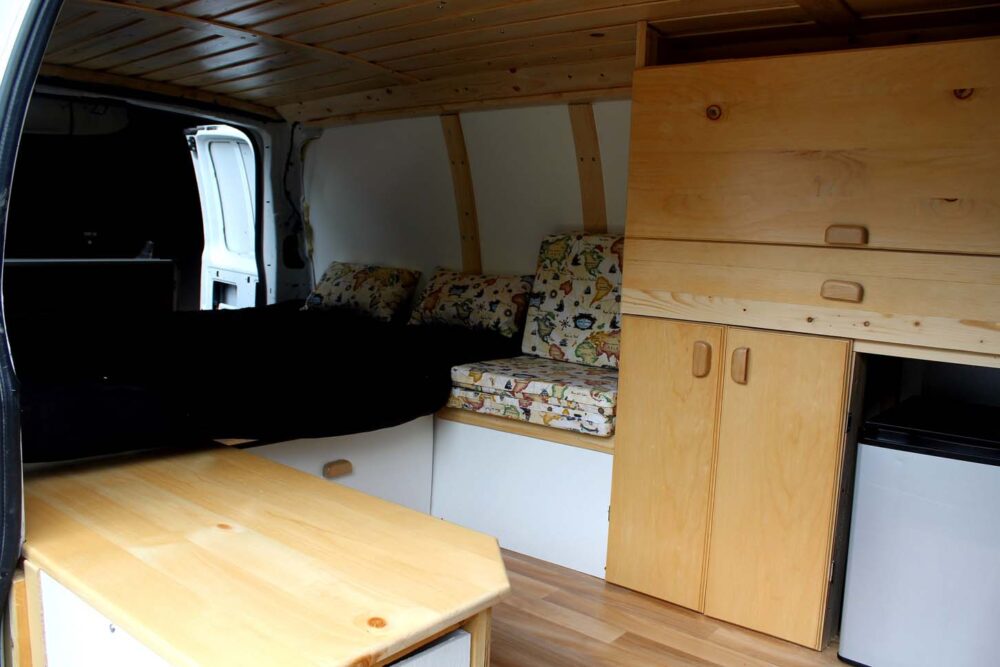
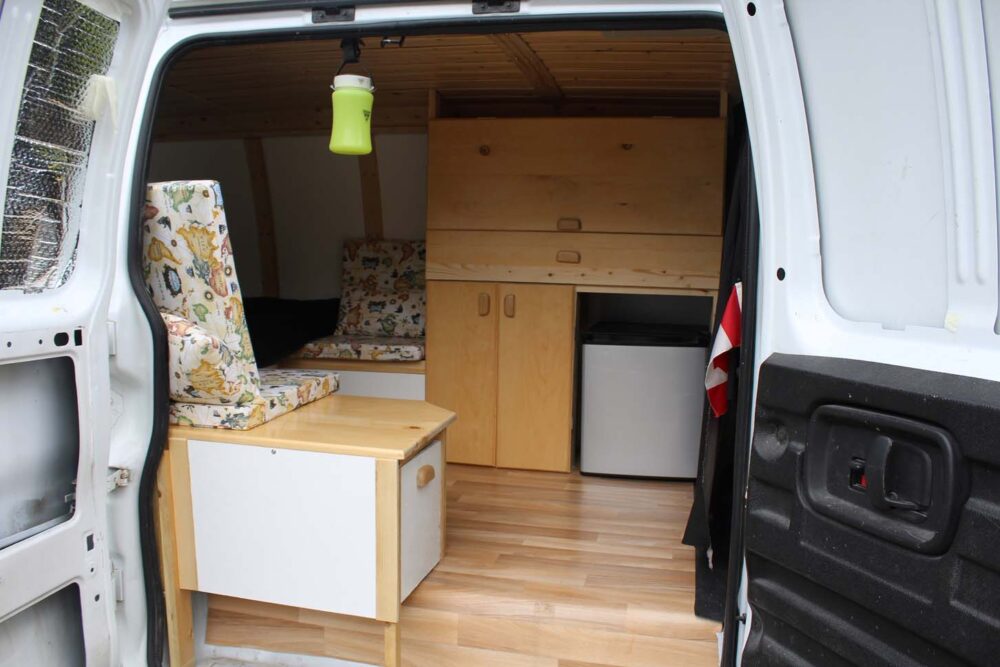
Our van kitchen
Another new storage area is our ‘kitchen.’ This cabinet has a sliding drawer containing almost all of our cooking equipment. Behind the drawer is a storage space for our two burner Jetboil Genesis (plus integrated pot system) and 5lb propane tank.
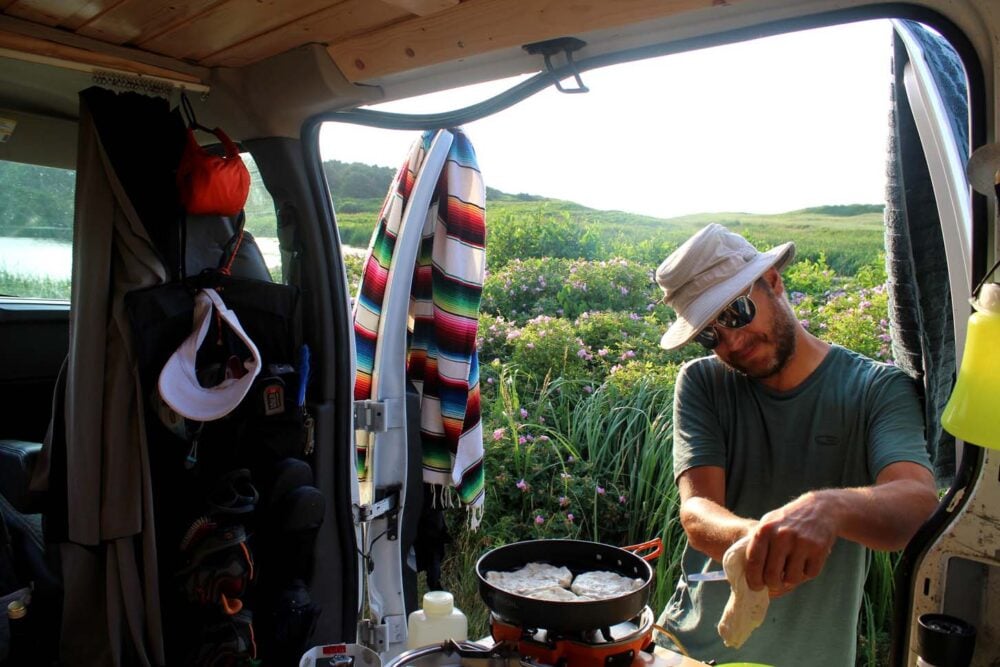
The work surface can be used from both inside and outside the van, great for those bad weather days. The section closest to the bed doubles up as a seat, with custom-made cushions (thanks Clare) that are easy to remove and store.
Opposite this is another seat, with storage underneath. A later project will be to add a removable table.

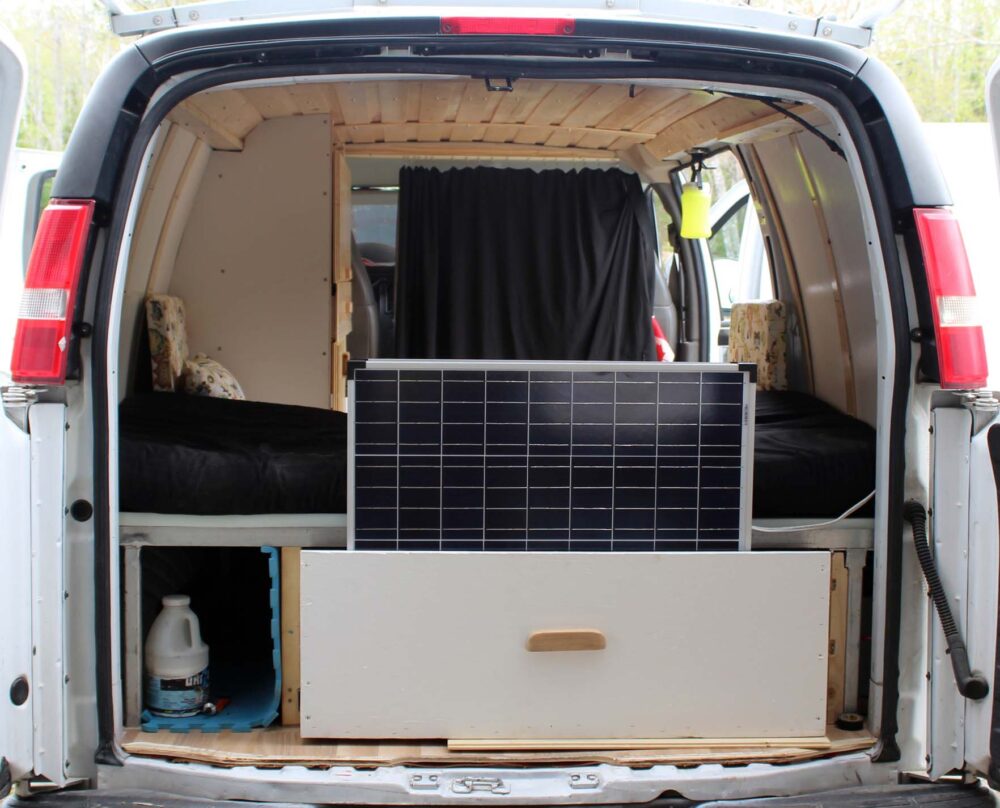
DIY van solar system
One of the last projects was the solar system. This was something we both worked on. All the parts had been purchased long before (2 x 75W panels, controller, fuses and deep cycle marine battery) but it proved to be a bit of head scratcher to put together.
At least, in theory. We read so many overly complicated guides on how to do it, became overwhelmed and then finally bit the bullet. And, somehow, it was a lot easier than expected. Isn’t it nice when that happens?!
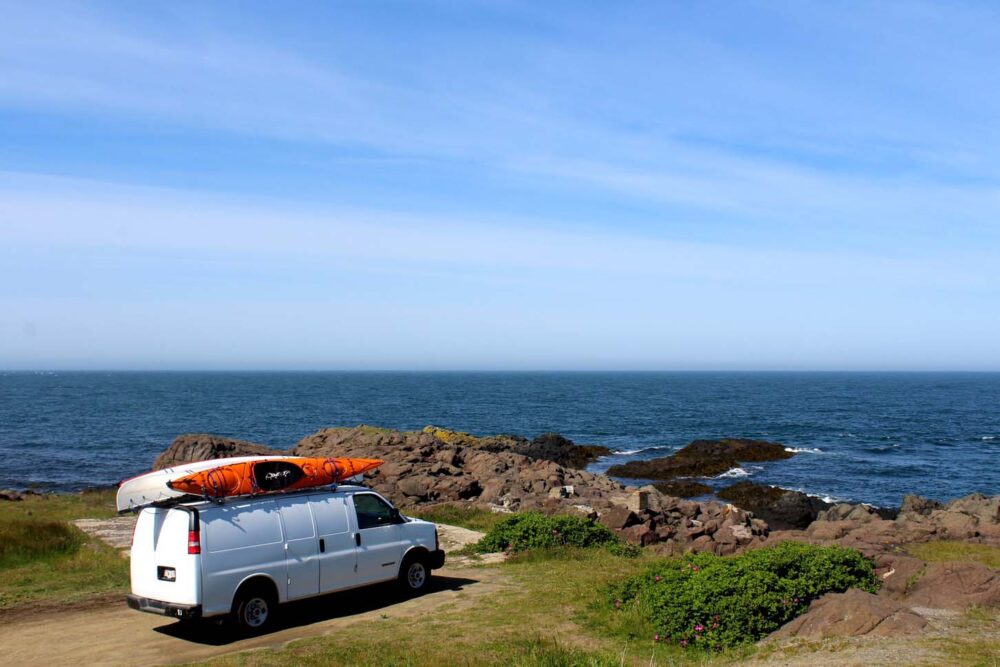
Unfortunately, we ran out of time to actually affix the panels anywhere on the outside of the van, so for the time being, they stayed stored in the back.
We planned to take them out whenever possible. Obviously, this wasn’t ideal. The most obvious location to affix them to would be the roof of the van, but we already have a canoe and two kayaks stored there.

Key lessons learned from this stage of the conversion:
- Be prepared for everything to be at least a little wonky. It’s almost impossible to have everything aligned and perfectly measured in a van conversion like this. The van itself is a bit wonky
- Try not to get overwhelmed by watts, volts and amps when setting up a solar system
- The best features are usually the ones that take the most blood, sweat and tears. In our conversion, it is the ceiling. All of that sanding, vanishing and crouching felt neverending but the result is pretty fabulous
- Work out what needs to be stored before planning a storage solution. A little obvious perhaps but entirely necessary
- Family and friend helpers are awesome. Thank you!

Catch up on other stages of the conversion:
Save or PIN this post for future reference with one of the below images!


One half of the Canadian/British couple behind Off Track Travel, Gemma is happiest when hiking on the trail or planning the next big travel adventure. JR and Gemma are currently based in the beautiful Okanagan Valley, British Columbia, Canada. Consider buying us a coffee if you have find any of our guides helpful!
Excellent build, love the design. R U able to cook inside if it’s nasty outside? We do get a lot of rain in BC, but this year they say, more snow and cold cold temps. Now I am going to go back and see your Astro again. I have a 96 Astro and want to semi camperize it and yours gave me some ideas of design.
Thanks again for this post and you are doing a great job of the van. 🙂
Thanks Sue! Yes, we do cook inside and just prop the doors open a little. It works great!
Thanks a lot for in depth review of work done on your van This is great information as I am deciding the best way to customize my 04 Savana 1500 Hi- too. I began work last year instslling laminent plank flooring then needing to remove it all same with electrical system. Work stopped after ankle surgery in December and back to initial drawing board. Last year i had difficulty finding a competent personwith solid experience to help me on the project. Now hoping to find someone willing to help. My first question is how you dealt with road noise issues. The door molding on front doors is ripped in places needing replaced. But it seems a fair amount of noise may be coming from side doors too. What door molding do you advise assuring maximum closure around all doors. And any other things I can do eliminate road noise assuring a much quieter ride. I’ll look forward hearing from you.
Hi Paul! Great to hear that you’re working on a Savana too. For the doors, we’ve used a panel of hardboard over the top of some foam insulation. We haven’t found there to be much issue with noise, but then again we are not too worried about it in general. We do have a curtain between the front cab and the back of the van, and this cuts some of the noise too.
Awesome job 🙂
wonder if there is certain requirements (regulations) for converting a vehicle into a campervan. and any way to reclassify the vehicle to campervan on the registration certificate. ?
I’m thinking of buying a used van and convert to a campervan in BC. and then travel around the world, take the van to my country(Export/import). In that case, It’s not allowed to import a “van” to my country but a a campervan is ok. that’s why I’m wondering about the certificate.
If you have any info about it. pls share 🙂
Thanks a lot .
Hi Dabi! Yes, there is a list of requirements to be able to register a vehicle as a RV (recreational vehicle) in British Columbia. JR called a few years ago and, from memory, he says that there was five major requirements – a permanent bed, toilet, propane attached on outside of vehicle, water tank and perhaps a permanent table. As I said, this is from memory so don’t take this as fact! 🙂 The details to contact ICBC can be found here https://www.icbc.com/about-icbc/contact-us/Pages/default.aspx
Thank you for sharing your build. It is great! I’m inspired. I am just starting on my Savana. I have been wondering if it is possible to have located the wiring harness that goes down the length of the van into that pillar down the length of the van. I know it would require disconnecting everything and trying to stuff it into that little hole, I just wonder if you guys had contemplated that? Maybe not worth the effort.
I’m so glad this has inspired you Carolyn! If you’re referring to the wiring that connects with the rear brake/reverse lights, we have threaded this through the top pillar. It wasn’t easy to do, JR had to use lots of electric tape to make sure all the wires were together.
Great job, your an inspiration.
If I could ask a few questions.
1. How did you handle ventilation, was it adequate in most weather conditions
2. Your cooking, I assume your using propane. How do you safely store it in your van, per warning on canisters your not to exceed 120f/48c. When hiking in warm climates temperatures can easily exceed 48c. RV’s typically mount the tanks outside the vehicle. Did you do the same ?
3. You configured your bed side to side orientation. Did that provide enough length or do you sleep in a diagonal position
Thx again and I plan to subscribe and follow your adventures. I’m planning to take a couple adventures across your beautiful country. One up the Alcan Hwy and the other from Lake Superior to Nova Scotia & Newfoundland, hopefully in my converted Chevy Van.
You look like a very nice and contented couple. I’m happy for you.
Take care and best wishes,
Jim
Hi Jim!
Great to hear from you. Your adventure plans sound exciting! Yukon Territory is one of our favourite places in all of Canada and I’d definitely recommend a road trip there. Nova Scotia is wonderful too (we spent seven weeks just in Nova Scotia last summer!)
Here’s some answers for you.
1. Ventilation is something JR ran out of time to add – we will be adding a vent on one of the doors. The van gets pretty warm at around 26-28c+ outside. We do have a USB fan inside to remedy this in the meantime.
2. We use a 5lb propane tank and store it securely (as in, it has no way to move) underneath the cooking counter. However, we want to move it outside as we know this is not the safest solution! We have never experienced temperatures anywhere close to that so we’ve never had a heat issue.
3. We sleep fine this way (it’s not luxurious, but fine) though our heights have something to do with it I’m sure. I’m 5″2 and JR is 5″8. I wouldn’t recommend it for anyone taller, I believe taller people would have to sleep on an angle.
Hi Gemma,
I bought a GMC Savana yesterday, 1999 with 60,000 mils on it… plan to make a wonderful place to play from, and occasionally work from.
I have a few questions… any major issues condensation?
Any thoughts on what you would have done differently
Pretty much the layout you have was what I had in mind
Do you have any more pictures of your wall installation? the white parts, are they thin ply, painted, and then attached to the ribs?
Have you found a different location for your propane? just curious where
Did you do any build out in the front.. thinking I will try and make the front and “office” space
Any thoughts on screen doors, to keep mosquitos out but get good air flow
Dawn
Reply from JR –
Hi,
This is an awesome van to make a conversion with and you have a lot of great questions. I did make a few mistakes which I hope I can help you avoid.
Condensation was a big concern of mine too. The 2 major things you help fight condensation is #1 ventilation and #2 insulation. I insulated all the walls with extruded foam and filled every nook and cranny with insulating spray foam, but under the bed I left the van ribs (metal frame) out in the open. After 2 years I noticed a bit of rot on some of the gear that we used less and that were left near the metal ribs. To avoid this I would strongly recommend that you insulate every metal part. I will use a thin layer of spray foam to fix that problem.
If you are planing to do some winter camping I would also consider getting some sort of heating device like an diesel system like this. I have seen it at work in other conversions of similar size and it did wonders in keeping the inside warm and dry.
For the walls and insulation, the best photos are on the blog posts. You are bang on for the white parts. It’s a thin ply, painted (one primer and 2 to 3 coat of paint) on both side to avoid rot and mold. These were then “glued” with spray foam dots so there would be a small air space between the insulation and the ply.
I haven’t found a new location for the propane yet but one day I will have small harness built so it can be secured on the outside back door.
I haven’t build up the front yet. After driving for a while and sitting in the front seat, having to spend another 3 to 5 hours in the front feels a lot less appealing unless you get a swivel seat. But side storage for books and bear spray on the side of the seats may happen.
For the mosquito screen I used a cheap bug net for the back door and front window secured with magnet and a mosquito net build to go over beds (useful if mosquitoes are already in the van)
To sum up in what I would do differently – more ventilation, insulation everywhere (and more insulation under the floor), have a heating system that works (I tried the buddy heater but they are not good for small space and gave us headache) and a cool box rather than a fridge. The fridge did not work for us, it’s really bulky for the amount of food that can be stored in and our battery system could would only last 2 to 3 days with it on and create mold problems inside the fridge. I will build a custom cool box in the future.
Your GMC van looks spectacular, clean, efficient and simple, excellent motivator for new van building enthusiest
Thanks so much for your comment Charles!